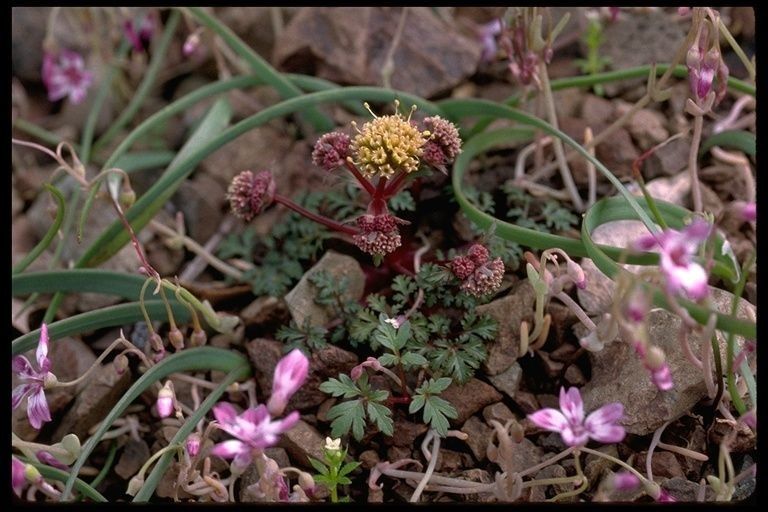
Hello there, fellow garden enthusiasts! Today, we’re diving into the wonderful world of propagating Sanicula saxatilis. If you’re anything like me, you’ve probably fallen in love with its unique charm – those delicate, glossy leaves and its ability to thrive in seemingly impossible spots. It’s a real gem, and multiplying it is incredibly satisfying. Now, I won’t pretend every plant is a walk in the park for a complete beginner. Sanicula saxatilis can be a little particular, but with a bit of focused attention and these tips, I’m confident you’ll achieve success. Think of this as your friendly guide to coaxing more of this beauty into your life.
The Best Time to Start
When it comes to Sanicula saxatilis, spring is your golden ticket. This is when the plant is bursting with new growth and vigor after its winter rest. You’ll see fresh shoots emerging, and these are usually the most receptive to propagation. Waiting until the plant is actively growing gives it the best chance to establish itself quickly once it roots. Trying to propagate during its dormant phase is generally less successful.
Supplies You’ll Need
No need for a fancy greenhouse here! You can get started with a few basic tools:
- Sharp, clean pruning shears or a knife: Essential for making clean cuts.
- Well-draining potting mix: A blend of peat moss, perlite, and a little sand works wonders. You can also look for a mix specifically designed for succulents or cacti.
- Small pots or seed trays: Choose something with drainage holes.
- Rooting hormone (optional but recommended): This can give your cuttings a helpful boost.
- A spray bottle: For gently misting.
- Clear plastic bags or a propagator: To create a humid environment.
- Labels: So you don’t forget what you planted where!
Propagation Methods
For Sanicula saxatilis, I find the most reliable method is stem cuttings. It’s straightforward and gives you a great success rate.
Stem Cuttings
- Select your cutting: Look for a healthy stem that’s at least 3-4 inches long. It should have a few sets of leaves, but avoid anything that’s too woody or too soft and new.
- Make the cut: Using your sharp, clean shears or knife, make a clean cut just below a leaf node. A leaf node is where a leaf attaches to the stem. This is where the magic happens – where roots will form.
- Prepare the cutting: Gently remove the lower leaves from the cutting, leaving about an inch or two of bare stem exposed. If the leaves are large, you can even cut them in half to reduce water loss.
- Apply rooting hormone (optional): Dip the cut end of the stem into your rooting hormone powder or gel, tapping off any excess.
- Plant the cutting: Fill your small pots with the well-draining potting mix. Make a small hole with your finger or a pencil and insert the prepared cutting, ensuring the leaf nodes are buried. Gently firm the soil around the stem.
- Water gently: Water the soil lightly, enough to moisten it but not soak it.
- Create humidity: Cover the pot with a clear plastic bag or place it in a propagator. This creates a mini-greenhouse effect, which is crucial for rooting. Make sure the leaves aren’t touching the plastic.
- Provide light: Place the pot in a bright spot but out of direct sunlight. A windowsill that gets bright, indirect light is perfect.
The “Secret Sauce” (Pro Tips)
Here are a couple of little tricks I’ve learned over the years that can really make a difference:
- Don’t be afraid to let your cuttings callus: Before you pot up your stem cuttings, let them sit for a day or two in a dry, shady spot. This allows the cut end to form a protective layer, which can help prevent rot.
- Bottom heat is your friend: If you have access to a propagation mat or can place your pots on top of a gently warmed surface (like a router, if it’s not too hot!), this can significantly speed up root development. It mimics the warmth of spring soil really well.
Aftercare & Troubleshooting
Once your cuttings have been in for a few weeks, you can give them a gentle tug. If you feel resistance, congratulations – you’ve got roots!
- Gradual Acclimatization: Slowly start to remove the plastic cover over a few days. This helps them adjust to the ambient humidity.
- Watering: Water them when the top inch of soil feels dry. Overwatering is the quickest way to trouble.
- Signs of Failure: The most common issue is rot. If your cutting turns mushy and black, or develops fuzzy mold, it’s usually a sign of too much moisture and not enough air circulation. Unfortunately, these are usually beyond saving. Discard them to prevent any spread. Another sign of trouble is wilting that doesn’t stop even after watering, indicating it’s not developing roots.
A Encouraging Closing
So there you have it – a simple guide to bringing more Sanicula saxatilis into your life. Remember, gardening is a journey, and propagation is a wonderful part of that. Be patient with your new plant babies; they’re working hard to establish themselves. Keep a positive outlook, learn from any setbacks, and most importantly, enjoy the process of coaxing life from a simple cutting. Happy propagating!
Resource:
https://identify.plantnet.org/k-world-flora/species/Sanicula%20saxatilis%20Greene/data