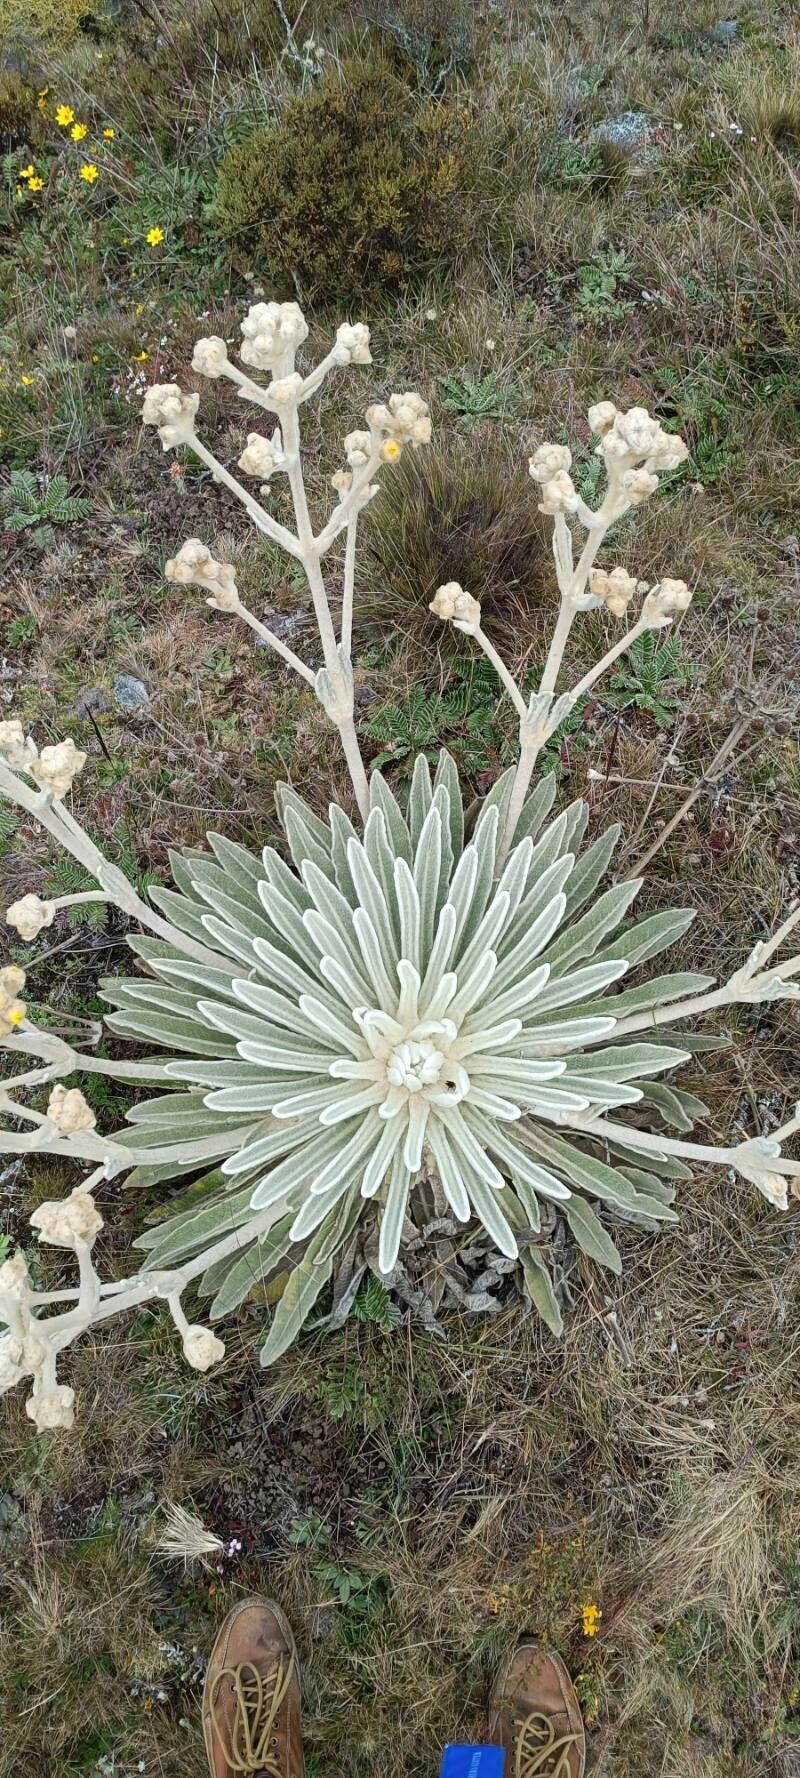
Hello fellow garden enthusiasts! I’m so excited to chat with you today about a plant that truly captures the imagination: Espeletia schultzii. Often called the “frailejon,” this South American native is absolutely striking with its fuzzy, silvery leaves and often a spectacular, solitary flower. Growing them from seed is a whole other adventure, but today we’re going to talk about a more hands-on approach: propagation.
Why Grow Your Own Frailejones?
There’s just something incredibly satisfying about creating new life from an existing plant. With Espeletia schultzii, it’s about expanding their unique beauty into your own collection. While they can be a tad bit particular, I’ve found that once you get the hang of it, it’s quite manageable. Don’t be discouraged if your first attempt isn’t picture-perfect!
When is the Best Time to Get Started?
For Espeletia schultzii, I’ve had the most success when I start propagating in late spring or early summer. This is when the plant is actively growing and has plenty of energy to put into developing new roots. You’ll want to choose a stem that’s not too young and tender, but also not woody and old. Think of it as the prime of its life!
Gather Your Tools
Before we dive in, let’s make sure we have everything we need. A little preparation goes a long way!
- Sharp Pruning Shears or a Clean Knife: For making clean cuts. Sterilize them with rubbing alcohol before and after use.
- Rooting Hormone (Optional but Recommended): This really gives your cuttings a boost. Look for one formulated for stem cuttings.
- Well-Draining Potting Mix: A standard succulent or cactus mix is usually perfect. You can also mix in some perlite or pumice for extra aeration.
- Small Pots or Seedling Trays: Make sure they have drainage holes!
- Watering Can or Spray Bottle: For gentle watering.
- Plastic Bag or Propagator: To create a humid environment.
- Gloves (Optional): Some people find the fuzzy leaves a bit ticklish.
Let’s Get Propagating! Stem Cuttings are Your Friend
For Espeletia schultzii, I find taking stem cuttings to be the most reliable method. Here’s how I do it:
- Select Your Cutting: Look for a healthy stem that’s at least 4-6 inches long. Identify a section just below a leaf node (where a leaf attaches to the stem).
- Make the Cut: Using your sharp, sterilized shears or knife, make a clean cut right below that leaf node.
- Prepare the Cutting: Gently remove the lower leaves from the cutting, leaving just a few at the very top. This is important to prevent them from rotting in the soil.
- Apply Rooting Hormone (if using): Dip the cut end of the stem into your rooting hormone, tapping off any excess.
- Plant the Cutting: Fill your small pot with your well-draining mix. Make a small hole in the center with your finger or a pencil. Gently insert the cut end of the Espeletia schultzii cutting into the hole, ensuring it’s firm.
- Water Gently: Lightly water the soil. You want it moist, but not soggy.
- Create Humidity: Cover the pot with a clear plastic bag or place it in a propagator. This will help keep the humidity high, which is crucial for root development. Make sure the leaves aren’t touching the plastic if possible.
- Find a Bright Spot: Place your pot in a location that receives bright, indirect light. Avoid direct, harsh sunlight, which can scorch the tender cutting.
My “Secret Sauce” Tips
Over the years, I’ve learned a few little tricks that really make a difference:
- Bottom Heat is Your Friend: If you have a seedling heat mat, place your pots on it. This gentle warmth from below will encourage roots to form much faster.
- Don’t Overwater, but Don’t Let it Dry Out: This is a delicate balance! Stick your finger into the soil. If it feels dry about an inch down, it’s time to water. Allowing the soil to dry out completely will kill your cutting.
- Patience is Key – Really! Don’t be tempted to pull up your cutting to check for roots every few days. Give it at least 4-6 weeks before you even think about looking. They can be slow starters!
Aftercare and When Things Go Wrong
Once you start to see new growth emerging from the top of your Espeletia schultzii cutting, that’s a good sign roots are forming! You can gently tug on the cutting – if there’s resistance, you’ve got roots!
- Gradual Acclimation: Slowly start to remove the plastic bag over a week or two, allowing the new plant to adjust to the lower humidity.
- Continue Bright, Indirect Light: Keep it in that same bright, but not too sunny, spot.
- Watering: Continue to water when the top inch of soil feels dry.
The most common issue you might encounter is rot. If the stem turns mushy or black, especially at the soil line, that’s a sign of too much moisture and not enough airflow. Unfortunately, if rot sets in, it’s usually game over.
Go Forth and Propagate!
Propagating Espeletia schultzii can be a deeply rewarding experience. It requires a touch of patience and an understanding of what they love, but the joy of seeing those fuzzy leaves unfurl on your very own new plant is absolutely worth it. So grab your shears, get your hands a little dirty, and enjoy the process! Happy gardening!
Resource:
https://identify.plantnet.org/k-world-flora/species/Espeletia%20schultzii%20Wedd./data