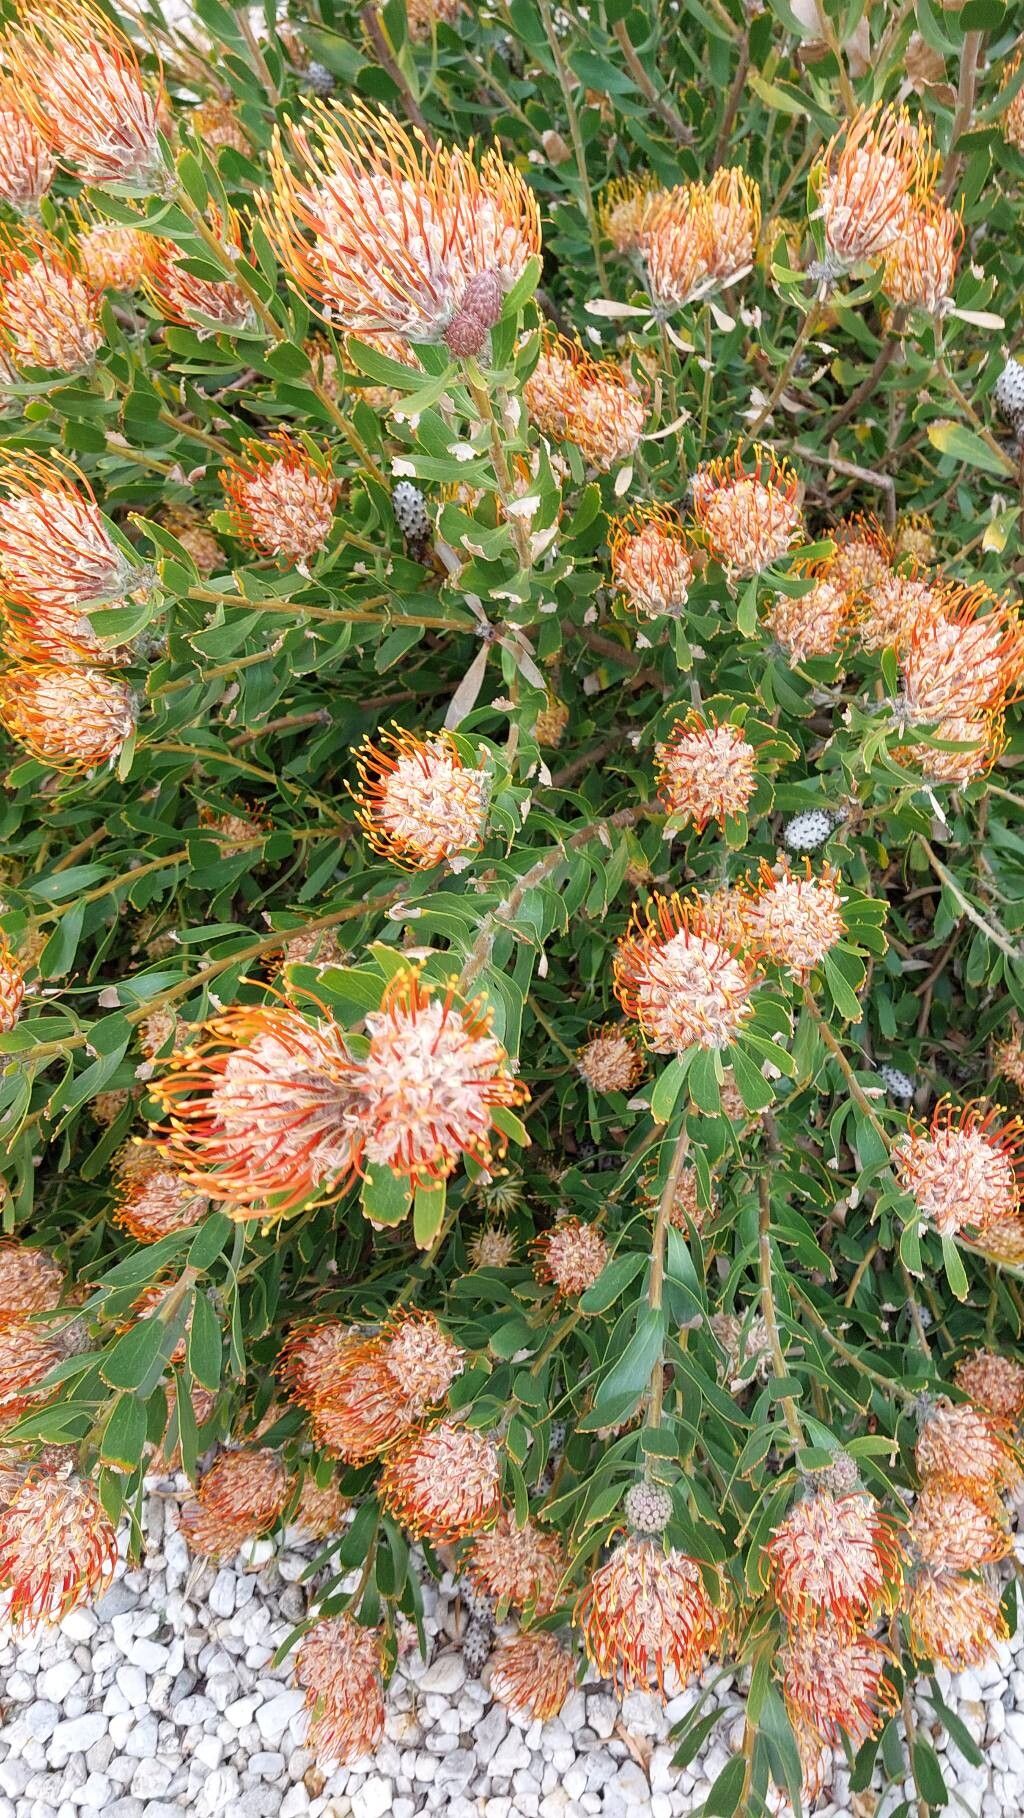
Hello there, fellow garden enthusiasts! I’m so excited to chat with you about one of my absolute favorites: Leucospermum cordifolium, often called the Heart-Leaved Pincushion. Just look at those stunning, star-shaped blooms! They bring such vibrant color and unique texture to any garden, and honestly, they’re a real showstopper.
If you’ve ever admired these beauties and thought, “I wish I had more!”, then propagating them yourself is a incredibly rewarding journey. Now, I’ll be honest, Leucospermum can be a little bit of a diva when it comes to propagation, so it might not be the absolute easiest for complete beginners. But with a bit of patience and these tips, you’ll be well on your way to multiplying your pincushion family.
The Best Time to Start
For the highest success, I always aim to take cuttings in late summer or early autumn. This is when the plant has finished its main flowering push and is producing firm, semi-hardwood growth. This type of growth has just enough flexibility without being too soft and prone to rot. Avoid taking cuttings during the hottest part of summer or when the plant is actively flowering.
Supplies You’ll Need
Gathering your supplies beforehand makes the whole process smoother. Here’s what I always have on hand:
- Sharp, clean pruning shears or a sharp knife: Essential for clean cuts that heal well.
- Rooting hormone: I prefer a powder or gel form specifically for woody cuttings.
- A well-draining potting mix: This is crucial! A mix of perlite, coarse sand, and a little peat moss works wonders. You can also find specialized mixes for proteas and fynbos.
- Small pots or trays: Clean containers are key to preventing disease.
- Plastic bags or a propagation dome: To create a humid environment.
- Watering can with a fine rose or a mister: For gentle watering.
- Labels and a permanent marker: Never underestimate the power of labeling!
Propagation Methods: Stem Cuttings
This is by far the most successful method for Leucospermum cordifolium. Let’s get our hands dirty!
- Select Your Cuttings: Look for healthy, non-flowering stems that are about pencil-thick and have started to firm up. Aim for cuttings that are 4-6 inches long. Gently snap a stem – if it bends without breaking cleanly, it’s too soft. If it snaps stiffly, it’s too hard. You’re looking for that sweet spot.
- Make the Cut: Using your clean shears or knife, make a clean cut just below a leaf node. A leaf node is where a leaf attaches to the stem. This is where the plant’s magic rooting hormones are concentrated.
- Prepare the Cutting: Remove the lower leaves from the bottom half of the cutting. This prevents them from rotting in the soil or water. You can leave a few sets of leaves at the top for photosynthesis.
- Apply Rooting Hormone: Dip the cut end of the prepared stem into your rooting hormone. Tap off any excess powder or gel.
- Plant Your Cuttings: Fill your clean pots or tray with your well-draining potting mix. Make a dibble hole (a small hole using a pencil or your finger) in the center. Gently insert the cut end of the cutting into the hole, ensuring the rooting hormone stays on the stem. Firm the soil around the base of the cutting.
- Water Gently: Water the potting mix thoroughly but gently. You want the soil to be moist, not waterlogged.
- Create Humidity: Cover your pots or tray with a plastic bag or propagation dome. Make sure the leaves of the cuttings don’t touch the plastic – this can encourage rot. If you’re using a bag, you might need to support it with sticks.
The “Secret Sauce” (Pro Tips)
Here are a few tricks I’ve learned over the years that can make a big difference:
- “Air Layering” is Your Friend: Sometimes, to improve the initial chances, I’ll actually make a small wound on the stem just below where I plan to cut the base (after removing leaves). I gently scrape away a thin sliver of the outer bark in a ring about half an inch long. This encourages root formation right at that spot. Then, I dip that area into the rooting hormone.
- Bottom Heat is Magic: If you can, place your pots on a heated propagator mat. Leucospermum roots often respond very well to gentle warmth from below, encouraging them to establish faster. Aim for a consistent temperature of around 70-75°F (21-24°C).
- Don’t Overwater! This is probably the biggest killer of cuttings. They need moisture to root, but they hate sitting in soggy soil. It’s a delicate balance, and it’s better to err on the side of slightly too dry than too wet.
Aftercare & Troubleshooting
Once your cuttings are planted, find them a bright spot that receives indirect light. Avoid direct, hot sun, which can scorch them. Your goal is to maintain that high humidity while allowing for some air circulation. You might need to open the bag or dome for a few minutes each day to prevent fungal issues.
After 4-8 weeks, gently tug on a cutting. If you feel resistance, roots are forming! You can also carefully look at the drainage holes of your pot. Signs of successful rooting include new leaf growth.
Common problems? Rotting at the base is the most frequent culprit, usually due to overwatering or poor drainage. If you see a cutting turn black and mushy, it’s best to discard it and learn for next time. Fungal spots on the leaves can also occur, so good air circulation is vital.
A Little Patience Goes a Long Way
Propagating Leucospermum cordifolium is a journey, not a race. There will be times when some cuttings don’t make it, and that’s perfectly okay. Celebrate the ones that do! Be patient, observe your cuttings, and enjoy the process of nurturing new life. Happy gardening!
Resource: