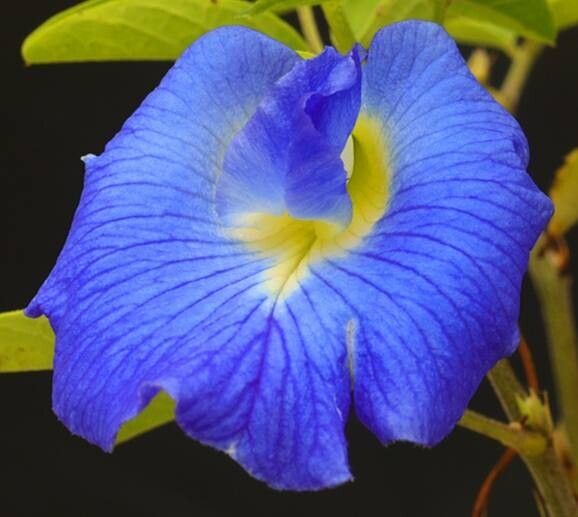
Hey there, fellow plant lovers! Grab your favorite mug, pull up a chair, and let’s chat about one of my all-time favorite blooms: Clitoria ternatea, or the Butterfly Pea Flower. Isn’t it just magical? Those incredible, vibrant blue petals – sometimes even a pure white or a lovely pale pink – have a way of making any garden feel a little more enchanted.
If you’ve ever admired this tropical beauty, you’ll be happy to know that bringing more of its magic into your life through propagation is surprisingly doable, even for beginners! It’s always so rewarding to coax a new life from a parent plant, and the Butterfly Pea Flower is a fantastic subject for your propagation adventures.
The Best Time to Start
For the highest success rate with Clitoria ternatea, I always recommend starting in late spring or early summer. This is when the plant is actively growing and has plenty of energy to put into developing roots. You’re looking for healthy, vigorous new growth, usually from the current season’s stems.
Supplies You’ll Need
Gathering your tools beforehand makes the whole process much smoother. Here’s what I usually have on hand:
- Sharp pruning shears or a clean, sharp knife: For making clean cuts.
- Well-draining potting mix: A good general-purpose mix with added perlite or vermiculite works wonders. I often make my own blend of equal parts compost, peat moss, and perlite.
- Small pots or seed trays: Clean ones, of course! Yogurt cups with drainage holes poked in work in a pinch too.
- Rooting hormone (optional but helpful): This is a powder or gel that encourages root development.
- Watering can or spray bottle: For gentle watering.
- Plastic bag or clear dome: To create a humid environment for cuttings.
- Bottom heat source (optional but excellent): A seedling heat mat really speeds things up.
- Labels: So you can remember what you planted and when!
Propagation Methods
The Butterfly Pea Flower is quite adaptable, and I’ve had success with several methods. For most gardeners, stem cuttings are the go-to.
Stem Cuttings
This is my favorite method for multiplying my collection.
- Select your stems: Look for healthy, semi-hardwood stems. These are usually stems that are green but starting to firm up, not the very soft new growth or the woody old stems. Aim for pieces about 4-6 inches long.
- Make the cut: Using your sharp shears or knife, make a clean cut just below a leaf node. A node is where a leaf attaches to the stem. This is where the magic happens – roots are most likely to form here.
- Prepare the cutting: Gently remove the lower leaves from the cutting, leaving just a couple of leaves at the top. If the top leaves are very large, you can even cut them in half to reduce water loss.
- Apply rooting hormone (optional): Dip the cut end of the stem into your rooting hormone. Tap off any excess.
- Plant your cuttings: Fill your small pots with your well-draining potting mix. Make a hole in the center with your finger or a pencil. Insert the cutting into the hole, ensuring the nodes where you removed the leaves are below the soil surface. Gently firm the soil around the cutting.
- Water gently: Water thoroughly until you see water draining from the bottom of the pot.
- Create humidity: This is key! Cover the pot with a clear plastic bag, secured around the rim with a rubber band, or place it under a clear dome. This creates a mini-greenhouse effect, keeping humidity high and preventing the cutting from drying out.
Water Propagation
This is a simpler method, though sometimes less reliable for long-term health.
- Select and prepare stems: Follow steps 1-3 from the stem cutting method.
- Place in water: Put the cuttings in a glass or jar filled with clean water. Make sure the leaf nodes are submerged, but do not let the leaves themselves touch the water. This can cause rot.
- Change water regularly: Refresh the water every few days to keep it clean and oxygenated.
- Place in bright, indirect light: Find a spot with good light but out of direct sun.
- Wait for roots: You should see roots forming within a few weeks. Once the roots are about an inch long, you can carefully transplant them into a potting mix.
The “Secret Sauce” (Pro Tips)
Here are a few little tricks I’ve picked up that make a big difference:
- Bottom Heat is Your Best Friend: Honestly, if you can, invest in a seedling heat mat. Placing your pots on one provides gentle warmth to the soil, which mimics summer conditions and drastically speeds up root formation. It’s a game-changer for tropical plants like the Butterfly Pea Flower.
- Don’t Overwater the Cuttings: While humidity is crucial, soggy soil is the enemy of new cuttings. It leads to rot. You want the soil to be consistently moist but not waterlogged. I often give my cuttings a good soak initially, then I’ll only water when the top inch of soil starts to feel dry.
- Watch for Pests: New, tender growth can attract little critters. Keep an eye out for aphids or spider mites, especially if you’re keeping your cuttings indoors. A gentle spray of neem oil solution usually keeps them at bay.
Aftercare & Troubleshooting
Once you start seeing signs of new growth – little leaves unfurling or tiny roots peeking out of the drainage holes – that’s your cue!
- Acclimation: Gradually introduce your new plant to normal air by removing the plastic bag or dome for increasing periods over a week. This helps it adjust.
- Potting Up: Once your cutting has a healthy root system and some new top growth, it’s time to pot it into a slightly larger pot with fresh potting mix.
- Watering: Continue to water when the top inch or two of soil feels dry.
- Sunlight: Gradually move your new plant to a spot with plenty of bright, direct sunlight.
- Troubleshooting: The most common issue you’ll face is rot. If your cutting looks mushy, black, or just wilts without any signs of rooting, it’s likely rotted. This is usually due to overwatering or poor drainage. If you used the water propagation method, make sure leaves aren’t submerged. If stem cuttings rot, it’s better to discard them and start fresh, ensuring your soil drains well and you’re not drowning them. Sometimes, they just don’t take, and that’s okay too!
A Little Patience Goes a Long Way
Propagating can sometimes feel like a waiting game, but there’s so much joy in the process. Don’t get discouraged if your first few attempts aren’t perfect. Each time you try, you learn a little more. With a bit of care and these tips, you’ll soon be surrounded by your own beautiful Butterfly Pea Flowers. Happy growing!
Resource:
https://identify.plantnet.org/k-world-flora/species/Clitoria%20ternatea%20L./data