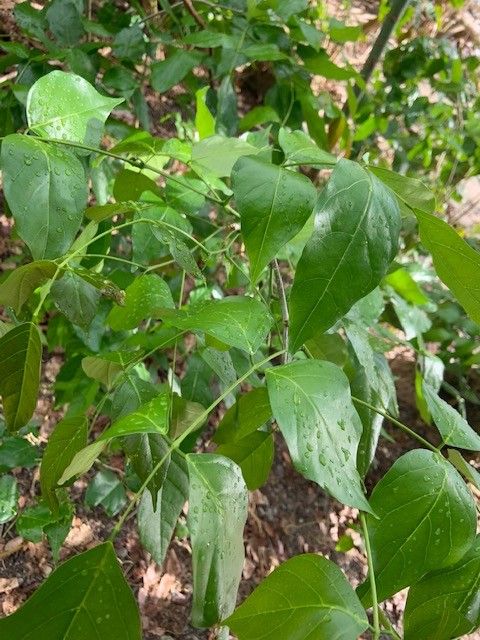
Oh, Premna tahitensis! If you’ve ever admired those lush, glossy leaves and the promise of a beautiful specimen for your bonsai collection or a stunning accent in a tropical garden, then you’re in for a treat. Propagating this beauty is incredibly rewarding, and I promise, it’s not as daunting as it might sound. It’s a plant that readily gives back, making it a fantastic choice for hobbyists looking to expand their green family.
The Best Time to Start
I find the sweet spot for propagating Premna tahitensis is in the late spring or early summer. This is when the plant is actively growing and brimming with energy. You’ll want to take cuttings from stems that are semi-hardwood. These aren’t the brand-new, floppy green shoots, nor are they the old, woody branches. Think of a stem that’s just starting to firm up – it still has a little give, but it feels substantial. This stage offers the best balance of having enough stored energy to root and the flexibility to establish quickly.
Supplies You’ll Need
Here’s a quick rundown of what you’ll want to have on hand before you get started:
- Sharp Pruning Shears or a Craft Knife: Clean cuts are crucial for reducing stress on the plant and preventing disease.
- Rooting Hormone (Optional but Recommended): A little boost can significantly improve your success rate. I usually reach for a powder or gel.
- Well-Draining Potting Mix: A blend of perlite, peat moss, and a bit of compost is ideal. You want it to hold moisture but not get waterlogged. Cactus mix or a seed-starting mix can also work well.
- Small Pots or Containers: Clean, small pots (around 4-6 inches) are perfect for starting individual cuttings. Make sure they have drainage holes!
- Plastic Bag or Humidity Dome: This is key to keeping your cuttings moist while they root.
- Water: For watering your cuttings and potentially for water propagation.
- Labels: So you don’t forget what you’ve planted!
Propagation Methods
You have a couple of excellent options for bringing new Premna tahitensis plants to life.
Stem Cuttings
This is my go-to method for Premna tahitensis, and it’s generally the most successful for this particular plant.
- Select a Healthy Stem: Look for a stem that fits the semi-hardwood description we talked about. Aim for cuttings that are about 4-6 inches long.
- Make a Clean Cut: Using your sharp shears or knife, make a clean cut just below a leaf node. Nodes are those little bumps where leaves emerge from the stem; this is where roots are most likely to form. Discard any leaves from the bottom half or two-thirds of the cutting, leaving just a few at the top. This prevents leaves from rotting in the soil.
- Apply Rooting Hormone (If Using): Dip the cut end of the stem into your rooting hormone powder or gel. Gently tap off any excess.
- Plant Your Cuttings: Fill your clean pots with your well-draining potting mix. Make a hole in the center of each pot with your finger or a pencil. Carefully insert the cut end of the stem into the hole. Gently firm the soil around it.
- Water Thoroughly: Give your newly potted cuttings a good watering until water runs out of the drainage holes.
- Create a Humid Environment: Cover the pot loosely with a plastic bag or a humidity dome. Poke a few small holes in the bag if you’re using one to allow for some air circulation. Place the pot in a bright spot, but out of direct sunlight.
Water Propagation
For a visually satisfying and often quick rooting process, try water propagation.
- Prepare Your Cuttings: Take your cuttings as described above, ensuring you remove the lower leaves.
- Place in Water: Fill a clean jar or glass with lukewarm water. Place the cuttings in the water, ensuring that no leaves are submerged. Leaves sitting in water will rot and can take down the whole cutting. Just the stem should be in the water, ideally with a leaf node just touching the surface or slightly above it.
- Change Water Regularly: Change the water every few days to keep it fresh and oxygenated.
- Watch for Roots: You should start to see small white roots emerging from the stem within a few weeks.
- Pot Up Once Rooted: Once the roots are an inch or two long, you can carefully transplant them into your well-draining potting mix, following the steps for stem cuttings, but with a little extra gentle handling.
The “Secret Sauce” (Pro Tips)
- Bottom Heat is Your Friend: I’ve found that providing a bit of gentle warmth from the bottom can make a world of difference. Placing your pots on a heating mat designed for seedlings can significantly speed up the rooting process and boost success rates, especially if your home is on the cooler side.
- Don’t Be Afraid to Experiment: Sometimes, a cutting that looks a bit rough will surprise you. Conversely, perfect-looking cuttings can sometimes fail. Nature has her ways! Don’t get discouraged if a few don’t make it. Patience and trying again is part of the fun.
- The “Scratch Test”: If you’re unsure if a cutting is still viable, you can gently scratch a tiny bit of the outer bark with your fingernail at the base of the stem. If you see green underneath, the stem is still alive and has a good chance of rooting. If it’s brown and dry, it’s likely gone.
Aftercare & Troubleshooting
Once you see those tiny roots peeking out from the drainage holes or pushing through the soil, it’s time for a slight shift in care. You can gradually remove the plastic bag or humidity dome, allowing the new plant to acclimate to normal humidity over a week or so. Continue to keep the soil consistently moist but not soggy.
The most common issue you might encounter is rot. This usually happens when the soil is too wet and there’s not enough air circulation. You might see the stem turn black and mushy. If this happens, unfortunately, that cutting is lost. To prevent it, ensure your soil is airy and avoid overwatering. Another sign of failure is a stem that just shrivels up and dries out – this can mean it’s not getting enough humidity or it simply didn’t root.
A Encouraging Closing
Propagating Premna tahitensis is a journey, and like any good garden adventure, it’s filled with learning and discovery. Be patient with your little green projects. Trust the process, enjoy watching those roots develop, and celebrate each new plant that graces your home. Happy propagating!
Resource:
https://identify.plantnet.org/k-world-flora/species/Premna%20tahitensis%20Schauer/data