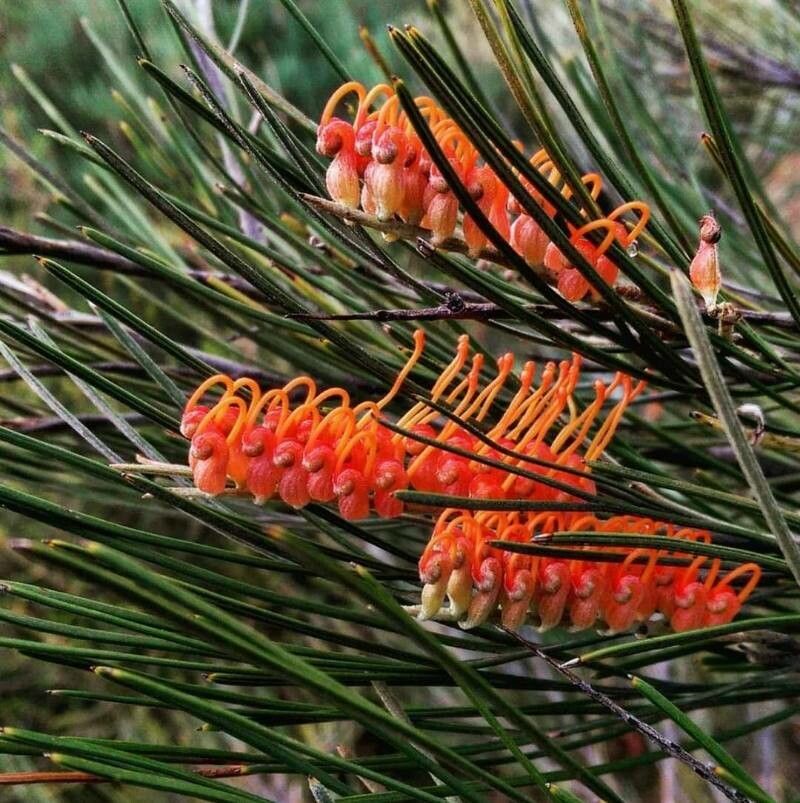
Hello, fellow garden enthusiasts! I’m so delighted you’re here to chat about one of my favorite Australian natives: Grevillea cagiana. If you’ve ever had the pleasure of seeing this beauty in bloom, you’ll know exactly why it’s so captivating. Its delicate, yet striking, bronze-red toothbrush-like flowers are a magnet for nectar-feeding birds, bringing a wonderful buzz of life to any garden.
Propagating Grevillea cagiana can feel a bit daunting at first, especially if you’re new to the world of plant propagation. But trust me, with a little patience and the right approach, it’s absolutely achievable and incredibly rewarding. You get to grow on more of these treasures, share them with friends, and truly deepen your connection with the plant world. It might not be the absolute easiest plant for a complete beginner, but it’s a fantastic learning curve that will yield beautiful results.
The Best Time to Start
For Grevilleas, the sweet spot for taking cuttings is generally in late spring to early summer. This is when the plant is actively growing, and those new, semi-hardened shoots have the best chance of developing roots. You want to look for stems that are firm but still have a bit of flexibility – no old, woody bits, and definitely no very soft, brand-new growth. Think “pencil thickness” is a good rule of thumb for much of it.
Supplies You’ll Need
Gathering your supplies before you start makes the whole process smoother. Here’s what I usually have on hand:
- Sharp, clean pruning shears or a sharp knife: For making clean cuts. Sterilize them with rubbing alcohol!
- Rooting hormone: A powder or gel specifically designed for cuttings.
- Small pots or trays: With good drainage holes.
- Propagating mix: A well-draining blend. I like to use a mix of coarse sand, perlite, and a little peat-free compost. You can buy specific Australian Native potting mix too.
- Plastic bags or propagation dome: To create a humid environment.
- Labels: To mark what you’ve propagated and when.
- Spray bottle: For misting.
Propagation Methods: Stem Cuttings
This is the most common and usually the most successful way to propagate Grevillea cagiana. Let’s get our hands dirty!
- Take Your Cuttings: Gently select healthy, semi-hardwood stems from your established plant. Aim for cuttings about 10-15 cm long. Make your cut just below a leaf node – this is where the magic happens for root development.
- Prepare the Cuttings: Carefully remove the lower leaves from the cutting. You want to expose at least one or two leaf nodes. You can also strip off any flower buds if present – these take energy away from root formation.
- Apply Rooting Hormone: Dip the cut end of the stem into your rooting hormone, tapping off any excess. Don’t be shy with this part!
- Plant Your Cuttings: Fill your pots or trays with your propagating mix. Make a small hole in the mix with a pencil or your finger. Gently insert the cutting, ensuring at least one leaf node is buried in the soil. Firm the mix around the stem.
- Water and Cover: Water the mix thoroughly until it’s moist but not waterlogged. Then, place the pots inside a plastic bag or cover them with a propagation dome to maintain high humidity.
The “Secret Sauce” (My Insider Tips)
Over the years, I’ve learned a few tricks that seem to give my cuttings a little extra boost.
- Bottom Heat is Your Friend: If you have a seedling heat mat, pop your pots on it. This gentle warmth from below really encourages root growth and can make a big difference, especially if your indoor temperatures are a bit cooler.
- Don’t Ditch All the Leaves: While you remove the lower leaves, leave a few at the top. Photosynthesis is still crucial for your cutting to stay alive and develop those roots. Just make sure any leaves are not touching the soil, as this can encourage rot.
- The “Air Layer” Trick: For slightly tougher stems, I sometimes use a variation of air layering on a mature plant. I’ll make a small cut on a stem, wrap that area with moist sphagnum moss, and then cover it all with plastic wrap. Roots often form in that moss, and then I can cut below the roots and pot it up. It takes a bit longer, but it’s a lovely way to get a head start.
Aftercare & Troubleshooting
Once your cuttings are potted, they need consistent care. Keep the soil consistently moist but not soggy, and ensure the humidity stays high within the bag or dome. Periodically open the bag or dome for a few minutes to allow for air circulation and prevent fungal issues.
The exciting part is when you see signs of new growth! This usually indicates that roots are forming. You can gently tug on a cutting – if there’s resistance, you’ve got roots. It can take anywhere from 4 weeks to a few months for roots to develop sufficiently.
The most common problem you’ll encounter is rot. If your cuttings look shriveled, mushy, or have turned black at the base, it’s usually a sign of overwatering or poor drainage. Ensure your mix is free-draining and don’t let them sit in water. If you catch it early, you might be able to salvage a cutting by trimming off the rotten bits and repotting in fresh, dry mix.
A Little Patience Goes a Long Way
There you have it! Propagating Grevillea cagiana is a process that requires a bit of attention, but the reward of nurturing new life from a single stem is truly immense. Don’t be discouraged if your first attempts aren’t perfect. Every gardener learns through trial and error. Celebrate the successes, learn from the challenges, and most importantly, enjoy the journey of growing. Happy gardening!
Resource:
https://identify.plantnet.org/k-world-flora/species/Grevillea%20cagiana%20McGill./data