Oh, hello there! Come on in, grab a mug. Let’s chat about one of my favorite little treasures from the cactus world: Cumulopuntia subterranea.
Why You’ll Love Propagating Cumulopuntia Subterranea
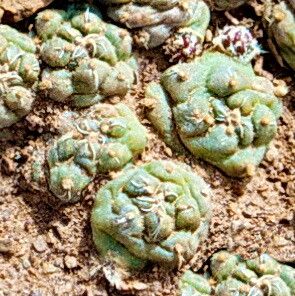
There’s something truly magical about taking a tiny piece of a plant and watching it grow into a whole new life. Cumulopuntia subterranea, with its charming, almost “fuzzy” appearance and its tendency to hug the ground, is a delightful specimen to multiply. Seeing those first little roots emerge from a cutting feels like a tiny miracle. This isn’t the most beginner-friendly cactus, I’ll admit, but with a little know-how and patience, I promise you’ll be successful!
When to Get Your Hands Dirty
The absolute best time to embark on this propagation adventure is during its active growing season. For most Cumulopuntia subterranea, this means late spring through summer. You want the plant to be healthy, vigorous, and full of stored energy. Avoid propagating during its winter dormancy or when it’s stressed – you’ll have a much higher chance of success when things are lush and green.
Your Propagation Toolkit
Let’s gather our essentials. You’ll want to have these on hand before you start:
- Sharp, clean pruning shears or a knife: For making clean cuts. Sterilize them with rubbing alcohol!
- Well-draining potting mix: A cactus and succulent blend is perfect. I sometimes add a bit of perlite or pumice for extra aeration.
- Small pots or propagation trays: With drainage holes, of course.
- Rooting hormone (optional but helpful): This encourages faster root development.
- Gloves: Cacti have spines, even fuzzy ones!
- Watering can or spray bottle: For gentle watering.
- A warm, bright location: Think a sunny windowsill or a greenhouse.
Let’s Get Propagating!
The most common and successful method for Cumulopuntia subterranea is through stem cuttings. It’s surprisingly straightforward.
- The Harvest: With your clean shears, carefully select a healthy segment from your parent plant. Look for a piece that’s at least a few inches long and shows no signs of disease or damage. Make a clean cut right at a joint.
- The Callusing Wait: This is CRUCIAL for cacti. Let the cut end of the segment dry and callus over. This can take anywhere from a few days to a week or two. Place it in a bright, dry spot, away from direct sun, until you see a firm, dry scab form. This prevents rot.
- Planting Time: Once callused, you have a couple of options. You can dip the cut end into rooting hormone, if you’re using it. Then, gently insert the callused end about an inch or so into your prepared, well-draining potting mix. You can plant multiple cuttings in the same pot, just give them a little space.
- The Gentle Start: Do NOT water immediately. Wait for a few days. When you do water, do so very lightly. A gentle misting or watering the soil around the base is best. You want the soil to be slightly moist, not soggy.
My “Secret Sauce” for Success
Here are a few little tricks I’ve learned over the years that make a big difference:
- The Warm Hug: I’ve found that bottom heat can be a game-changer for root development. Placing your pots on a seedling heat mat set to a low temperature (around 70-80°F or 21-27°C) encourages those roots to get moving much faster. Just make sure the heat mat isn’t too intense.
- Airflow is Key: While you don’t want your cuttings to dry out completely, you definitely don’t want them sitting in stagnant, humid air. Ensure good air circulation around your cuttings. I often remove any plastic covers I might initially use after the first week or so.
- Patience is a Virtue (and a Cactus Necessity): Don’t be tempted to constantly tug at your cuttings to check for roots. This can damage fragile new growth. Wait at least 3-4 weeks, sometimes longer, before you even think about gently trying to move it. Signs of new growth at the tip are a much better indicator.
Nursery Days & Dodging Disaster
Once you start seeing signs of new growth or feel a gentle tug when you very carefully try to wiggle the cutting (after several weeks!), you know roots have formed.
At this point, you can start watering a bit more regularly, but still let the soil dry out between waterings. Gradually expose your new little cactus to more light.
The biggest enemy you’ll face is rot. If your cutting starts to look mushy, black, or dissolves into a gooey mess, it’s likely rot. This is usually caused by too much moisture, too little drainage, or not allowing the cutting to callus properly. Don’t despair if this happens; just clean your tools and start again with a fresh cutting, making sure to follow the callusing step diligently.
Go Forth and Grow!
Propagating Cumulopuntia subterranea is a journey of observation and gentle care. Enjoy the process, celebrate the small wins, and be patient with your new little cacti. Happy gardening!
Resource: