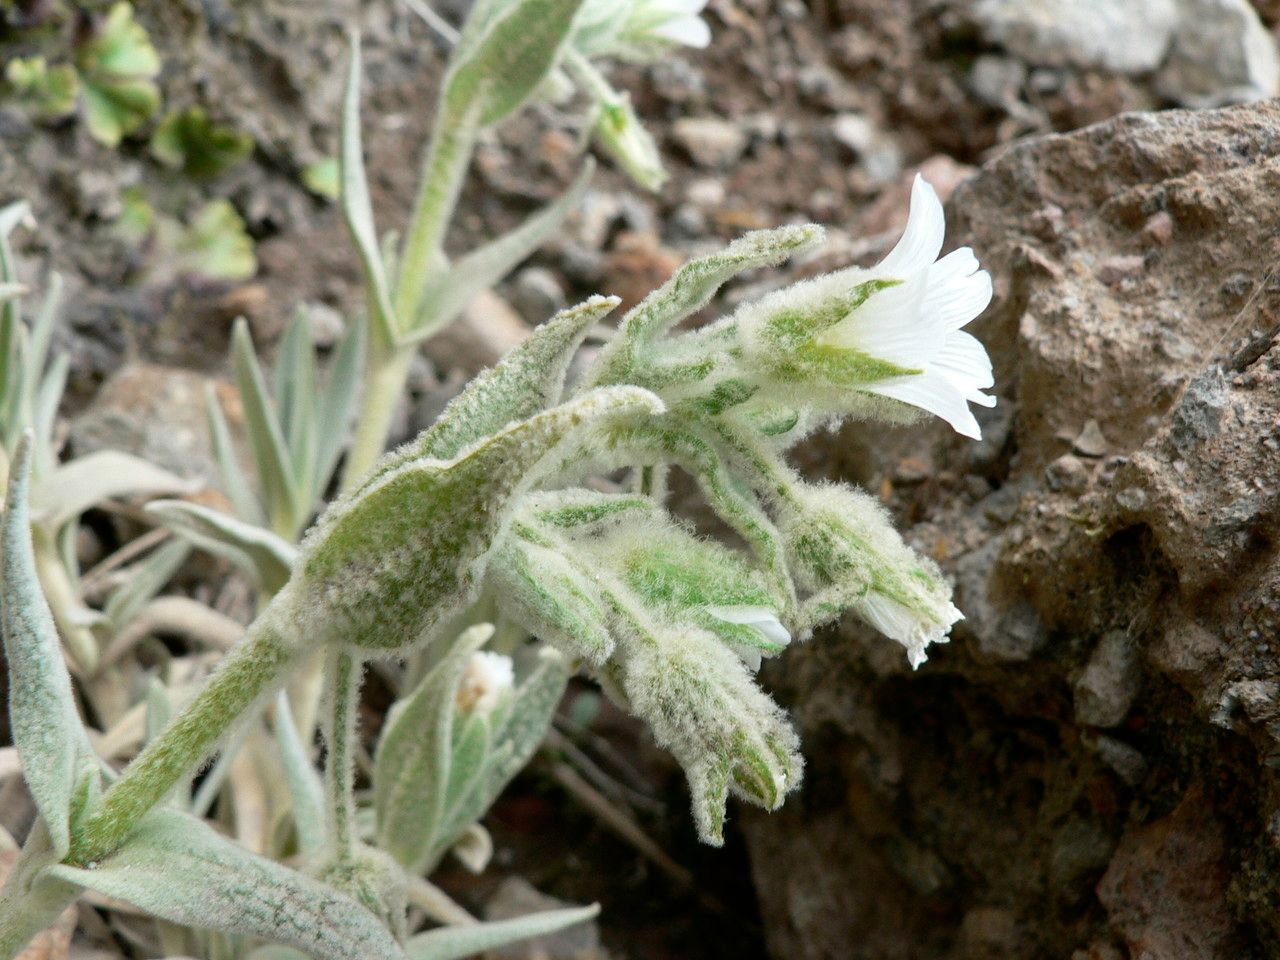
Oh, hello there! It’s so lovely to have you join me in the garden, virtually speaking. Today, we’re going to talk about a little gem that I absolutely adore: Cerastium floccosum. You might know it by its common name, maybe Fuzzy Mouse Ear or Snow-in-Summer, though this particular velvety variety is really special. Its soft, silvery leaves and dainty white flowers create such a delicate tapestry in any border or rock garden. And the best part? It’s surprisingly rewarding to share this beauty by propagating it yourself.
The Best Time to Start
For Cerastium floccosum, I find the easiest time to get a good start is in the late spring or early summer. This is when the plant is actively growing after its spring bloom, and it has plenty of energy to put into developing new roots. You’ll want to look for stems that are firm but not yet woody. Think of it as capturing that youthful vigor!
Supplies You’ll Need
Gathering your supplies beforehand makes the whole process so much smoother. Here’s what I usually have on hand:
- Sharp pruning shears or a clean, sharp knife: For making clean cuts. It’s crucial to avoid crushing the stems.
- Rooting hormone powder (optional but recommended for cuttings): This little helper gives your cuttings a better chance at success.
- Small pots or seed trays: Clean ones, please! I like to use 3-4 inch pots for cuttings.
- A good quality potting mix: I usually use a light, well-draining mix. A blend of peat moss, perlite, and a little compost works wonderfully. For Cerastium, good drainage is key.
- Perlite or coarse sand: To further improve drainage if your potting mix seems a bit heavy.
- A spray bottle: For misting.
- A plastic bag or a propagator lid: To create a humid environment for cuttings.
- Labels and a pen: Always label your precious new plants!
Propagation Methods
Cerastium floccosum is quite obliging, and there are a couple of really effective ways to propagate it.
Stem Cuttings
This is my go-to method for Cerastium floccosum. It’s efficient and gives you multiple new plants from just one healthy specimen.
- Take Cuttings: Select healthy, non-flowering stems that are about 3-4 inches long. Make a clean cut just below a leaf node (where a leaf meets the stem).
- Prepare Cuttings: Gently remove the lower leaves from the cutting, leaving just a few at the top. This prevents them from rotting in the soil.
- Apply Rooting Hormone (Optional): Dip the cut end of the stem into rooting hormone powder. Tap off any excess.
- Plant Cuttings: Fill your clean pots with your well-draining potting mix. Make a small hole with your finger or a pencil, gently insert the cutting, and firm the soil around it.
- Water and Cover: Water the potting mix gently until it’s moist but not soggy. Cover the pot with a plastic bag or a propagator lid to maintain humidity. You can secure it with a rubber band.
- Provide Light and Warmth: Place the pots in a bright spot, but out of direct sunlight. A warm location will encourage rooting.
Division
If your Cerastium floccosum has become a nice, established clump, dividing it is a fantastic way to get more plants while also giving your original plant a refresh.
- Dig Up the Plant: In late spring or early summer, carefully dig up the entire clump. You can do this with a trowel or garden fork.
- Separate the Divisions: Gently shake off some of the excess soil. You should be able to see natural divisions within the clump. You can often pull these apart with your hands. If they are stubborn, you can use a clean, sharp knife or even two forks to separate them. Aim for divisions that have roots and at least a few stems.
- Replant: Plant the divisions into their new spots in the garden or into pots with fresh potting mix. Make sure they are planted at the same depth they were previously growing.
- Water Well: Water the newly planted divisions thoroughly.
The “Secret Sauce” (Pro Tips)
Here are a couple of little tricks I’ve picked up over the years that really help boost success rates:
- Bottom Heat is Your Friend: For stem cuttings, if you have a heat mat, pop your pots on it. This gentle warmth from below encourages root development much faster than ambient room temperature alone. It’s like giving your cuttings a cozy incubator.
- Don’t Be Afraid of a Little Airflow: While humidity is important for cuttings, you don’t want stagnant air, which can lead to fungal issues. If you’re using a plastic bag, I like to lift it for a few minutes each day to allow for this exchange. It’s a small step that can make a big difference in preventing rot.
Aftercare & Troubleshooting
Once those tiny roots have formed – which can take anywhere from 2-6 weeks, depending on conditions – it’s time for a little extra care.
- Gradually Acclimate: If you’ve used a plastic bag or propagator lid, start gradually removing it over a few days to let your new plants get used to the drier air.
- Water Wisely: Continue to keep the potting mix consistently moist but never waterlogged. Overwatering is the most common culprit for failure, leading to rot. You’ll know they’re ready for a bigger pot when you see good root development peeking out from the drainage holes.
- Signs of Trouble: The biggest red flag is wilting that doesn’t improve after watering, or a mushy, discolored stem at the soil line. This usually indicates rot. In this case, it’s best to discard the affected cutting and review your watering and drainage. If the leaves start to turn yellow and drop, it might mean it’s getting too much direct sun, or perhaps not enough water.
A Encouraging Closing
There you have it! Propagating Cerastium floccosum is a wonderfully satisfying way to multiply your garden’s beauty. Don’t be discouraged if your first attempt isn’t perfect; gardening is all about learning and adapting. Be patient with your little cuttings, give them a bit of love, and enjoy the process of watching new life emerge. Happy gardening!
Resource:
https://identify.plantnet.org/k-world-flora/species/Cerastium%20floccosum%20Benth./data