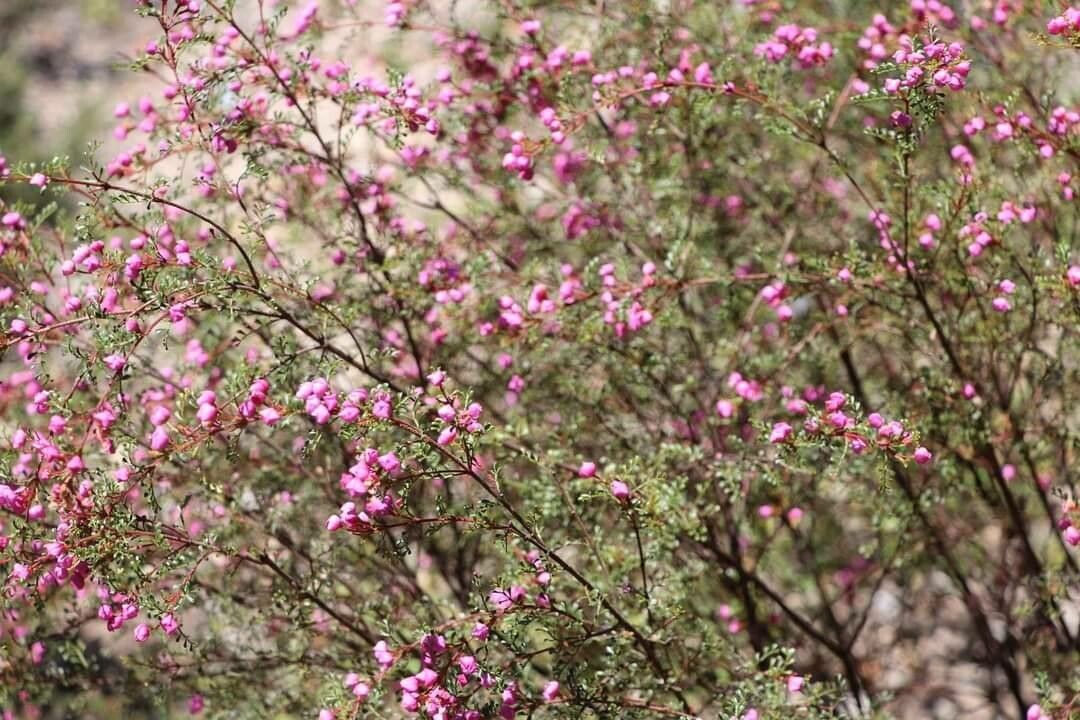
Hello there, fellow plant lovers! It’s so good to connect with you today. I’ve always had a special spot in my heart for Boronia microphylla, commonly known as Rose Boronia. Isn’t it just a delight? Those delicate, starry blooms, often in shades of pink and white, just bring a smile to your face. And the fragrance! Oh, that subtle, sweet scent is pure heaven on a warm day.
Wanting to multiply this beauty is a wonderful idea. It’s incredibly rewarding to take a little piece of a plant you love and coax it into becoming a whole new one. Now, if you’re new to the gardening scene, Boronia can be a tad bit fussy. It’s not quite as straightforward as, say, a succulent, but with a little patience and the right approach, it’s absolutely achievable. Think of it as a fun challenge that will make those successes all the sweeter.
When to Get Your Hands Dirty
For Rose Boronia, the best time to start propagating is during the late spring or early summer. This is when the plant is actively growing but not yet in full bloom. You’re looking for young, semi-hardwood stems. These are stems that have started to firm up a bit but are still flexible enough to root. Avoid very soft, new growth or old, woody stems. Think of it as being “just right” – not too soft, not too tough.
Gathering Your Gardening Arsenal
Before we dive in, let’s make sure you have everything you need. A little preparation goes a long way!
- Sharp Pruning Shears or a Craft Knife: Cleanliness is key here to prevent disease.
- Rooting Hormone: A good quality rooting hormone powder or gel will give your cuttings a significant boost.
- Potting Mix: A well-draining mix is crucial. I like to use a blend of equal parts perlite and peat moss, or a commercial seed-starting mix that has good aeration. You can even add a bit of coarse sand.
- Small Pots or Seedling Trays: Make sure they have drainage holes!
- Plastic Bags or Cling Film: To create a humid environment.
- Watering Can with a Fine Rose: To water gently without disturbing your cuttings.
- Optional: Heat Mat: This can really speed up root development in cooler environments.
Bringing New Boronias to Life: Stem Cuttings
This is my go-to method for Boronia microphylla. It’s reliable and gives you the best chance of success.
- Take Your Cuttings: On your chosen day (remember, late spring/early summer!), select a healthy-looking stem from your mature Boronia. Using your clean pruners or knife, take cuttings that are about 10-15 cm (4-6 inches) long. Make the cut just below a leaf node, which is where the stem naturally joints.
- Prepare the Cuttings: Gently remove the lower leaves from the stem, leaving only a few at the top. This prevents them from rotting submerged in the soil or water. If your leaves are quite large, you can even trim them in half to reduce water loss.
- Dip in Rooting Hormone: Moisten the cut end of each cutting slightly, then dip it into your rooting hormone. Tap off any excess.
- Plant Your Cuttings: Fill your small pots or trays with your prepared potting mix. Make a hole in the center of the soil with a pencil or your finger. Gently insert the rooting hormone-coated end of the cutting into the hole, ensuring at least one leaf node is beneath the soil surface. Firm the soil gently around the stem.
- Water Gently: Water the pots thoroughly but gently. You want the soil to be moist, not waterlogged.
- Create a Humid Home: To keep those cuttings happy and hydrated, cover each pot loosely with a plastic bag or some cling film. Prop it up so it doesn’t touch the leaves. You can use small sticks to keep the plastic from collapsing. Place the pots in a bright spot out of direct sunlight.
My Little “Secret Sauce” for Boronia
Here are a few things I’ve learned over the years that can make all the difference:
- Bottom Heat is Your Friend: If you can, place your pots on a gentle heat mat. This little bit of warmth from below encourages root formation, especially if your ambient temperature isn’t consistently warm. It’s like giving your cuttings a cozy little foundation to grow from.
- Don’t Let the Leaves Wilt: Watch those cuttings closely. If the leaves start to look a bit sad, it means they’re losing too much moisture. Mist them lightly with water occasionally, and ensure that the plastic cover is creating a good, humid environment. The goal is to keep them turgid.
- Patience, Patience, Patience: Boronias can be slow rooted. Don’t be tempted to pull them out of the pot too soon to check for roots. It can take anywhere from 4 to 8 weeks, sometimes even longer, to see significant root development. Trust the process!
Nurturing Your New Sprouts & What to Watch For
Once you start to see signs of new growth, like tiny leaves appearing at the top, it’s a good indication that roots have formed. You can gently tug on the cutting; if there’s resistance, you’ve got roots!
Carefully remove the plastic cover gradually over a few days to let the new plant acclimatize to normal humidity. Continue to water when the top layer of soil feels dry. Keep them in that bright, indirect light.
Now, let’s talk about the not-so-fun stuff – troubleshooting. The most common issue you’ll encounter is rot. If your cutting goes dark and mushy, or the leaves start to completely shrivel and die despite your efforts, it’s likely rot has set in. This is often due to inconsistent watering (too wet, or letting it dry out too much) and poor drainage. Don’t be discouraged if a few don’t make it! It’s part of the learning curve.
Keep Growing, Keep Blooming!
Propagating Boronia microphylla might require a little extra care and a dash of patience, but oh, is it worth it! Witnessing those tiny cuttings transform into healthy, blooming plants is one of the most satisfying aspects of gardening. Enjoy the journey, learn from each step, and don’t be afraid to get your hands dirty. Happy planting!
Resource:
https://identify.plantnet.org/k-world-flora/species/Boronia%20microphylla%20Sieber%20ex%20Rchb./data