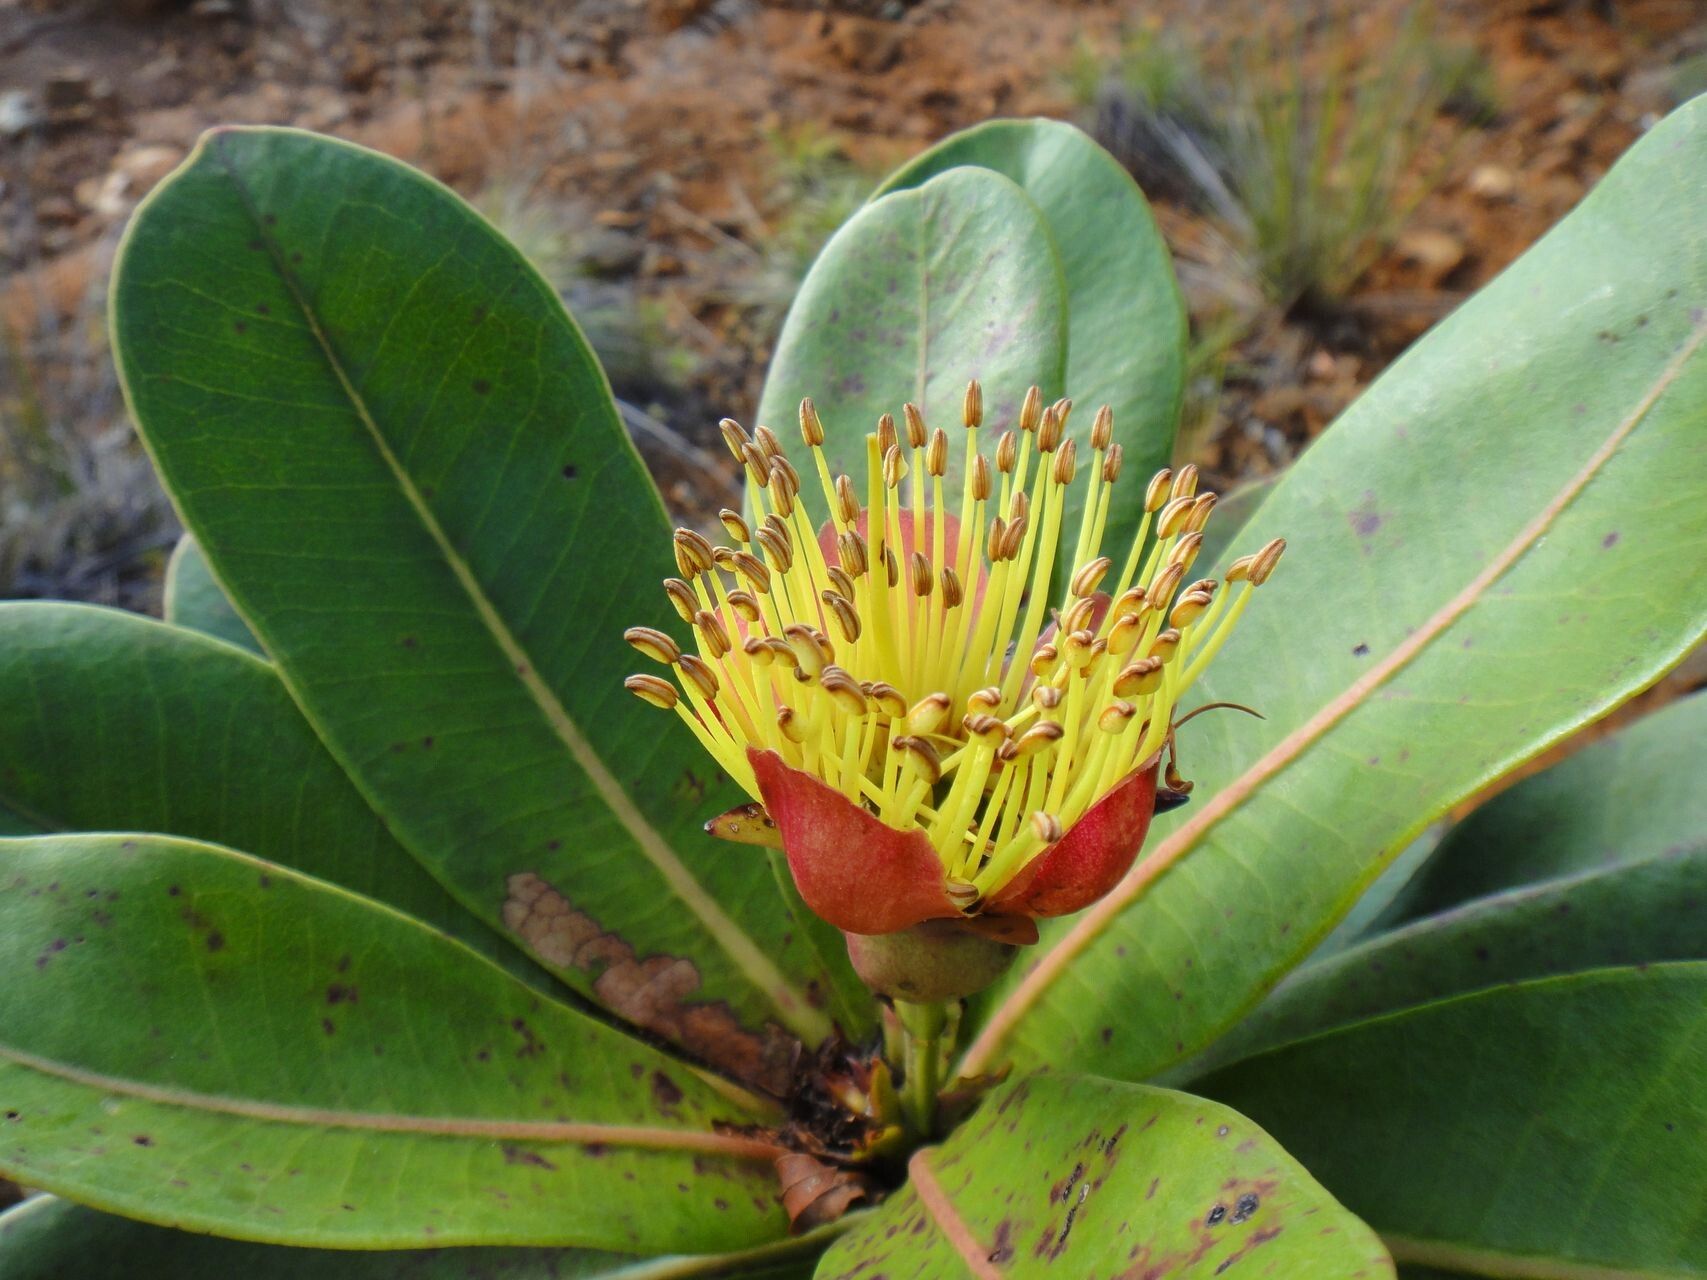
Hello, fellow plant lovers! I’m so excited to chat with you today about a truly spectacular Australian native: Xanthostemon gugerlii, often called the Golden Penda. Its vibrant, fluffy golden-yellow blooms are a sight to behold, like little bursts of sunshine in the garden. If you’re looking to add more of this cheerful beauty to your life, or perhaps share it with friends, propagating your own plants is incredibly rewarding. Now, I’ll be honest, Xanthostemon gugerlii can be a little bit fussy when it comes to propagation, so it might not be the absolute easiest plant for a complete beginner. But don’t let that deter you! With a little care and attention, it’s absolutely achievable.
The Best Time to Start
For the best chance of success with our Golden Penda, I always aim to take cuttings in late spring or early summer. This is when the plant is actively growing, full of vigor, and has plenty of healthy, semi-hardwood to offer. If you miss this window, a late summer propagation can also work, but I find the spring/early summer growth gives you the most robust material.
Supplies You’ll Need
Here’s a little toolkit to get you ready:
- Sharp, clean pruning shears or a sharp knife: Essential for making clean cuts.
- A rooting hormone powder or gel: While not always strictly necessary for Xanthostemon, it can give your cuttings a significant boost.
- A well-draining potting mix: Think of something like a 50/50 blend of perlite and a good quality potting soil, or a specialized seed-starting mix. The key is excellent drainage.
- Small pots or seed trays: Clean ones, please!
- A plastic bag or a propagator lid: To create a humid microclimate.
- Trays for bottom watering (optional but recommended): Makes watering much easier.
- Labels: So you don’t forget what you planted where!
Propagation Methods
Let’s get our hands dirty with the most reliable method for Xanthostemon gugerlii: stem cuttings.
- Select Your Cuttings: Look for healthy, non-flowering stems from your mature plant. You want pieces that are about 4-6 inches long. I like to choose stems that are firm but still have a little flexibility – this is often referred to as semi-hardwood.
- Make the Cut: Using your clean secateurs or knife, make a clean, sharp cut just below a leaf node (the point where a leaf joins the stem). This is a prime spot for root development.
- Prepare the Cutting: Gently remove the lower leaves from your cutting, leaving just the top few leaves. You can even trim the largest of the remaining leaves in half horizontally if they seem very big, as this reduces moisture loss.
- Apply Rooting Hormone: Dip the cut end of the stem into your rooting hormone powder or gel, tapping off any excess.
- Potting Up: Fill your small pots or trays with your well-draining potting mix. Create a small hole in the center of the mix with your finger or a pencil.
- Insert the Cutting: Place the prepared cutting into the hole, gently firming the mix around the base to ensure good contact.
- Water Gently: Water your cuttings thoroughly but gently. I prefer to bottom water if possible, by placing the pots in a tray of water and letting them soak it up from below until the surface of the soil is moist. This avoids disturbing the new cuttings.
- Create Humidity: Cover the pots with a clear plastic bag or a propagator lid. This traps humidity around the cuttings, which is crucial for them to root. Make sure the leaves aren’t touching the plastic if possible – poke some skewers into the soil to prop it up if needed.
- Find a Suitable Spot: Place your pots in a bright spot, but out of direct, harsh sunlight. A warm location is best.
The “Secret Sauce” (Pro Tips)
Here are a few little tricks I’ve picked up over the years:
- Bottom Heat is Your Best Friend: If you can provide gentle bottom heat – perhaps by placing your propagator on a seedling heat mat – it really speeds up root formation for woody cuttings like these. Aim for around 70-75°F (21-24°C).
- Don’t Constantly Disturb Them: Resist the urge to pull at your cuttings to check for roots! This damages delicate new growth. Patience is key. If you’re using a propagator, you might open the lid for a few minutes each day to allow for some air exchange and prevent fungal issues.
- The “Wiggle Test” (After a While!): Once you think they might have rooted (usually after 6-8 weeks), give a cutting a very gentle wiggle. If it offers resistance, it’s likely developing roots. Another sign is new leaf growth appearing.
Aftercare & Troubleshooting
Once your cuttings have started to show signs of life, like new leaves unfurling, it’s time for them to gradually acclimate to open air. Slowly remove the plastic cover over a week or two, opening it up for longer periods each day. Continue to water them consistently but avoid letting them sit in soggy soil.
The most common problem you might encounter is rot. This usually happens if the soil is too wet and there’s not enough air circulation. If you see a cutting going limp and mushy at the base, it’s usually a lost cause, sadly. Don’t be discouraged, though; just try again with fresh material and ensure excellent drainage. Another sign of failure is if the cutting simply shrivels up and turns brown without any signs of rooting.
A Little Encouragement
Propagating can feel like a bit of a mystery sometimes, but with Xanthostemon gugerlii, taking the time and providing the right conditions really pays off. Be patient with your new green babies. Enjoy the process of nurturing them, and soon you’ll have your own little golden wonders to admire and share! Happy gardening!
Resource:
https://identify.plantnet.org/k-world-flora/species/Xanthostemon%20gugerlii%20Merr./data