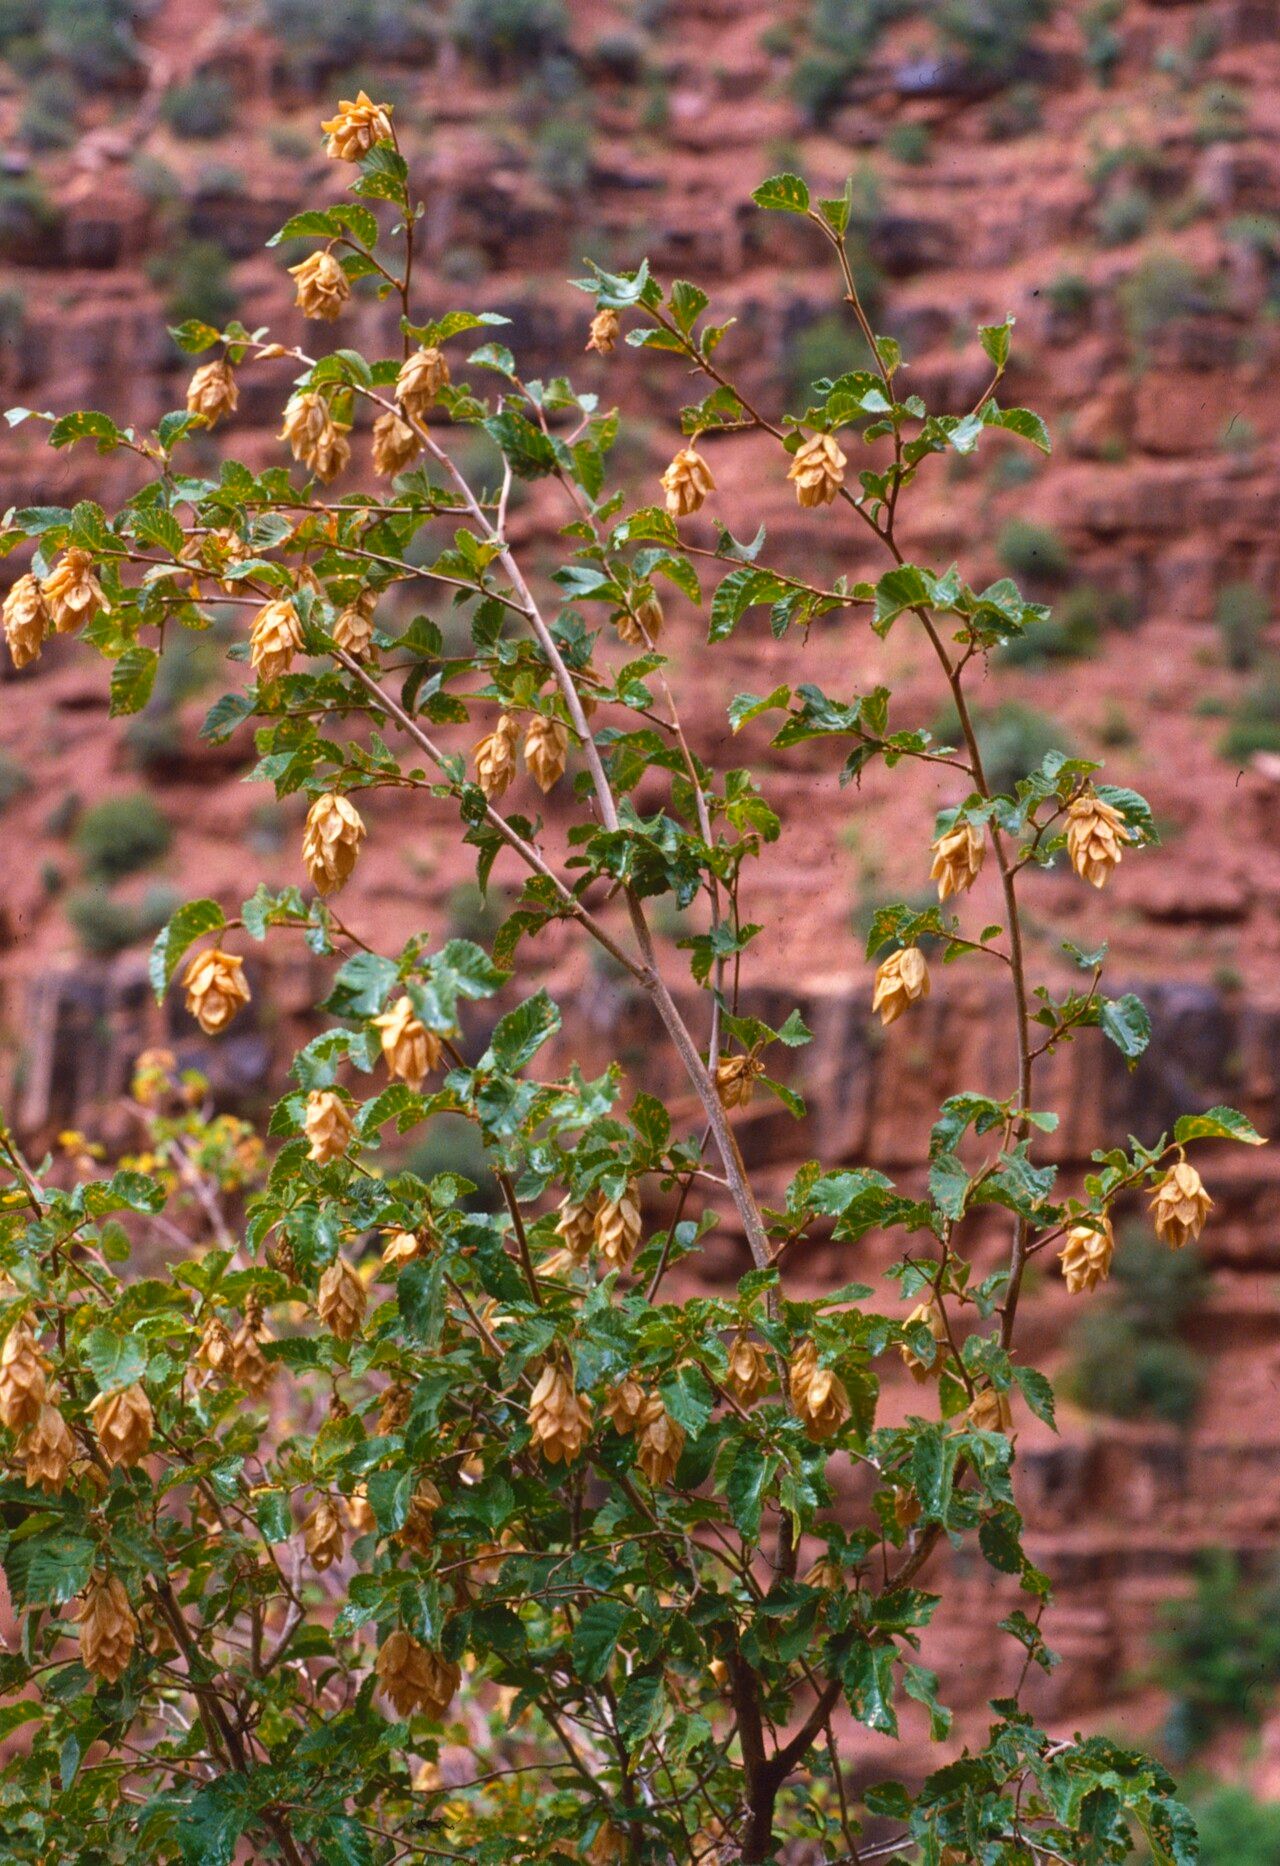
Oh, hello there! Come on in, pull up a chair. I’ve been excited to chat with you about Ostrya knowltonii. You know, this particular ironwood is such a treasure. It offers this delicate, almost fern-like foliage in the summer and then these charming papery husks in the fall, like little lanterns. Plus, it’s known for its toughness. Propagating anything new for your garden is always a thrill, and Ostrya knowltonii is no exception. Now, is it a walk in the park for absolute beginners? Honestly, it can be a little finicky, but with a few tried-and-true methods, I promise you can get a wonderful start on your own little ironwood grove.
The Best Time to Start
For Ostrya knowltonii, late spring to early summer is truly your golden window. Think about it: the plant is in full swing of its growing season. New growth is putting on a spurt, and those young, flexible stems are much more receptive to rooting. Waiting until the wood has started to harden just a bit, but is still relatively soft, gives you the best shot. Avoid trying this when the plant is stressed, like during a heatwave or extreme drought. Your future plants will thank you for giving them the best start.
Supplies You’ll Need
Here’s what you’ll want to have on hand before you get your hands dirty:
- Sharp, sterile pruning shears or a clean knife: For making clean cuts.
- Rooting hormone: A powder or gel can really give your cuttings a boost.
- Potting mix: A well-draining blend is crucial. I like to use a mix of equal parts peat moss or coco coir, perlite, and a little bit of regular potting soil.
- Small pots or trays: Clean ones, please!
- Plastic bags or a propagation dome: To create a humid environment.
- Watering can with a fine rose: For gentle watering.
- Labels: To remind yourself what you’ve planted and when!
Propagation Methods
There are a couple of ways we can go with Ostrya knowltonii. I’ve found success with stem cuttings, which I think is the most straightforward for many home gardeners.
1. Stem Cuttings:
- Select your cuttings: On a bright, sunny day – this is key! – look for new growth on your Ostrya knowltonii. You want stems that are about 4-6 inches long and have started to harden off a bit, meaning they aren’t floppy green but have a little substance to them. They should snap cleanly when bent, not just bend over.
- Make the cut: Using your sharp, sterile shears or knife, take your cuttings just below a leaf node. This is the point where a leaf attaches to the stem, and it’s where roots are most likely to form. Remove any lower leaves, leaving just 2-3 leaves at the top. If the top leaves are very large, you can even cut them in half to reduce water loss.
- Prepare the cutting: Dip the cut end into your rooting hormone, tapping off any excess.
- Plant your cuttings: Fill your pots with your well-draining potting mix. Make a small hole with a pencil or your finger. Gently insert the prepared cutting into the hole, ensuring the bottom leaves aren’t buried. Firm the soil gently around the stem.
- Water and cover: Water the pot gently until the soil is evenly moist but not soggy. Then, cover the pot with a clear plastic bag, or place it under a propagation dome. This creates a mini-greenhouse, keeping the humidity high, which is vital for cuttings to root.
2. Water Propagation (with a caveat):
While I do sometimes start woody plants in water, for Ostrya knowltonii, it’s a bit more challenging to get robust root systems this way, and the roots can be more prone to rot. If you try it, only use softwood cuttings (that very new, flexible growth) and be very diligent about changing the water daily. You’ll still want to remove lower leaves so they don’t decay in the water. Once you see a good inch or so of roots, you’ll need to carefully transplant them into potting soil, as they can be shocked by the transition. I tend to lean towards soil propagation for this beauty.
The “Secret Sauce” (Pro Tips)
Here are a couple of things I’ve learned over the years that can make a real difference:
- Bottom Heat is Your Friend: A heating mat placed under your pots or trays can significantly speed up root development. It mimics the warmth of spring soil and encourages those root hormones to get to work. Just be sure your pots aren’t sitting in soggy conditions on the mat – good drainage is still paramount.
- Don’t Suffocate Them: While that plastic bag or dome is crucial for humidity, it’s a good idea to “vent” them for a little while each day. Open the bag or dome for 15-30 minutes to allow for some air circulation. This helps prevent fungal diseases from setting in, which can be a real bummer.
- Listen to the Leaves: If the leaves on your cuttings start to look wilted and sad, even though the soil is moist, it’s often a sign they’re losing too much water through transpiration. This is where either larger leaves need trimming, or your humidity cover isn’t doing its job.
Aftercare & Troubleshooting
Once you see new leaf growth appearing on your cuttings, that’s a fantastic sign! It means roots are forming. At this point, you can gradually acclimate them to less humid conditions by opening the bag or dome for longer periods each day over a week. Continue to water them carefully, keeping the soil consistently moist but never waterlogged. You can also start feeding them with a diluted liquid fertilizer every few weeks once they’re established.
Now, what if things go wrong? The most common issue you’ll encounter is rot. If the cuttings turn black and mushy, or the base of the stem looks slimy, that’s rot. It’s usually a sign of too much moisture and not enough air circulation. Unfortunately, if rot sets in deeply, the cutting is usually a goner. Another sign of failure is if the cutting just stays limp and refuses to root after several weeks. This can happen if the cutting wasn’t taken at the right time, the hormone wasn’t effective, or the conditions just weren’t right. Don’t get discouraged – it’s all part of the learning process!
A Encouraging Closing
Growing new plants from cuttings is a truly rewarding experience. It’s like giving a gift to the future, watching a tiny piece of your beloved tree develop into something independent. Be patient with your Ostrya knowltonii cuttings. Gardening asks us to slow down and observe, to nurture and to learn from every little sprout, or indeed, every failed attempt. Enjoy the process, celebrate the successes, and I guarantee you’ll find immense satisfaction in growing your own beautiful ironwood. Happy planting!
Resource:
https://identify.plantnet.org/k-world-flora/species/Ostrya%20knowltonii%20Coville/data