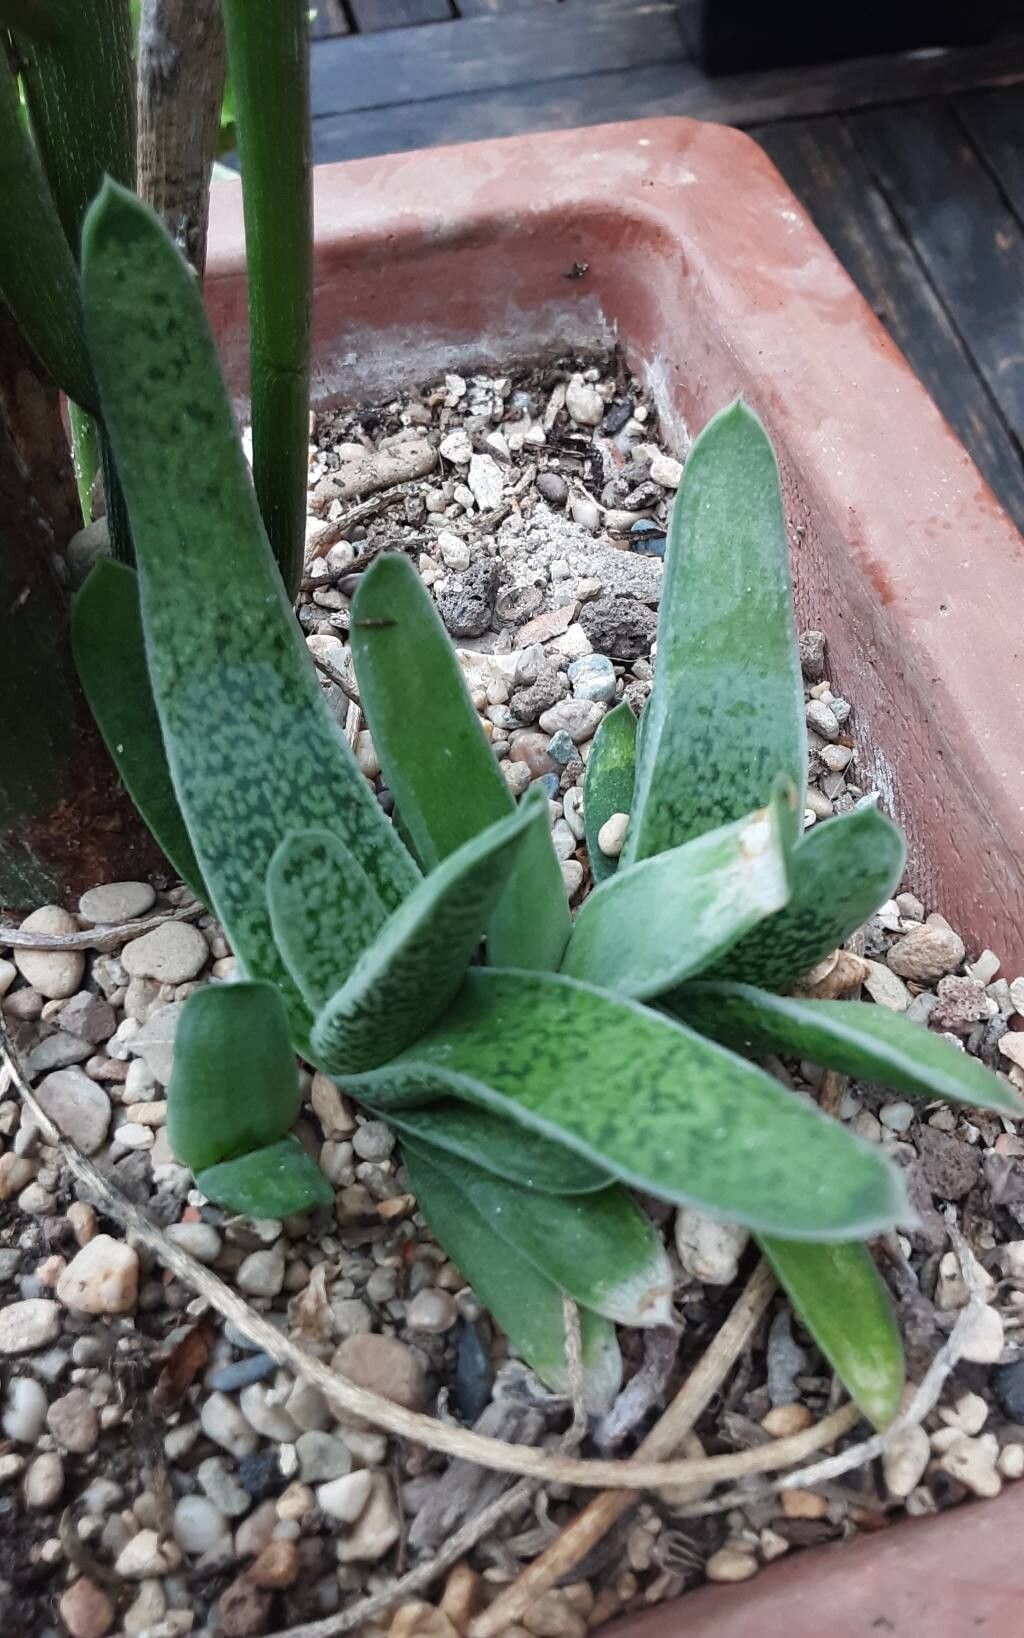
Hello, fellow plant lovers! Today, we’re diving into the fascinating world of Gasteria pillansii, a succulent that truly brings a touch of the extraordinary to any windowsill. With its upright, tongue-shaped leaves, often adorned with delightful white speckles, the Gasteria pillansii is a real stunner. And the best part? You can easily create more of these beauties yourself! Propagating succulents is one of my favorite ways to fill my home with greenery, and I think you’ll find it incredibly rewarding too. For beginners, Gasteria pillansii is a wonderfully forgiving plant to start with, which is always a bonus.
The Best Time to Start
When it comes to getting those new Gasteria babies going, spring and early summer are your golden ticket. This is when the plant is actively growing and has the most energy to put into creating new roots. You’ll often see little offsets, or “pups,” forming around the base of a mature plant during this time, making it the perfect opportunity to get started.
Supplies You’ll Need
Gathering your supplies beforehand makes the whole process so much smoother. Here’s what I always have on hand:
- Well-draining succulent potting mix: A commercial mix works fine, or you can make your own by combining potting soil, perlite, and coarse sand.
- Sharp, clean pruning shears or a sharp knife: Sterilizing them with rubbing alcohol is key to preventing disease.
- Rooting hormone (optional, but helpful): This is a powder or gel that encourages root development.
- Clean pots or trays: Terracotta pots are great because they breathe well.
- Watering can or spray bottle: For gentle watering.
- Gloves: Some succulents have fine hairs that can be irritating.
- A sunny spot: Bright, indirect light is ideal.
Propagation Methods
Gasteria pillansii is quite versatile, but my go-to methods are division and leaf cuttings.
1. Division (The Easiest Way!)
This is my absolute favorite for Gasteria pillansii because it usually yields the quickest results. Mature plants often produce little baby plants, called pups, around their base.
- Gently remove the parent plant from its pot. You might need to loosen the soil around the edges.
- Examine the base of the plant. Look for offsets that have their own miniature roots already.
- Carefully separate the pup from the mother plant. You can use your fingers or a clean knife for this. Try to get as much of the pup’s root system as possible.
- Allow the cut end to callus over. This means letting it air dry for a day or two until it forms a dry scab. This prevents rot.
- Pot the new pup in its own small pot filled with succulent mix.
- Don’t water immediately. Wait a few days, then water sparingly.
2. Leaf Cuttings (A Touch More Patience)
This method takes a bit longer, but it’s incredibly satisfying to watch a whole new plant grow from just a single leaf!
- Select a healthy, mature leaf. Gently twist or cut it from the mother plant, ensuring you get a clean break right at the stem. If the leaf has any damage, it’s best to discard it.
- Allow the cut end to callus over. This is crucial! Let the leaf sit out of soil for 2-3 days, or until the cut edge is dry and sealed.
- Place the callused end of the leaf onto the surface of your succulent potting mix. You can also gently press it into the soil so about a quarter of an inch of the leaf is just covered.
- Mist the soil lightly every few days. You want the soil to be slightly moist, but not soggy.
- Be patient! It can take several weeks, or even months, for tiny roots and a new rosette to appear from the base of the leaf.
The “Secret Sauce” (Pro Tips)
Here are a few tricks I’ve learned over the years that can make a big difference:
- Bottom Heat is Your Friend: If you’re propagating from cuttings, especially in a cooler environment, placing your pots on a seedling heat mat can significantly speed up root formation. It mimics the warmth found in their natural habitat, and the plants just love it.
- Don’t Drown Your Cuttings: This is the most common mistake! While succulents need some moisture to root, soggy soil is a fast track to rot. Allow the soil to dry out slightly between waterings. For leaf cuttings, misting is usually sufficient until you see signs of new growth.
- Think About Airflow: Good air circulation is a lifesaver for succulents, especially when they’re young and vulnerable. Avoid overcrowding your cuttings, and if you’re using a propagation tray, ensure it has drainage holes and isn’t covered too tightly.
Aftercare & Troubleshooting
Once you see those little roots emerging (hooray!), it’s time for a slightly different care routine.
- Watering: Begin watering more regularly, but still allow the soil to dry out between waterings. The frequency will depend on your environment – more often in warmer, drier conditions, less in cooler, humid ones.
- Light: Gradually introduce your new plants to brighter, indirect light. They can scorch if moved too quickly into intense sun.
- Repotting: Once your new plant has developed a decent root system and is growing well (you’ll see new leaves appearing), you can repot it into a slightly larger container with fresh succulent mix.
Common Signs of Failure:
The biggest culprit is usually rot. If your leaf cutting turns mushy and black, or your divided pup’s leaves start to yellow and fall off without any sign of roots, it’s likely due to too much moisture. If this happens, gently pull the failing cutting or pup out, remove any rotted parts, and let the healthy bits air dry for a day or two before trying again, this time with much more cautious watering.
A Little Patience Goes a Long Way
Watching a new plant emerge from a leaf or a tiny pup is such a joy. Remember that propagation takes time, and not every attempt will be a roaring success, but that’s all part of the learning process. Celebrate your wins, learn from your setbacks, and most importantly, enjoy the journey of growing your own Gasteria collection. Happy propagating!
Resource:
https://identify.plantnet.org/k-world-flora/species/Gasteria%20pillansii%20Kensit/data