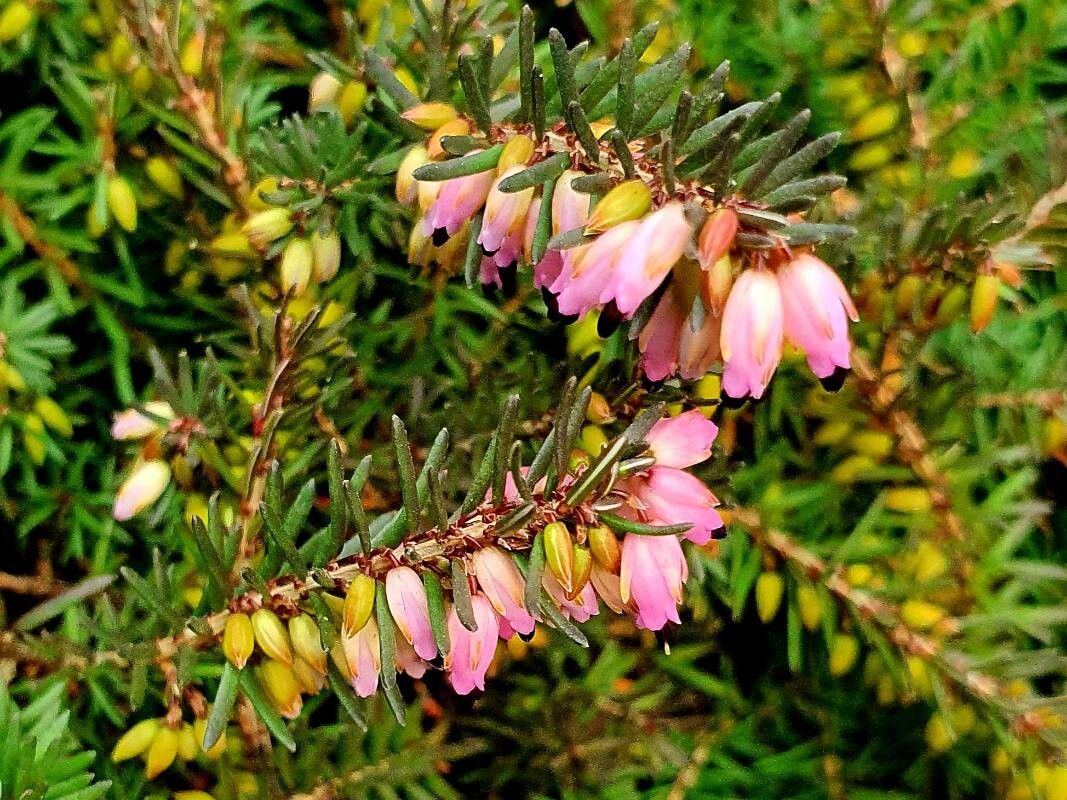
Hello there, fellow plant lovers! I’m so excited to chat with you today about a gem in the garden that truly brightens up the colder months: Erica carnea, or Winter Heath. If you’re looking for a splash of color when everything else is snoozing, this is your plant! Its delicate pink, white, or purplish blooms, often appearing in late winter or early spring, are a welcome sight. And the best part? Propagating it is incredibly rewarding, a wonderful way to multiply these beauties and share them with friends. Honestly, it’s not too tricky, making it a fantastic project for beginners too!
The Best Time to Start
When it comes to getting a head start on your Erica carnea babies, timing is everything. The absolute sweet spot is late spring to early summer, after the plant has finished its spectacular bloom and is starting to put on new, soft growth. This is when the stems are most pliable and have the energy to unfurl new roots.
Supplies You’ll Need
Alright, let’s gather our tools! Think of this as assembling your gardening toolkit for success:
- Sharp Pruning Shears or a Craft Knife: For clean cuts that minimize damage.
- Rooting Hormone (Optional but Recommended): A powder or gel to encourage root development.
- A Well-Draining Potting Mix: I like to use a 50/50 blend of perlite and peat moss, or a specialized heather and rhododendron mix. Anything that doesn’t hold too much water is key.
- Small Pots or a Propagation Tray: Clean pots are a must to prevent disease.
- Plastic Bags or a Propagator Lid: To create a humid environment.
- Watering Can or Spray Bottle: For gentle watering.
- Labels: So you don’t forget what you’ve planted where!
Propagation Methods
Let’s get our hands dirty! I find stem cuttings to be the most reliable method for Erica carnea.
Stem Cuttings
- Take Your Cuttings: Head out to your healthy Erica carnea plant. Look for non-flowering shoots that are about 3-4 inches long. Use your clean shears to make a cut just below a leaf node (where the leaves attach to the stem). Try to select rather soft, new growth, not woody old stems.
- Prepare the Cuttings: Gently remove the leaves from the bottom two-thirds of the cutting. This prevents them from rotting in the soil and encourages root formation higher up the stem. If the remaining leaves are very large, you can snip them in half to reduce water loss.
- Apply Rooting Hormone (Optional): Dip the cut end of each stem into your rooting hormone powder or gel. Tap off any excess. This step isn’t strictly necessary, but it can give those tiny roots a significant boost.
- Plant Your Cuttings: Fill your pots or propagation tray with your well-draining potting mix. Make a small hole with a pencil or your finger. Insert the prepared cuttings into the holes, ensuring the bottom leaf nodes are nestled in the soil. Gently firm the soil around them.
- Water Gently: Give the soil a good, but gentle, watering. You want it moist, but not waterlogged. A spray bottle is great for this initial watering.
- Create Humidity: Cover the pots or tray with a clear plastic bag or a propagator lid. This traps moisture and creates the humid environment those cuttings need to thrive.
- Placement: Find a bright spot, but out of direct sunlight. A warm windowsill that doesn’t get intense afternoon sun is perfect.
The “Secret Sauce” (Pro Tips)
Here are a few little tricks I’ve picked up over the years that can really make a difference:
- Don’t Let Leaves Touch Water: If you’re using a propagation tray that sits in a shallow tray of water, make absolutely sure the leaves of your cuttings never dip into the water. They’ll rot faster than you can say “heather!”. You want the soil to wick up moisture, not for the leaves to be submerged.
- Bottom Heat is King: If you happen to have a heated propagator or a heat mat, use it! Erica carnea cuttings absolutely love a bit of warmth from below. It significantly speeds up root development and increases your success rate. Just place your pots or tray on it.
- Air Circulation Helps: While humidity is crucial, stagnant air can lead to fungal issues. If you notice condensation building up heavily inside your plastic bag, wipe it down occasionally or lift the bag for a few minutes each day to allow for some air exchange.
Aftercare & Troubleshooting
Once your cuttings have been planted and covered, vigilance is your best friend. Keep the soil consistently moist but never soggy. Check them regularly. You’ll know they’re starting to root when you see new growth appearing – look for tiny leaves unfurling or a gentle resistance when you very carefully tug on a cutting (though avoid tugging if possible!). This usually takes anywhere from 4 to 8 weeks.
What if things go wrong? The most common problem is rot. If you see stems turning black and mushy, it’s usually a sign of too much moisture and not enough air circulation. Unfortunately, rotted cuttings are usually beyond saving. The best approach is to remove them immediately to prevent the rot from spreading to other cuttings. Make sure your soil drains well and consider improving air circulation the next time.
A Encouraging Closing
Propagating Erica carnea is a journey, and like any good gardening journey, it requires a little patience. Don’t be discouraged if every single cutting doesn’t make it. Celebrate the ones that do! Enjoy the process of nurturing these tiny beginnings, and soon you’ll have a whole new patch of these cheerful heaths to admire. Happy propagating!
Resource:
https://identify.plantnet.org/k-world-flora/species/Erica%20carnea%20L./data