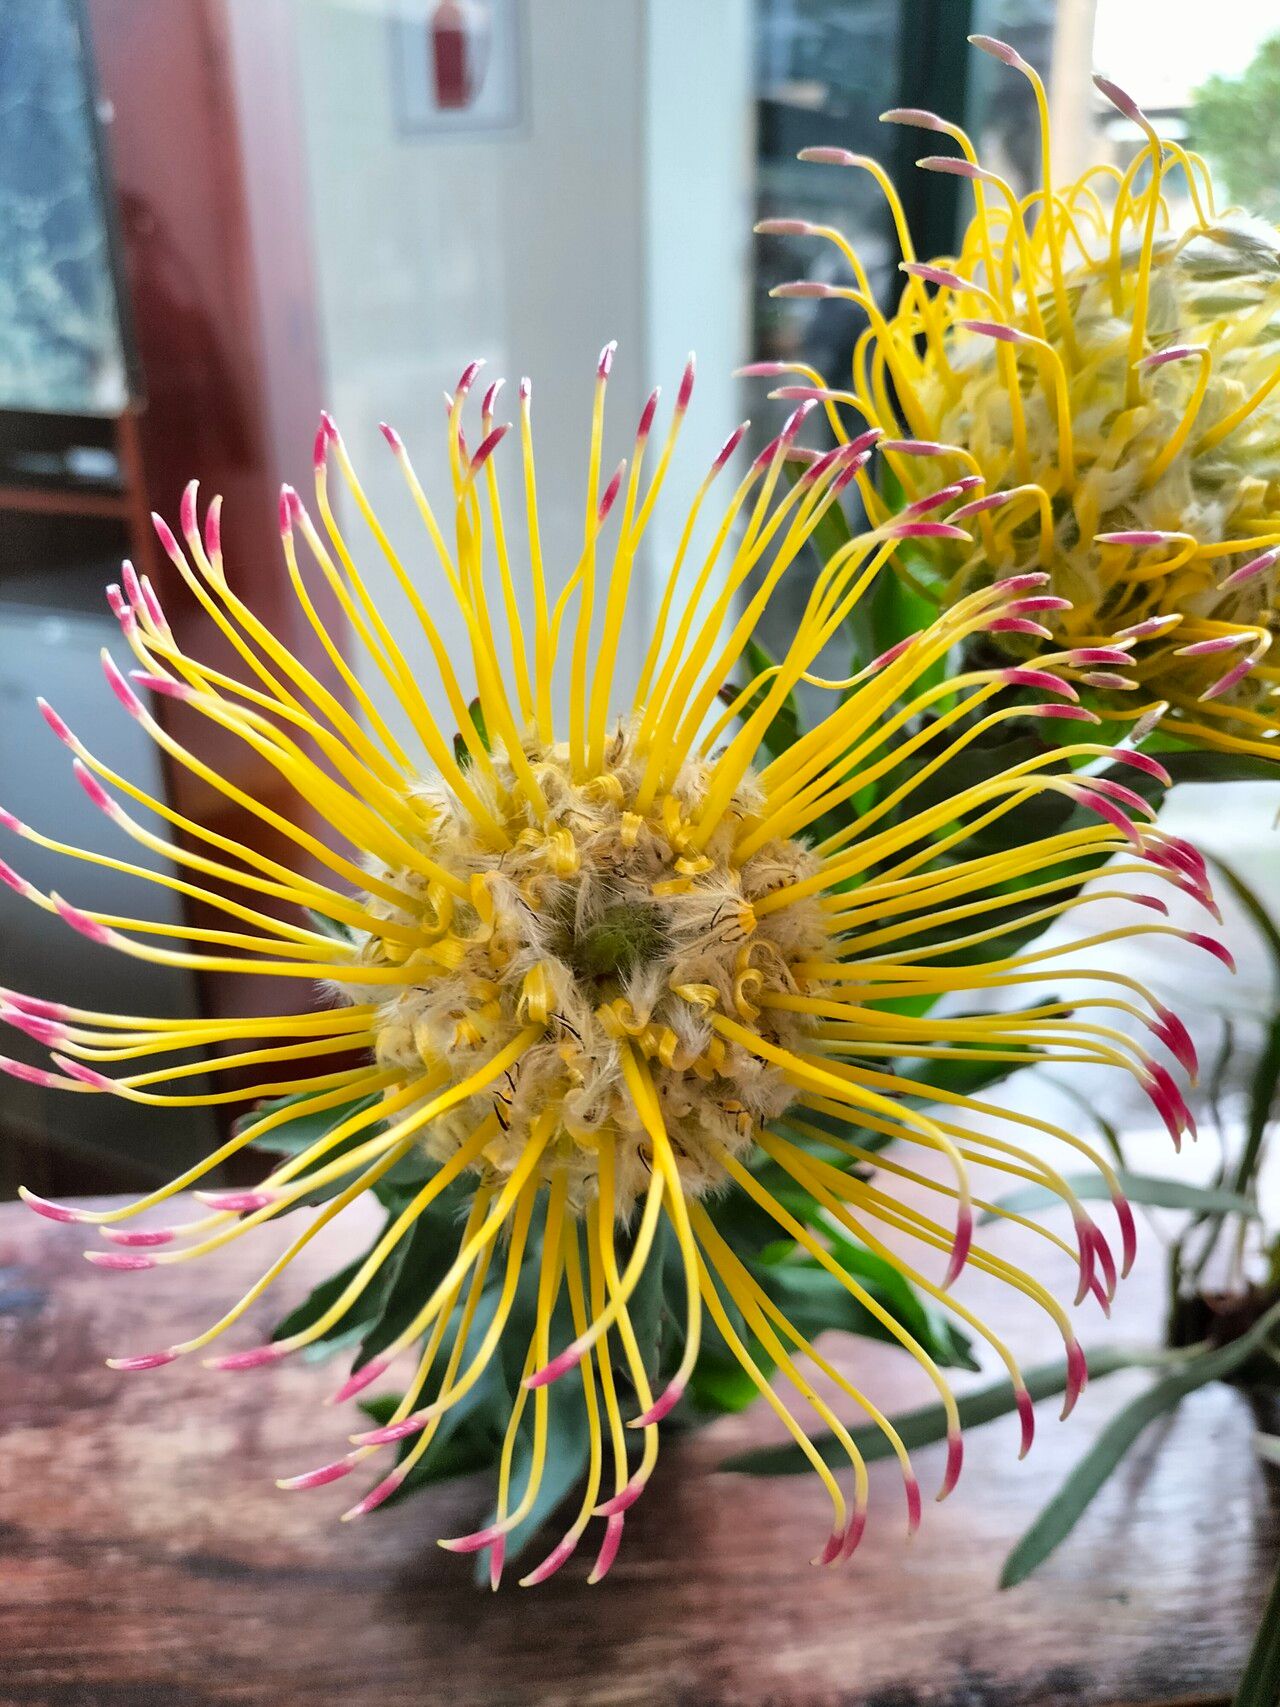
Oh, hello there! It’s so lovely to have you join me in the garden today. We’re going to chat about a plant that truly sparkles – Leucospermum grandiflorum, or the Large-flowered Pincushion. Its bold, stunning blooms are like little bursts of sunshine, and bringing new ones into existence from your own plants? Pure magic.
Why Propagate Leucospermum Grandiflorum?
There’s a special kind of joy that comes from successfully propagating a plant, and Leucospermum grandiflorum is no exception. You get to share these beauties with friends, fill more of your own garden space, or simply marvel at the wonder of life unfolding. Now, is it a walk in the park for a complete beginner? Honestly, it can be a tad on the trickier side, but with a little guidance and patience, you’ll absolutely nail it. Think of it as a rewarding challenge!
The Best Time to Start
For the best chance of success with Leucospermum grandiflorum, I always aim for late spring or early summer. This is when the plant is actively growing, and the stems have developed some maturity – not too soft and sappy, but not woody either. You’re looking for stems that have flowered or are just finishing up.
Supplies You’ll Need
Gathering your tools beforehand makes the whole process so much smoother. Here’s what I always have on hand:
- Sharp, sterile pruning shears or a sharp knife: Cleanliness is key to preventing disease.
- Rooting hormone powder or gel: This really gives your cuttings a boost.
- A well-draining potting mix: I like a blend of coarse sand, perlite, and a fine bark or coco coir. You want something that won’t hold onto too much moisture.
- Small pots or seed trays: With drainage holes, of course!
- A clear plastic bag or propagation lid: To create a humid environment.
- A heat mat (optional but highly recommended): Especially if your room is a bit cool.
Propagation Methods: Stem Cuttings
Stem cuttings are my go-to method for Leucospermum grandiflorum. It’s reliable and gives you a good number of new plants from one parent.
- Take Your Cuttings: On a bright but not scorching day, select healthy, semi-hardwood stems. Look for growth that’s firm but still has a bit of flexibility. Using your sterile shears, take cuttings about 4-6 inches long.
- Prepare the Cuttings: Gently remove the leaves from the bottom two-thirds of the cutting. This prevents them from rotting in the soil. You want to leave just a few leaves at the very top to photosynthesize. If any leaves are particularly large, I’ll sometimes cut them in half.
- Apply Rooting Hormone: Dip the cut end of the stem into water, then into your rooting hormone powder or gel. Tap off any excess.
- Plant Your Cuttings: Fill your pots or trays with your prepared, moist potting mix. Make a small hole with a pencil or your finger. Insert the treated cutting, ensuring the nodes (where leaves were) are below the soil surface. Gently firm the soil around the cutting.
- Create Humidity: Water the soil gently so it’s evenly moist but not waterlogged. Then, cover your pots with a clear plastic bag or propagation lid. This will trap moisture and humidity, which is crucial for rooting. You can secure the bag with a rubber band.
The “Secret Sauce” (Pro Tips)
Here are a few little tricks I’ve learned over the years that make a big difference:
- Bottom Heat is Your Friend: Leucospermums love a bit of warmth from below. Placing your pots on a heat mat, set to a gentle 70-75°F (21-24°C), really encourages strong root development. It mimics that lovely spring soil warmth.
- Don’t Drown Them, But Keep Them Moist: While we need humidity, soggy soil is the enemy. Check the moisture regularly by gently poking your finger into the soil. If it feels dry about an inch down, give them a light watering.
- Good Airflow Prevents Fungus: Even with the cover, a little airflow is good. You can lift the plastic bag for a few minutes each day to let fresh air in. This helps prevent fungal issues, which can be a problem with cuttings.
Aftercare & Troubleshooting
Once those little roots start to form and your cuttings look perky (you might see new growth!), it’s time to transition them.
- Acclimatization: Gradually remove the plastic cover over a week or two. Start by lifting it for longer periods each day.
- Light: Give them bright, indirect light. Once they are well-rooted and growing, you can slowly introduce them to more direct sun.
- Watering: Continue to water carefully. Let the top inch of soil dry out between waterings.
- Watch for Rot: The most common issue you’ll face is rot. If a cutting turns black and mushy at the base, or the leaves start to yellow and wilt dramatically despite having adequate moisture, it’s likely rot. This is usually caused by too much moisture and poor drainage. If you catch it early, you might be able to salvage it by repotting into fresh, dry mix, but often it’s best to discard to prevent it spreading.
Keep Nurturing and Enjoy!
Propagating Leucospermum grandiflorum is a journey, not a race. Be patient with your little cuttings; it can take several weeks, or even a few months, for them to establish a good root system. Watch them closely, offer them the right conditions, and marvel at their slow but steady progress. Every new plant you nurture is a testament to your green thumb and a beautiful reminder of nature’s persistence. Happy propagating!
Resource: