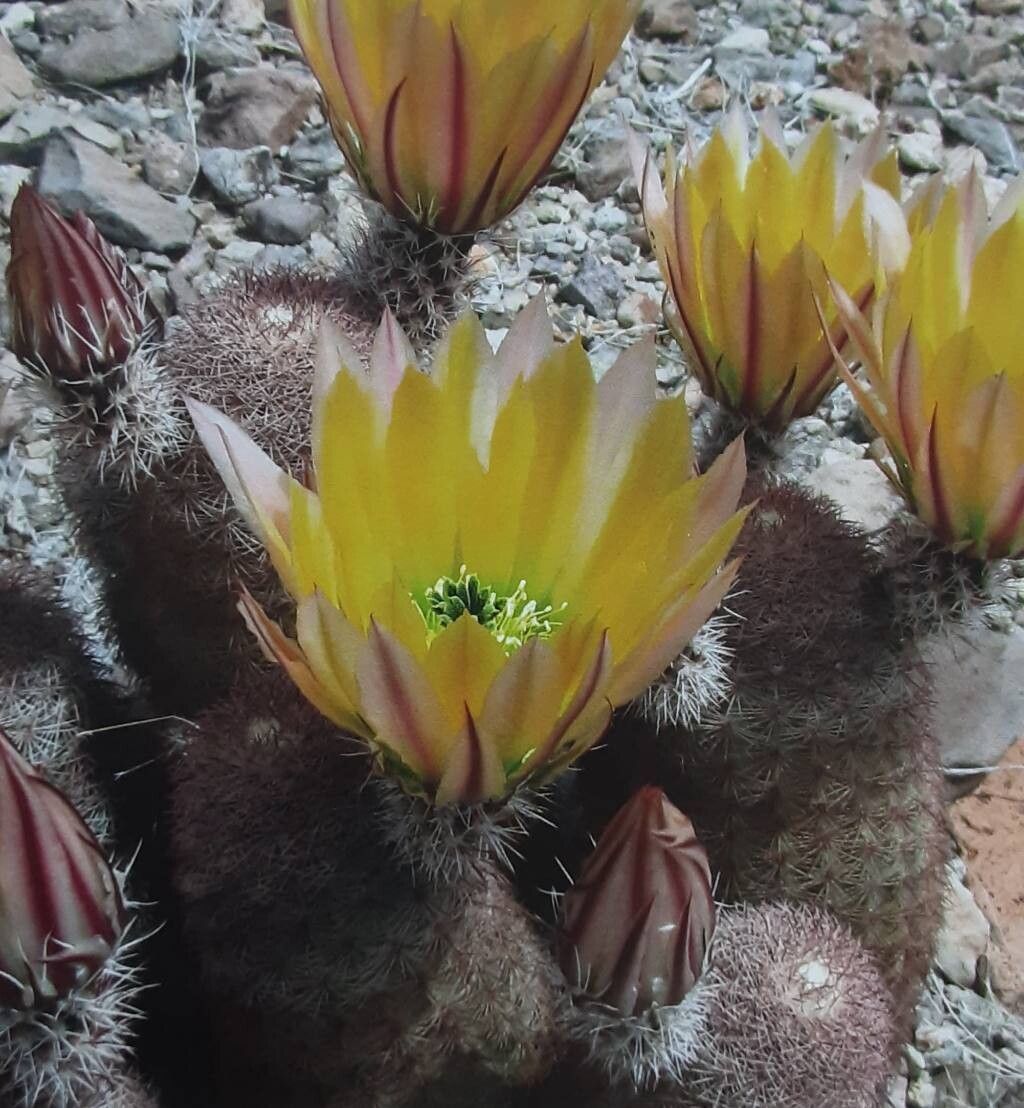
Oh, Echinocereus dasyacanthus! What a treat. If you’ve ever admired those stunning, jewel-toned flowers of the Hedgehog Cactus, you’re not alone. They’re truly a showstopper in any collection. And the great news? Propagating them is a wonderfully rewarding experience, even for those who are just finding their green thumb. While not as straightforward as propagating a pothos, it’s certainly achievable and well worth the effort.
The Best Time to Start
For Echinocereus dasyacanthus, the sweet spot for propagation is definitely during its active growing season. Think late spring through early summer. This is when the plant has the most energy to dedicate to producing new roots and developing into a healthy specimen. Waiting for this period gives your cuttings the best chance of success.
Supplies You’ll Need
Here’s what I always have on hand when I’m ready to multiply my Hedgehog Cacti:
- Sharp, clean knife or pruning shears: A clean cut is essential to prevent disease.
- Cactus or succulent potting mix: I love a gritty blend – about 50% potting soil and 50% perlite or pumice works wonders. You can also buy pre-made cactus mix.
- Rooting hormone (optional but recommended): This little boost can speed things up.
- A well-draining container: Terra cotta pots are my favorite because they breathe.
- Newspaper or paper towels: For protecting your hands and collecting sap.
- Soft brush: To gently remove excess sap.
- Spray bottle: For lightly misting.
Propagation Methods
The most common and effective way to propagate Echinocereus dasyacanthus is by stem cuttings. This is where most of the magic happens.
- Taking the Cutting: The first step is gentle. Examine your mature plant and identify a healthy stem segment, ideally one that’s a few inches long. Using your clean knife or shears, make a clean cut at the base of the desired segment. Try to get a piece that has at least one or two constrictions, as these are where new roots often emerge.
- Allowing to Callus: This is a CRITICAL step. The cut end needs to dry out and form a callus before planting. This prevents rot. Place the cutting in a dry, well-ventilated spot, out of direct sunlight, for several days to a couple of weeks. You’ll know it’s ready when the cut surface looks dry and leathery. Don’t rush this!
- Planting the Cutting: Once callused, you can plant your cutting. I like to gently dip the callused end into rooting hormone (if using), tapping off any excess. Then, insert the cut end about an inch or so into your prepared cactus mix. Make sure it’s stable but don’t pack the soil too tightly around it.
The “Secret Sauce” (Pro Tips)
Now, for a few tricks I’ve learned over the years that really make a difference:
- Sap Management: Echinocereus cacti can ooze a milky sap. It’s generally harmless, but it can be sticky. After taking your cutting and before it calluses, I sometimes gently wipe off excess sap with a damp paper towel. This isn’t strictly necessary, but I find it helps the callus form more cleanly for me.
- Don’t Water Immediately: Resist the urge to water after planting. Let the cutting sit in the dry soil for about a week before giving it its first light watering. This gives the callused area another chance to settle in and reinforces the prevention of rot.
- Bottom Heat is Your Friend: If you can, providing a little warmth from below really speeds up root development. A seedling heat mat set to a gentle temperature can work wonders, especially if you’re propagating a bit earlier or later in the season.
Aftercare & Troubleshooting
After planting and that initial week of dryness, you can begin lightly watering. I usually just mist the surface of the soil or give it a very small amount of water around the base. You want the soil to be barely moist, not soggy. Overwatering is the quickest way to invite trouble.
You’ll know your cutting has rooted when you feel a slight resistance if you gently tug on it. You might also see new growth starting to emerge. This can take anywhere from a few weeks to a couple of months, so patience is key!
The most common problem you’ll encounter is rot. If you see your cutting turning mushy or black, it’s likely succumbed to rot. Unfortunately, there’s no coming back from that. The best prevention is always proper callusing, well-draining soil, and not overwatering.
A Encouraging Closing
Propagating Echinocereus dasyacanthus is such a rewarding journey. Watching a tiny cutting transform into a beautiful, flowering cactus is pure joy. Don’t be discouraged if your first attempt isn’t perfect – every gardener has experienced a little rot or a cutting that just wouldn’t root. Just keep trying, observe your plants, and enjoy the process. Happy gardening!
Resource:
https://identify.plantnet.org/k-world-flora/species/Echinocereus%20dasyacanthus%20Engelm./data