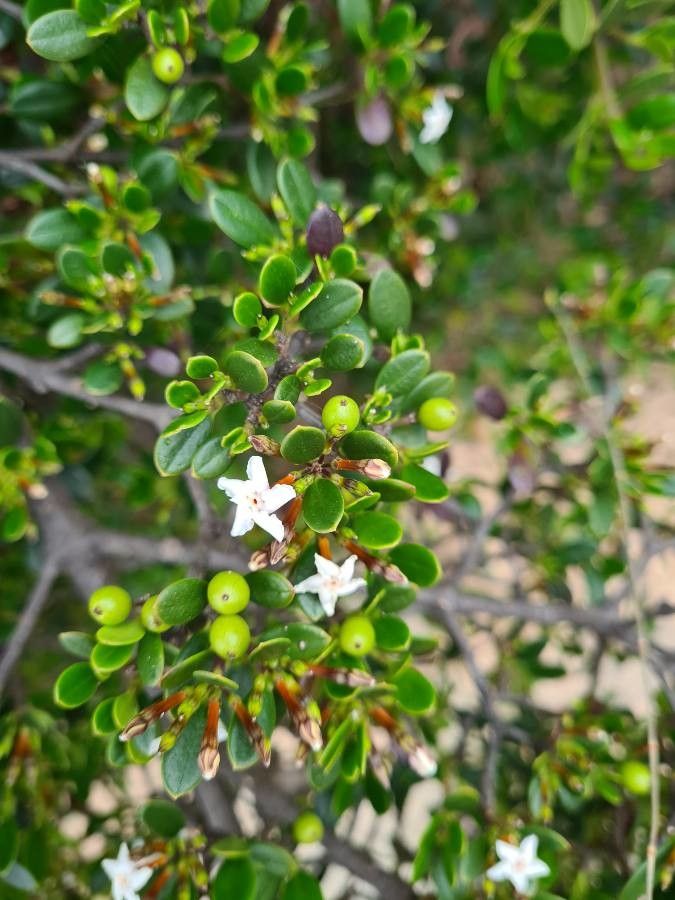
Ah, Alyxia buxifolia! If you’ve ever had the pleasure of encountering this beauty, you know why it captures our hearts. Its glossy, boxwood-like leaves are a delight, and oh, that fragrance! The sweet, jasmine-like scent that wafts from its delicate white flowers is simply intoxicating, especially on a warm evening. For me, growing anything from a tiny cutting or seedling is pure magic, and Alyxia is no exception. Some might find it a tad trickier than, say, a succulent, but with a little patience and these tips, I promise you’ll be rewarded with a whole new bush, or several!
The Best Time to Start
Honestly, the sweet spot for propagating Alyxia buxifolia is late spring to early summer. This is when the plant is actively growing and has plenty of energy to put into developing new roots. You want to use semi-hardwood cuttings, meaning stems that are no longer brand new and floppy, but haven’t become old and woody yet. Think of it as the “just right” stage – firm but still flexible.
Supplies You’ll Need
Before we get our hands dirty, let’s gather our tools. Having everything ready makes the process so much smoother:
- Sharp pruning shears or a clean knife: For taking precise cuttings.
- Rooting hormone powder (optional but recommended): This encourages faster and stronger root development. Look for one that contains IBA.
- A well-draining potting mix: A good blend for me is 50% perlite and 50% peat moss or coconut coir. You can also buy specific seed starting or propagation mixes.
- Small pots or trays: Clean ones are key to preventing disease. Small 4-inch pots work perfectly.
- Plastic bags or a propagation dome: To create a humid environment.
- A watering can with a fine rose: For gentle watering.
- Labels and a marker: Don’t skip this! You’ll thank yourself later.
Propagation Methods
I’ve had the most success with stem cuttings, so let’s focus on that. It’s a very straightforward process.
- Take Your Cuttings: In your chosen season, select healthy, non-flowering shoots from your mature Alyxia. Using your clean shears or knife, take cuttings about 10-15 cm (4-6 inches) long. Make a clean cut just below a leaf node (where the leaves attach to the stem). Remove the leaves from the bottom half of the cutting.
- Prepare the Cutting: If you’re using rooting hormone, lightly dip the cut end of the stem into the powder. Tap off any excess.
- Pot Up: Fill your small pots with your prepared potting mix. Make a hole in the center of the mix with a pencil or your finger. Gently insert the cut end of your Alyxia cutting into the hole, ensuring the leaf nodes on the bottom half are buried. Firm the mix gently around the stem.
- Water Gently: Water the pot thoroughly until water runs out of the drainage holes. This settles the soil around the cutting.
- Create Humidity: Cover the pot loosely with a plastic bag, propping it up with skewers or stakes so the leaves don’t touch the plastic. Alternatively, use a propagation dome. This traps moisture and prevents the cutting from drying out.
The “Secret Sauce” (Pro Tips)
Here are a couple of things I’ve learned over the years that really make a difference:
- Bottom Heat is Your Friend: If you have access to a heat mat designed for seedlings, place your pots on it. This gentle warmth from below encourages root formation much faster and more reliably, especially if your ambient room temperature is a bit cooler.
- Observe the Leaves: While you want to keep things humid, it’s still important to allow for a bit of air circulation. If the leaves look perpetually waterlogged or seem to be turning yellow, your humidity might be too high. You can carefully open the bag or dome for a short period each day to let things breathe.
Aftercare & Troubleshooting
Once your cuttings are potted, place them in a bright spot with indirect sunlight. Avoid direct sun, which can scorch the tender cuttings. Keep the soil consistently moist but not soggy. Feel the top of the soil – it should be moist to the touch.
You’ll know your Alyxia cutting has rooted when you gently tug on it and feel resistance. You might also see new growth starting to emerge. This can take anywhere from 4 to 8 weeks, or even longer. Be patient!
The most common problem you’ll encounter is rot. This usually happens if the soil is too wet and there’s not enough drainage or air circulation. If you see a cutting turning black and mushy at the base, unfortunately, it’s usually a lost cause. Remove it promptly to prevent it from affecting other cuttings.
A Encouraging Closing
Growing plants from cuttings is such a rewarding journey. It’s an exercise in patience, observation, and a little bit of faith. Don’t be discouraged if not every cutting takes. Every gardener, myself included, has had experiments that didn’t quite pan out. What matters is that you tried, you learned, and you’re one step closer to a garden filled with your own lovingly propagated Alyxia buxifolia. Happy propagating!
Resource:
https://identify.plantnet.org/k-world-flora/species/Alyxia%20buxifolia%20R.Br./data