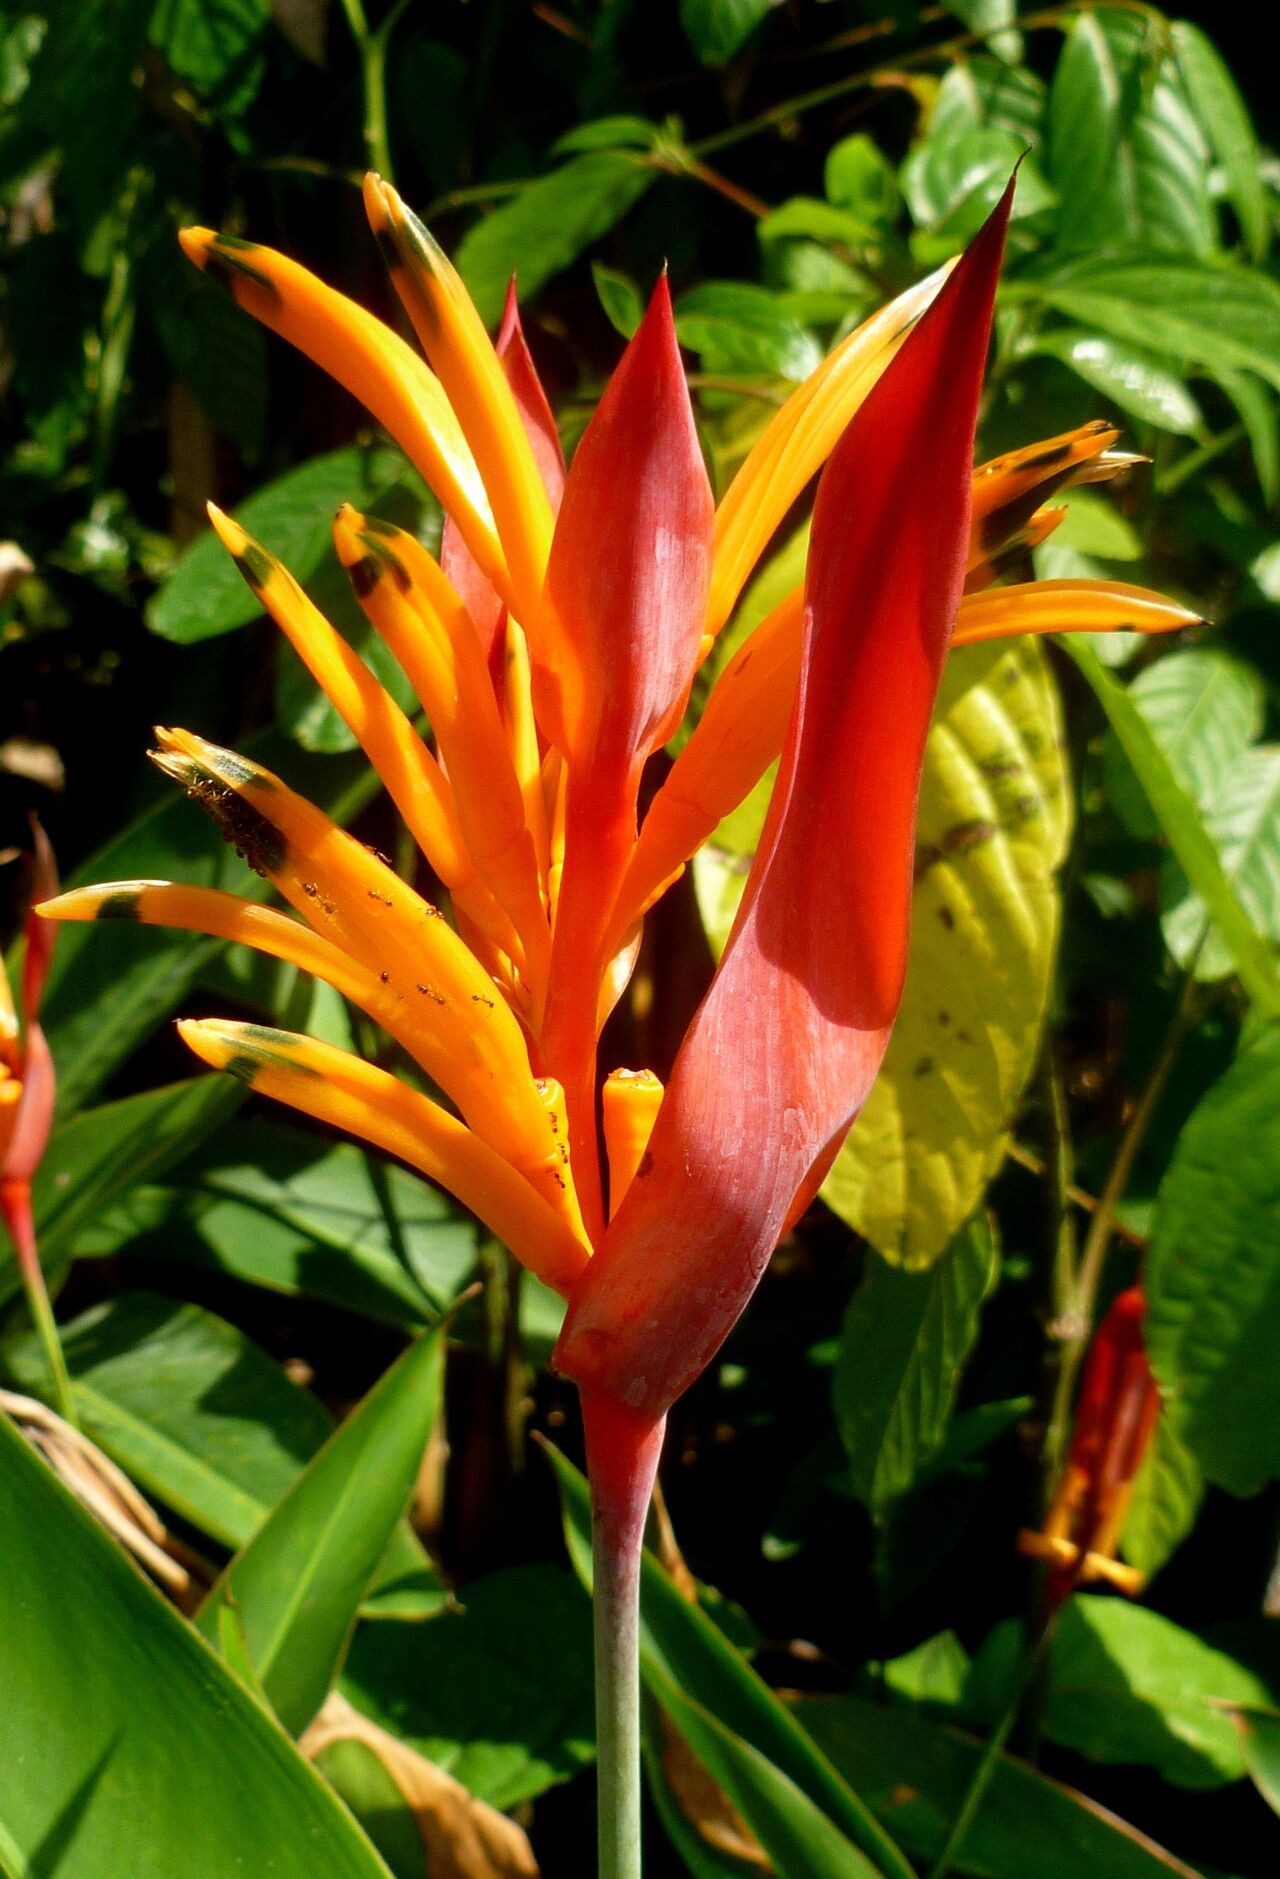
Hello, fellow plant lovers! Today, we’re diving into the vibrant world of Heliconia psittacorum, often called the parrot’s beak heliconia. If you’re dreaming of adding a splash of tropical color to your garden or even just enjoying a bit of exotic flair indoors, this is a fantastic plant to get to know. Those stunning, fiery blooms are a real showstopper, aren’t they?
The beauty of propagating Heliconia psittacorum is that you can multiply these beauties yourself. It’s incredibly rewarding to watch a tiny piece transform into a thriving new plant. Now, I won’t lie to you, while not overly difficult, it does require a little patience and the right approach. It’s not quite as straightforward as a spider plant, but with these tips, you’ll be well on your way.
The Best Time to Start
When it comes to heliconias, spring is generally your best bet. This is when the plant is vigorously growing and has plenty of energy to put into developing new roots. Aim to propagate when your established plant is actively producing new shoots and has a good amount of healthy foliage. Avoid propagating during a plant’s dormancy or when it’s stressed from extreme heat or cold.
Supplies You’ll Need
To get started with your heliconia propagation, gather these essentials:
- Clean, sharp pruning shears or a knife: Sanitize them with rubbing alcohol to prevent disease.
- Rhyzome pieces or stem cuttings: Depending on your chosen method.
- Well-draining potting mix: A good blend for tropical plants, often a mix of peat moss, perlite, and a bit of compost works wonders.
- Small pots or containers: For your new cuttings. Make sure they have drainage holes.
- Rooting hormone (optional but recommended): This can significantly speed up root development. Look for one formulated for stem cuttings.
- Water (for water propagation or before planting): Use filtered or distilled water if your tap water is heavily chlorinated.
- A spray bottle: For misting.
- A warm spot: Either a greenhouse, a sunny windowsill with a heat mat, or a simply a warm corner of your home.
Propagation Methods
Heliconia psittacorum is most commonly propagated through division, but you can also have success with stem cuttings. Let’s explore both.
1. Division (The Easiest Way)
This method involves separating the rhizomes (underground stems) of your mature plant.
- Step 1: Gently dig up your established heliconia plant. Try to disturb the roots as little as possible. If it’s in a pot, carefully tip it out.
- Step 2: Gently brush away excess soil to expose the rhizomes.
- Step 3: Look for healthy rhizome sections, each with at least one or two eyes (small buds) and preferably a visible shoot or leaf.
- Step 4: Using your clean knife or pruning shears, carefully cut the rhizome into sections. Ensure each piece has an eye and some root attached.
- Step 5: If you’re using rooting hormone, dip the cut end of the rhizome piece into it.
- Step 6: Plant each division in its own pot filled with your well-draining potting mix. Bury the rhizome just deep enough so the eye is near the surface.
- Step 7: Water gently and place the pot in a warm, bright location, out of direct harsh sunlight. Keep the soil consistently moist but not waterlogged.
2. Stem Cuttings (A Bit More Finesse)
This method works best when the plant is actively growing.
- Step 1: Select a healthy, actively growing stem from your heliconia.
- Step 2: Using your sanitized pruning shears, make a clean cut just below a leaf node (where a leaf attaches to the stem). You’re aiming for a cutting that’s about 6-8 inches long.
- Step 3: Remove the lower leaves, leaving just one or two at the top. This helps the cutting conserve energy.
- Step 4: Dip the cut end into rooting hormone, ensuring it’s well-coated.
- Step 5: Prepare your pot with moist, well-draining potting mix.
- Step 6: Insert the cutting into the mix, making sure the leaf nodes where you removed leaves are buried. Gently firm the soil around the stem.
- Step 7: Mist the leaves lightly with water from your spray bottle and place the pot in a warm, bright location. You can increase humidity by covering the pot loosely with a clear plastic bag, but ensure the leaves aren’t touching the plastic.
The “Secret Sauce” (Pro Tips)
Here are a few things I’ve learned over the years that can really boost your success:
- Bottom Heat is Your Friend: For stem cuttings especially, providing gentle bottom heat can be a game-changer. A seedling heat mat placed under the pots encourages those roots to form much faster. It mimics the warmth of the tropics!
- Don’t Overcrowd Your Cuttings: When dividing, give each rhizome piece enough space in its own pot. Cramming them together can invite disease and competition for resources.
- Patience with Rhizomes: Even if you don’t see immediate top growth on a divided rhizome, it could still be busy developing roots underground. Resist the urge to dig them up too soon to check!
Aftercare & Troubleshooting
Once your new heliconia shows signs of new growth – a tiny shoot emerging from the soil or a visible increase in leaf size – you’re on the right track!
- Continue consistent watering: Keep the soil moist but never soggy. Overwatering is the quickest way to invite root rot.
- Gradually introduce to more light: Move your new plants to a spot with brighter indirect light. Avoid direct sun until they are well-established.
- Watch for rot: The most common problem you’ll encounter is rot, which looks like a mushy, brown base on your cutting or rhizome. This is usually caused by too much moisture and poor drainage. If you see this, remove the affected part immediately and check your watering habits. Sometimes, a cutting can be saved if caught early.
- Yellowing leaves: This can indicate a nutrient deficiency or too much direct sun. Ensure you’re using a good potting mix and acclimatizing to light slowly.
A Encouraging Closing
I always say, gardening is a journey of learning, and propagation is one of its most rewarding chapters. Be patient with your little heliconia babies. They’ll take their time, but with a little care and the right conditions, you’ll soon have a collection of these vibrant beauties to enjoy. Happy propagating!
Resource:
https://identify.plantnet.org/k-world-flora/species/Heliconia%20psittacorum%20L.f./data