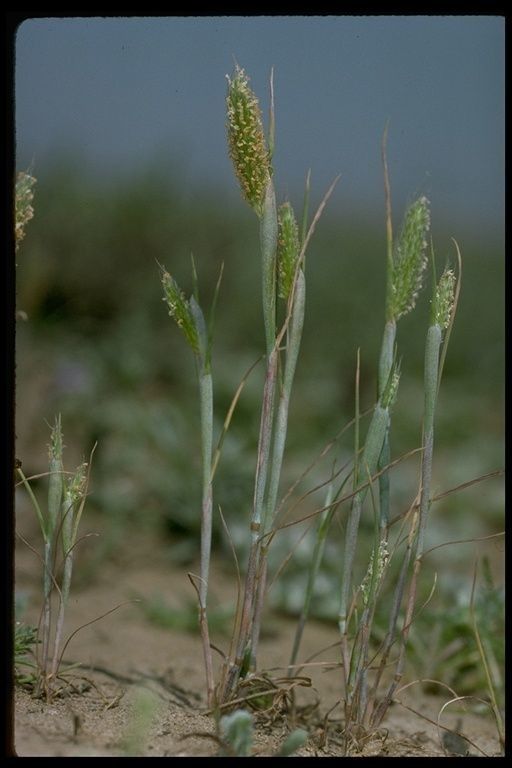
Oh, hello there! Pull up a chair, grab your cuppa, and let’s talk about one of my favorite little grasses: Alopecurus saccatus. You know, “foxtail grass”? It’s got this incredibly charming, fuzzy, almost whimsical look. I just adore those soft, upright plumes that dance in the breeze. Propagating it is such a joy, and honestly, it’s a pretty gentle introduction to plant propagation, even for those of you just starting out. You get this wonderful feeling of creating new life from an existing beauty.
The Best Time to Start
For Alopecurus saccatus, I find the sweet spot is usually late spring to early summer. This is when the plant is actively growing and has plenty of energy reserves. You’ll also find it easier to identify healthy new growth at this time, which is key for successful propagation. Another excellent time, if you missed the spring window, is early autumn before the first hard frost. The plant has had a good growing season and can often still put out decent roots before it goes dormant.
Supplies You’ll Need
Gathering your tools beforehand makes the whole process smooth sailing. Here’s what I typically have on hand:
- Sharp pruning shears or a clean knife: For making precise cuts. Avoid sawing motions!
- Rooting hormone (optional but helpful): Especially for stem cuttings. Look for a powder or gel.
- Well-draining potting mix: A mix designed for cacti and succulents works wonderfully, or you can blend potting soil with perlite and coarse sand (about 2 parts soil to 1 part perlite, 1 part sand).
- Small pots or seedling trays: With drainage holes, of course! Terracotta pots are great because they breathe.
- Watering can with a fine rose or a spray bottle: To water gently without disturbing new cuttings.
- A clear plastic bag or propagation dome: To create a humid environment for cuttings.
- Labels or plant markers: Because let’s be honest, we can forget what we planted where!
Propagation Methods
Alopecurus saccatus is quite obliging and can be propagated effectively through a couple of straightforward methods.
Division
This is hands-down the easiest and most rewarding method for Alopecurus saccatus. It’s like giving your plant a little haircut and getting free plants in the process!
- Gently unpot your mature Alopecurus saccatus. It’s best to do this when the soil is slightly moist, not bone dry or soaking wet.
- Examine the base of the plant. You’ll see clumps of stems originating from the root ball.
- Carefully tease the root ball apart with your fingers or a small trowel. You want to separate the plant into smaller sections, each with a healthy portion of roots and several shoots. If the roots are really tangled, you can use your clean knife to slice through them.
- Repot each division into its own container with fresh, well-draining soil mix.
- Water thoroughly but gently.
- Place the newly potted divisions in a spot with bright, indirect light and keep the soil consistently moist until they establish.
Stem Cuttings
If you want to try the cutting method, it’s also quite achievable.
- Select healthy, non-flowering stems from your Alopecurus saccatus. Look for stems that are about 3-4 inches long.
- Using your sharp shears, make a clean cut just below a leaf node (where a leaf attaches to the stem).
- Carefully remove the lower leaves from the cutting, leaving just a few at the top.
- Dip the cut end into rooting hormone, if you’re using it, tapping off any excess.
- Prepare your small pots with your well-draining potting mix.
- Make a small hole in the soil with a pencil or your finger and insert the cutting, ensuring the node is below the soil surface. Gently firm the soil around it.
- Water lightly to settle the soil.
- Cover the pot with a clear plastic bag or propagation dome to create a humid environment.
- Place the pot in a warm spot with bright, indirect light.
The “Secret Sauce”
Here are a couple of tricks I’ve learned over the years that really make a difference:
- When doing stem cuttings, don’t let the leaves touch the potting mix. If they sit in the moist soil, they’re more likely to rot before they have a chance to root. Just trim them back a bit so they’re clear.
- For divisions, I often find that placing the pots in a shallow tray of water for the first week or so helps them establish roots quickly. Let the pot soak up water from the bottom until the surface is moist. This provides consistent moisture without waterlogging those brand-new roots.
Aftercare & Troubleshooting
Once you see new growth appearing on your cuttings, or your divisions are looking perky and starting to grow more vigorously, you know you’ve succeeded!
- Gradually acclimate cuttings to normal room humidity by removing the plastic bag or dome for longer periods each day over a week.
- Continue to keep the soil consistently moist but not soggy. Overwatering is the quickest way to invite trouble.
- Watch out for rot. If you notice your cuttings going limp, mushy, or developing black spots, it’s likely due to too much moisture and poor air circulation. You might need to improve drainage or reduce watering.
- If your divisions aren’t taking off, ensure they have enough light and are getting consistent moisture. Sometimes, a bit of patience is all they need.
A Bit of Encouragement
Growing plants from cuttings and divisions is such a fulfilling part of gardening. It connects you to the rhythm of nature and the resilience of these beautiful plants. Don’t be discouraged if a few don’t make it; it’s all part of the learning process. Just keep at it, be patient, and enjoy the magic of watching new life unfold. Happy gardening!
Resource:
https://identify.plantnet.org/k-world-flora/species/Alopecurus%20saccatus%20Vasey/data