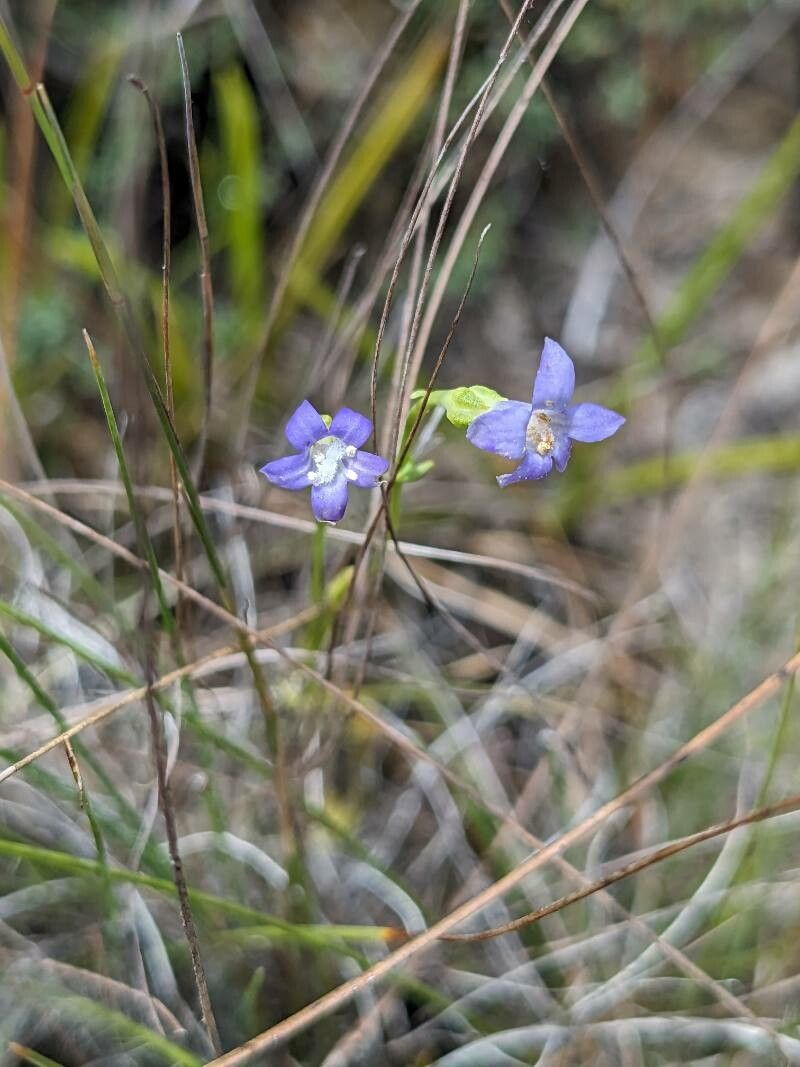
Hello, fellow plant lovers! Today, we’re diving into the wonderful world of propagating Tetrapollinia caerulescens. If you’ve ever been captivated by its striking blue-grey foliage and eye-catching flower stalks, you’re not alone! This beauty adds a unique touch to any garden. The best part? Successfully propagating it is incredibly rewarding.
Now, let’s be upfront: while not the absolute easiest plant for complete novices, Tetrapollinia caerulescens is certainly manageable with a little guidance. Don’t let that deter you! Think of it as a delightful challenge that will teach you so much.
The Best Time to Start
For the highest success rate, aim to propagate Tetrapollinia caerulescens during its active growing season. This typically means late spring to early summer. The warmer temperatures and increased daylight hours really encourage new growth and root development. Trying to take cuttings in the dead of winter will likely lead to disappointment, so let’s wait for nature to give us a hand.
Supplies You’ll Need
Here’s what you’ll want to have on hand before you begin:
- Sharp, clean pruning shears or a sharp knife: Crucial for making clean cuts.
- Small pots or seed trays: For housing your new propagations.
- Well-draining potting mix: A mix designed for succulents or cacti works wonderfully. You can also create your own by blending equal parts potting soil, perlite, and coarse sand.
- Rooting hormone (optional, but recommended): A powder or gel that encourages root formation.
- Watering can or spray bottle: For gentle watering.
- Plastic bag or propagation dome: To create a humid environment.
- Sterilizing solution (like rubbing alcohol): To clean your tools between cuts.
Propagation Methods: Let’s Get Cutting!
The most common and effective way to propagate Tetrapollinia caerulescens is through stem cuttings. It’s straightforward and yields great results.
- Select a healthy stem: Look for a mature, healthy stem that is at least 4-6 inches long. Avoid any that look weak, damaged, or are flowering heavily.
- Make the cut: Using your sterilized pruning shears or knife, make a clean cut just below a leaf node (where the leaves attach to the stem). This is where new roots are most likely to form.
- Remove lower leaves: Gently strip off the leaves from the bottom 2-3 inches of the cutting. You want to expose the stem where the roots will emerge.
- Let it callus: This is an important step for succulents! Allow the cut end of the stem to air dry for a day or two in a cool, dry place. You’ll see a dry, scab-like layer form, which helps prevent rot.
- Apply rooting hormone (optional): If you’re using rooting hormone, lightly dip the calloused end of the cutting into the powder or gel. Tap off any excess.
- Plant your cuttings: Fill your small pots or trays with your well-draining potting mix. Make a small hole in the center with your finger or a pencil.
- Insert the cutting: Place the calloused end of the cutting into the hole and gently firm the soil around it. Ensure that no leaves are touching the soil surface.
- Water lightly: Water the soil very gently. You want it to be moist, not soggy. A spray bottle works well here too.
- Create humidity: Cover the pot or tray with a plastic bag or propagation dome to maintain humidity. If using a bag, you can use stakes to keep it from touching the leaves.
- Place in bright, indirect light: Find a spot that receives plenty of bright light but no direct, harsh sun, which can scorch the delicate cuttings.
The “Secret Sauce” (Pro Tips)
Here are a couple of tricks I’ve learned over the years that really make a difference:
- Bottom heat is your friend: If you can, place your pots on a heat mat designed for seedlings. This gentle warmth from below encourages root development much faster than ambient room temperature alone. It’s like giving your cuttings a cozy little spa day!
- Don’t overwater – ever!: This is probably the most common mistake. Tetrapollinia caerulescens is a succulent relative, meaning it stores water. Overwatering cuttings is a surefire way to invite rot. Let the soil dry out slightly between waterings, and when you do water, water thoroughly but allow for good drainage.
Aftercare & Troubleshooting
Once your cuttings have been in their new home for a few weeks, you might start to see signs of new growth – tiny leaves emerging or a slight increase in the stem’s girth. The real confirmation, however, is when you gently tug on the cutting and feel resistance. This indicates that roots have formed!
Once you’ve established roots, you can gradually remove the humidity cover over a few days, allowing the plant to acclimate to normal room humidity. Continue to water sparingly, letting the soil dry out between waterings.
Now, for the less fun part: troubleshooting. The most common issue is rot. If you see your cutting turning mushy, black, or falling over, it’s likely due to too much moisture. Unfortunately, rot is often fatal. If you catch it early on a single cutting, you might be able to salvage a healthy part by taking a new, clean cutting. Make sure your soil is draining well and you’re not overwatering. Another sign of trouble is if the cutting just looks sad and fails to root – this could be due to poor light, lack of humidity, or simply the cutting not being viable. Don’t get discouraged; sometimes it just doesn’t work out.
A Encouraging Closing
Propagating Tetrapollinia caerulescens is a journey of patience and observation. You’re essentially coaxing life from a single stem, and it’s a process that requires a gentle touch and a keen eye. Don’t be afraid to experiment, and celebrate every little success. The joy of watching a tiny cutting transform into a beautiful, thriving plant is truly unparalleled. Happy propagating!
Resource: