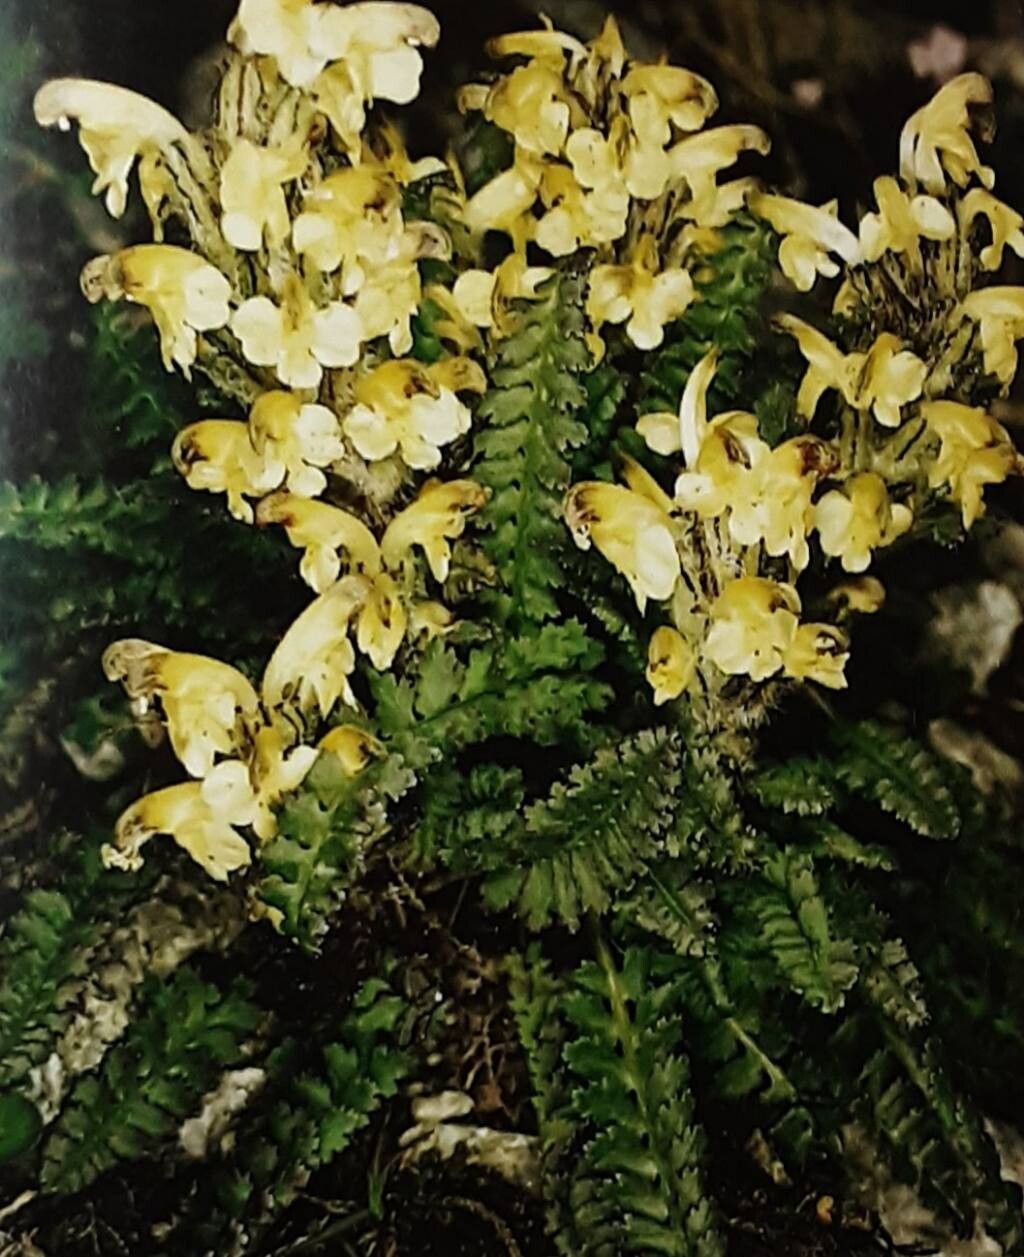
Hello fellow garden enthusiasts! Today, we’re diving into the wonderful world of Pedicularis oederi, also known as Oeder’s betony. If you’re drawn to its intricate, often vibrant, hooded flowers and unique foliage, you’re not alone. Growing this beauty from scratch is an incredibly satisfying endeavor, much like nurturing a shy woodland creature into your garden. It’s a plant that rewards a bit of patience and understanding.
As for beginners, I’d say Pedicularis oederi leans towards the moderately challenging side. It’s not one of those plants that will practically propagate itself from a snapped twig, but with the right approach, you can absolutely be successful. The reward of seeing those delicate blooms emerge from a plant you’ve grown yourself? Priceless.
The Best Time to Start
When it comes to coaxing new life from your Pedicularis oederi, late spring to early summer is your sweet spot. This is when the plant is in its active growing phase, brimming with energy. You’ll want to take cuttings from healthy, non-flowering stems. If you’re thinking about dividing an established plant, that same window, just as new growth is appearing, is also ideal.
Supplies You’ll Need
Before we get our hands dirty, let’s gather our tools. Think of this as prepping for a little gardening science experiment!
- Sharp Pruning Shears or a Craft Knife: Clean cuts are essential for preventing disease.
- Rooting Hormone (Optional but Recommended): A gentle dip can encourage faster root development. Look for one formulated for softwood or semi-hardwood cuttings.
- Potting Mix: A light, well-draining mix is crucial. I like to use a blend of peat moss or coco coir with perlite or vermiculite at a 1:1 ratio. Adding a bit of seedling starter mix can also be beneficial.
- Small Pots or Seed Trays: With drainage holes, of course!
- Plastic Bags or a Propagator: This helps maintain humidity, which is key for cuttings.
- Watering Can with a Fine Rose: To water gently without disturbing young roots.
- Marker Pen: To label your pots – trust me, you’ll thank yourself later!
- Bottom Heat (Optional but Highly Beneficial): A seedling heat mat can significantly speed up rooting.
Propagation Methods
Let’s talk about getting those new Pedicularis oederi plants started. I find stem cuttings to be the most reliable method.
Stem Cuttings
- Select Your Cuttings: During late spring or early summer, identify healthy, vigorous stems that are not bearing flowers. Look for stems that are flexible but not too soft – about 4-6 inches long is a good length.
- Take the Cuttings: Using your sterilized pruning shears or craft knife, make a clean cut just below a leaf node (where a leaf attaches to the stem). This is where the magic happens for root formation.
- Prepare the Cuttings: Gently remove the lower leaves from the bottom half of the cutting. You want about 2-3 leaves remaining at the top. If the remaining leaves are quite large, you can even cut them in half horizontally to reduce water loss through transpiration.
- Apply Rooting Hormone (Optional): Lightly dip the cut end of the stem into your rooting hormone. Tap off any excess.
- Pot Them Up: Fill your small pots or seed trays with your prepared, moistened potting mix. Make a small hole in the center of the mix with a pencil or your finger.
- Insert the Cuttings: Gently place the cutting into the hole, ensuring it’s snug. You want the leaf nodes that were buried to be in contact with the soil.
- Water Gently: Water the potting mix thoroughly but gently.
- Create a Humid Environment: This is vital! You can cover the pot with a clear plastic bag (supported by stakes so it doesn’t touch the leaves) or place the pots inside a propagator. Ensure good airflow to prevent mold.
Division of Established Plants
If you have a mature Pedicularis oederi that’s looking a bit crowded, division can be a great way to multiply your plants.
- Timing is Key: As mentioned, early spring when new shoots are just emerging is the best time.
- Careful Excavation: Gently dig around the base of the plant. Try to disturb the root ball as little as possible.
- Separate the Divisions: Once you’ve lifted the plant, you’ll see where the crown naturally divides. Use your hands or a clean spade to gently pull apart the root ball into sections. Ensure each section has a good portion of roots and at least one healthy shoot.
- Replant Immediately: Pot up each division into its own container with fresh, well-draining soil. Water them in well.
The “Secret Sauce” (Pro Tips)
Here are a couple of little tricks I’ve learned over the years that can really tip the scales in your favor:
- Keep those leaves dry! When watering, try your best to water the soil directly and avoid getting water on the leaves of your cuttings. This helps prevent fungal issues, which are the bane of propagation.
- Embrace the heat. If you have a seedling heat mat, place your pots on it. This gentle bottom heat encourages root development much faster than ambient room temperature alone. You’ll be amazed at the difference it makes!
Aftercare & Troubleshooting
Once your cuttings have successfully rooted – you’ll usually see new leaf growth emerge – it’s time to move them into slightly larger pots.
- Gradual Acclimation: If they’ve been under a plastic bag or in a propagator, gradually remove the cover over a few days to let them adjust to normal humidity.
- Watering: Continue to keep the soil consistently moist but not waterlogged. As they grow larger, you can start to let the top inch of soil dry out slightly between waterings.
- Light: Provide them with bright, indirect light. Avoid harsh, direct sun, which can scorch their delicate new leaves.
Now, what if things don’t go as planned? The most common adversary is rot. If your cuttings start to look mushy, black, or fall over, it’s usually a sign of too much moisture and not enough airflow. If you catch it early, you might be able to trim away the rotted parts and try again. Sometimes, cuttings simply fail to root. Don’t be discouraged! It happens to the best of us. Simply discard them and try again with fresh material.
A Little Bit of Patience Goes a Long Way
Propagating Pedicularis oederi is a journey, not a race. Celebrate each tiny victory – the first hint of a new leaf, the firmness of a rooted cutting. Be patient with yourself and the process. Soon enough, you’ll have a whole bevy of these enchanting plants to share and enjoy. Happy gardening!
Resource:
https://identify.plantnet.org/k-world-flora/species/Pedicularis%20oederi%20Vahl/data