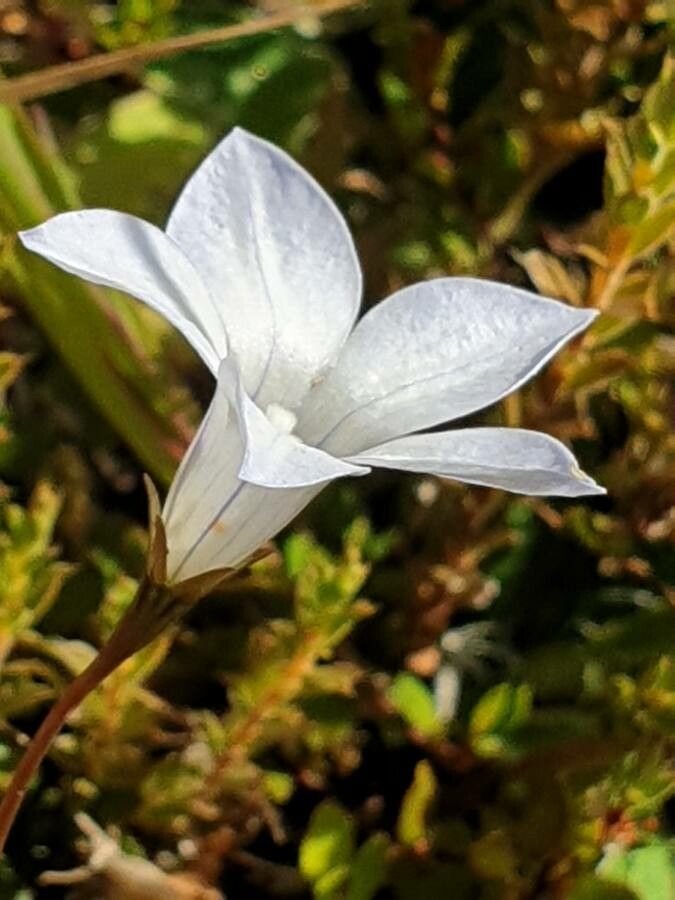
Oh, hello there! Pull up a chair and let’s chat about one of my very favorite garden treasures: Wahlenbergia procumbens. You know, those charming little native bellflowers, like dainty blue or white bells nodding in the breeze? They add such a sweet, understated beauty to any garden. And the best part? Getting more of them is absolutely doable, even for us home gardeners! It’s incredibly satisfying to nurture these little guys from a tiny snippet into a blooming plant. I’d say Wahlenbergia procumbens is a pretty forgiving plant to propagate, making it a lovely choice to get your feet wet, or to expand your collection if you’re already a seasoned pro.
The Best Time to Start
My best advice? Aim for late spring to early summer. This is when the plant is actively growing, full of vigor, and ready to put its energy into making new roots. You’re looking for stems that are semi-hardwood – not brand new, bright green and floppy, but also not old and woody. Think of it like a pencil; firm enough to hold its shape but not yet like an old tree branch.
Supplies You’ll Need
Gathering your tools beforehand makes the whole process so much smoother. Here’s what I always have on hand:
- Sharp pruning shears or a clean knife: For making clean cuts.
- A well-draining potting mix: I often use a blend of perlite, coarse sand, and peat moss – about a 1:1:1 ratio works wonderfully for drainage. You can also find specialized seedling or propagation mixes.
- Small pots or seed trays: Ideally with drainage holes.
- Rooting hormone (optional but helpful): A powder or gel can really speed things up.
- A watering can with a fine rose: To water gently without disturbing the cuttings.
- A clear plastic bag or propagation dome: To create a humid environment.
Propagation Methods: My Go-To Techniques
There are a couple of ways we can coax new life from your existing Wahlenbergia procumbens.
Stem Cuttings: The Most Reliable Way
This is my bread and butter, honestly.
- Take Your Cuttings: Head out to your healthiest plant and select a few non-flowering stems. Using your sharp shears, cut lengths of about 4-6 inches. Make your cut just below a leaf node (where a leaf attaches to the stem).
- Prepare the Cuttings: Gently remove the lower leaves from your cuttings, leaving just a few at the top. This prevents them from rotting in the soil. If you’re using rooting hormone, dip the bottom inch or so of each cutting into it, tapping off any excess.
- Pot Them Up: Fill your small pots with your prepared potting mix. Make a small hole in the center of the soil with a pencil or your finger. Carefully insert the cut end of each cutting into the hole, ensuring the leaf nodes are below the soil surface. Gently firm the soil around the stem.
- Water and Cover: Water the soil thoroughly but gently, until you see water draining from the bottom. Now, the crucial part: cover the pots with a clear plastic bag or propagation dome. This creates a mini-greenhouse, keeping the humidity high, which is essential for the cuttings to develop roots.
Division: For a Quicker Start
If your plant is already a decent size and starting to get a bit crowded, division is a fantastic option.
- Dig Up Gently: Carefully dig up your Wahlenbergia procumbens plant. Try to disturb the roots as little as possible.
- Separate the Roots: Gently tease apart the root ball into smaller sections. Look for areas where the crown (where the stems emerge from the roots) is naturally divided. You usually want each division to have a good amount of roots and at least a few leafy shoots.
- Replant Immediately: Pot up your divisions into fresh, well-draining soil. Water them in well.
The “Secret Sauce”: Insider Tips
Here are a few things I’ve learned over the years that really make a difference:
- Don’t Drown Them: While humidity is key, don’t let the leaves of your cuttings sit directly in water if you’re doing water propagation (which is less common for this plant but some try it). For stem cuttings in soil, waterlogging is the enemy. Ensure excellent drainage.
- Bottom Heat is Your Friend: If you have the space and inclination, placing your pots on a gentle heat mat can significantly speed up root development. Many cuttings just find that little bit of warmth irresistible!
- Patience with Foliage: Don’t be alarmed if a cutting looks a little sad initially. As long as the leaves haven’t completely shriveled and the stem is still firm, there’s hope. New growth is the best indicator that roots are forming.
Aftercare & Troubleshooting
Once you see signs of new growth – tiny leaves or a bit of upward energy – that’s a good sign roots are developing! You can gradually remove the plastic cover over a few days to acclimate them to normal humidity. Continue to water them consistently, letting the soil dry out slightly between waterings.
The biggest issue you’ll likely encounter is rot. This usually happens if the soil is too wet, drainage is poor, or the environment is too stagnant. If a cutting turns mushy or black, sadly, it’s time to discard it and try again. Don’t get discouraged if not every cutting takes; it’s part of the learning process!
A Gentle Encouragement
And there you have it! Propagating Wahlenbergia procumbens is a truly rewarding experience. It takes a little observation and a bit of patience, but honestly, the joy of seeing those little bells start to bloom in your own garden is second to none. Just enjoy the process, learn from each attempt, and soon you’ll have tiny blue treasures everywhere! Happy gardening!
Resource:
https://identify.plantnet.org/k-world-flora/species/Wahlenbergia%20procumbens%20(L.f.)%20A.DC./data