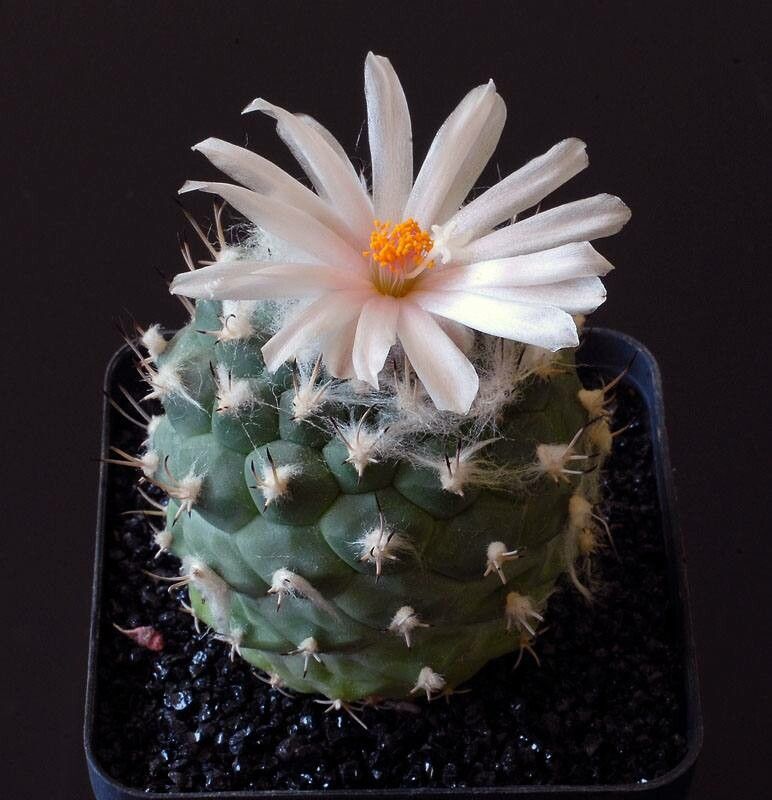
Hello fellow plant enthusiasts! Today, we’re diving into the fascinating world of propagating Turbinicarpus lophophoroides. If you’ve ever admired these delightful little cacti with their fuzzy texture and unique look, you’re not alone. Growing them from seed or offsets is a wonderfully rewarding experience, offering a tangible connection to the plant’s life cycle. Now, I’ll be honest, Turbinicarpus can be a tad bit finicky, so while it might not be my very first cactus recommendation for a brand-new gardener, with a little patience and the right approach, you’ll be enjoying new plants in no time.
The Best Time to Start
For propagating Turbinicarpus lophophoroides, especially from offsets or by division, spring and early summer are your golden windows. This is when the plant is entering its most active growth phase. The warmer temperatures and longer daylight hours give any new cuttings or divisions the best chance to establish themselves and develop roots before the cooler weather arrives.
Supplies You’ll Need
Gathering your supplies beforehand makes the whole process smoother. Here’s what you’ll want to have on hand:
- A well-draining cactus and succulent potting mix: I often make my own by mixing equal parts perlite, pumice, and a good quality potting soil. The key is excellent aeration.
- Clean, sharp pruning shears or a sterile knife: For making clean cuts to minimize damage and disease.
- Rooting hormone (optional but recommended): A good quality rooting hormone powder or gel can significantly boost success rates, especially for cuttings.
- Small pots or trays: Choose something suitable for the size of your cuttings or divisions. Ensure they have drainage holes!
- A spray bottle: For gentle misting.
- Gravel or perlite top dressing: This helps keep the base of the plant dry and prevents rot.
- A small hand trowel or dibber: For gently firming soil.
Propagation Methods
While Turbinicarpus lophophoroides can be grown from seed, propagating through offsets (pups) is generally more accessible for home growers and yields faster results.
Propagating from Offsets (Division):
- Assess your plant: Look for any little babies, or offsets, that have emerged from the base of the parent plant. They’ll typically be smaller versions of the main cactus.
- Wait for the right size: Ideally, wait until the offset is at least a quarter of the size of the parent plant, or has started to develop its own small root system.
- Gently remove: Using a clean, sharp knife or your fingers if they detach easily, carefully cut or twist the offset away from the mother plant. Try to take a tiny bit of the root if possible.
- Allow to callus: This is crucial! Place the removed offset in a dry, airy spot out of direct sunlight for 3-7 days. This allows the cut surface to dry and form a callus, which prevents rot when it’s planted.
- Potting up: Once callused, place the offset into a small pot filled with your well-draining cactus mix. You can gently stick the callused end into the soil.
- Top dressing: I like to add a layer of perlite or gravel around the base of the offset once it’s in the pot. This keeps the areoles (where spines grow) dry.
- No immediate watering: Resist the urge to water right away. Wait about 1-2 weeks after potting before giving it its first light watering.
The “Secret Sauce” (Pro Tips)
Over the years, I’ve learned a few tricks that can really make a difference:
- Bottom Heat is Your Friend: For offsets, especially those that might be a bit reluctant to root, placing the pot on a seedling heat mat can work wonders. Just a gentle warmth encourages root development without drying out the plant.
- Think “Dry” First: When in doubt, err on the side of being too dry rather than too wet, especially in the initial rooting stages. Rot is the enemy of succulent propagation, and Turbinicarpus are particularly sensitive.
- Don’t Crowd Your Potting: Even if you’re planting multiple offsets, give them a bit of space in their pot. Good airflow is essential for preventing fungal issues.
Aftercare & Troubleshooting
Once your offset is potted and has had its initial watering (after that 1-2 week waiting period), continue to water sparingly. Allow the soil to dry out completely between waterings. You’re aiming for conditions that mimic its natural arid habitat.
You’ll know your offset is establishing roots when you see new growth – perhaps a tiny bit of expansion of the main body or the emergence of new spines. This can take anywhere from a few weeks to a few months, so patience is key!
The most common sign of trouble is rot. If you see the offset turning mushy, black, or translucent, it’s likely rotting. This is usually due to overwatering or insufficient callusing before planting. If you catch it early, you might be able to cut away the rotted parts and re-callus the healthy section, but often, it’s sadly a loss. Another sign of no roots is if the plant remains shriveled and firm without any signs of new growth after a prolonged period.
A Encouraging Closing
Propagating Turbinicarpus lophophoroides is a journey of observation and learning. Don’t be discouraged if your first attempt isn’t a runaway success. Each plant, and each propagation attempt, teaches you something new. The joy of watching a tiny offset grow into a mature plant is truly unparalleled. So, grab your tools, be patient, and enjoy the green-thumb magic! Happy growing!
Resource: