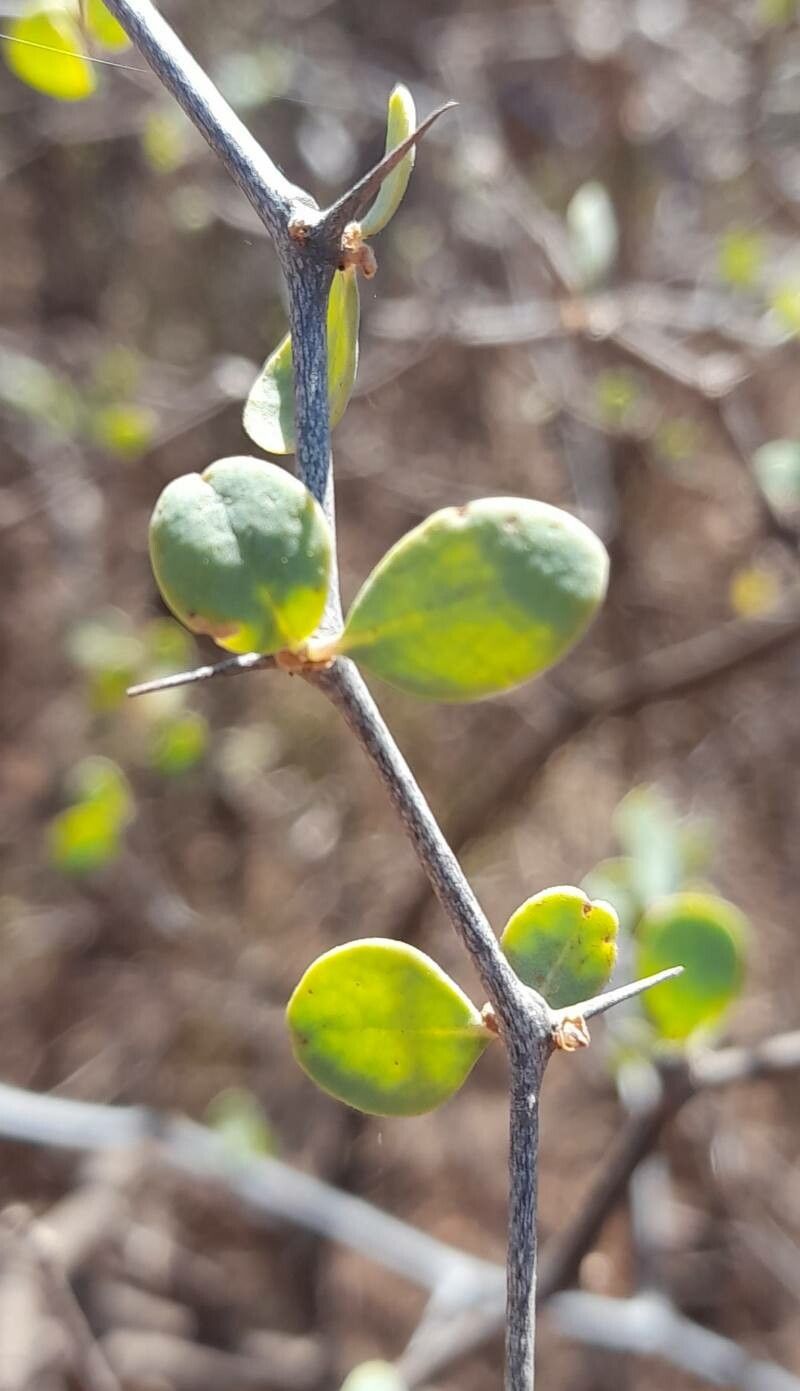
Hello, fellow garden enthusiasts! Today, let’s talk about a plant that’s really captured my attention lately: Lycium boerhaviifolium. You might know it better by its common names, like Boxthorn or Lycium. This tough, adaptable shrub offers beautiful clusters of berries and delicate flowers, making it a real asset to any garden. The best part? It’s quite rewarding to multiply it yourself! For beginners, I’d say propagating Lycium boerhaviifolium falls into the moderately easy category. With a little care and the right timing, you’ll be well on your way to more beautiful plants.
The Best Time to Start
When it comes to getting the best results, I find that late spring to early summer is our prime window. This is when the plant is actively growing, and the stems have become somewhat woody but are still flexible. Waiting until after the plant has finished its main flush of growth, but before it starts to wind down for the season, gives us the best chance of success. Think of it as catching the plant at its most vigorous, ready to put that energy into creating new roots.
Supplies You’ll Need
To get started on your propagation journey, gather these items:
- Sharp Pruning Shears or a Clean Knife: For making clean cuts.
- Rooting Hormone (Optional, but Recommended): A powder or gel to encourage root development.
- Potting Mix: A light, well-draining mix. I like a blend of peat, perlite, and a bit of compost.
- Small Pots or Trays: Clean containers for your cuttings.
- Plastic Bags or Clear Domes: To create a humid environment.
- Watering Can or Spray Bottle: For gentle watering.
- Labels: To keep track of your projects!
Propagation Methods
Two methods really stand out for Lycium boerhaviifolium, and I usually find myself leaning towards stem cuttings.
Stem Cuttings
This is my go-to method for Lycium.
- Select Healthy Stems: Look for current season’s growth that is semi-hardwood. The stems should be flexible but not bright green and soft.
- Take Cuttings: Using your sharp shears, cut lengths of stem about 4-6 inches long. Make your cut just below a leaf node (where a leaf attaches to the stem).
- Prepare the Cuttings: Gently remove the leaves from the bottom two-thirds of each cutting. If any leaves are very large, you can even snip them in half to reduce water loss through transpiration.
- Apply Rooting Hormone (Optional): Dip the cut end of each stem into your rooting hormone, tapping off any excess. This step really can give your cuttings a helpful boost.
- Plant the Cuttings: Fill your small pots with the well-draining potting mix. Make a hole with your finger or a pencil and insert the cuttings, ensuring the leaf nodes are buried. Gently firm the soil around them.
- Water Gently: Water the soil thoroughly but gently.
- Create Humidity: Cover the pots with plastic bags or place them under clear domes. This will create a mini-greenhouse effect. Make sure the plastic doesn’t touch the leaves as much as possible.
Water Propagation (Less Common, but Can Work)
This method requires a bit more attention to detail.
- Take Cuttings: Follow steps 1-3 from the stem cutting method.
- Place in Water: Put the prepared cuttings into a clear jar or vase filled with fresh water.
- Positioning is Key: Make sure that no leaves are submerged in the water. Leaves in the water will rot, and that’s the last thing we want!
- Change Water Regularly: Refresh the water every few days to keep it clean and oxygenated.
- Wait for Roots: You should start to see small white roots emerging from the nodes in a few weeks. Once the roots are an inch or so long, you can carefully transplant them into pots with soil.
The “Secret Sauce” (Pro Tips)
Here are a couple of things I’ve learned over the years that really make a difference:
- Bottom Heat: If you can, set your pots on a heated propagation mat. This gentle warmth from below encourages root formation much faster and more efficiently than just ambient room temperature. It’s a game-changer for many plants, including Lycium.
- Don’t Rush the Transplant: Resist the urge to check for roots too soon. Give your cuttings a good 3-4 weeks before you even think about gently tugging on them, or better yet, wait until you see new leaf growth, which is a great indicator that roots have formed.
Aftercare & Troubleshooting
Once your cuttings have developed a decent root system – you’ll feel some resistance when you gently tug, or see them peeking through the drainage holes – it’s time for them to graduate.
- Acclimate Slowly: Gradually remove the plastic cover over a few days to let them adjust to the drier air.
- Pot Up: Carefully transplant them into slightly larger pots with fresh, well-draining potting mix. Continue to keep them consistently moist but not waterlogged.
- Troubleshooting: The biggest enemy here is rot, often caused by overwatering or poor drainage. If you see your cuttings turning black and mushy, it’s usually a sign of too much moisture. If they simply shrivel up and dry out, it’s likely a lack of humidity or insufficient watering. Don’t be disheartened if you lose a few; it’s part of the learning process!
A Gentle Encouragement
Propagating plants is such a wonderful way to connect with nature and gain more of the things you love in your garden. Be patient with your Lycium cuttings. Some will take off quickly, while others might take their sweet time. Enjoy the process, celebrate every tiny root you see, and before you know it, you’ll have a whole new collection of these lovely Boxthorn shrubs to admire. Happy propagating!
Resource:
https://identify.plantnet.org/k-world-flora/species/Lycium%20boerhaviifolium%20L.f./data