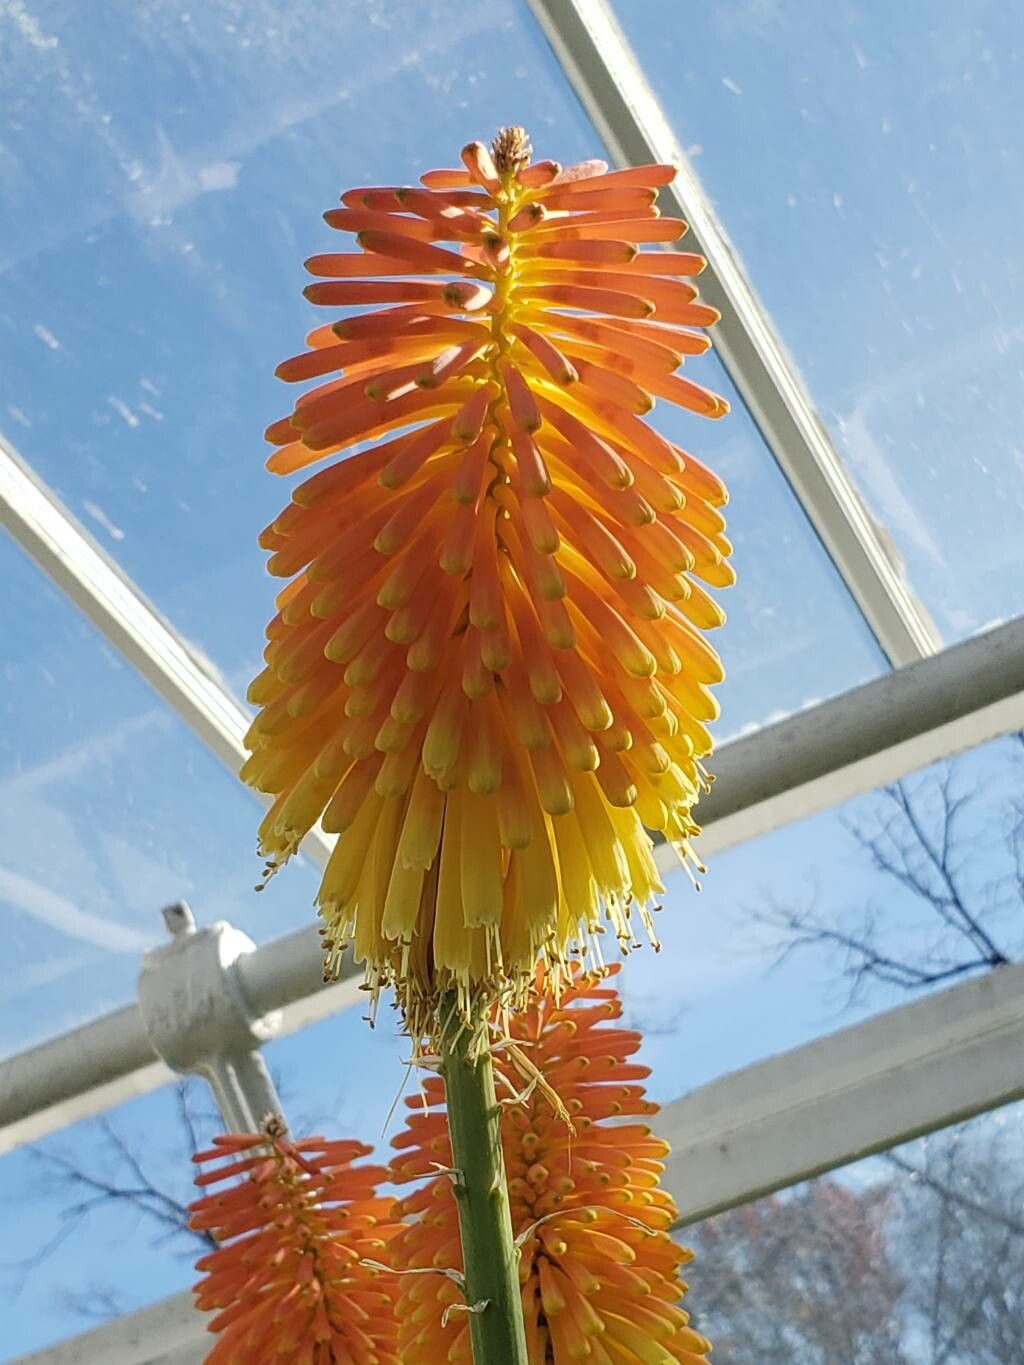
Oh, hello there! I’m so glad you’re thinking about growing more of these fiery beauties. Kniphofia rooperi, the Red Hot Poker or Torch Lily, is just an absolute showstopper in the garden, isn’t it? With those dramatic spikes of orange and red, reminiscent of a flickering flame, it brings such a wonderful architectural element and a burst of vibrant color. Capturing a piece of that magic for yourself is incredibly rewarding, and I can tell you, for a plant that looks so exotic, it’s surprisingly accessible to propagate. Don’t let its dramatic appearance fool you; even if you’re new to the gardening game, you can absolutely succeed with this one!
The Best Time to Start
For Kniphofia rooperi, the absolute sweet spot for propagation is early spring. Think of it as the plant waking up from its winter slumber. As the days get longer and the soil starts to warm up, new growth is spurred, and this is precisely when the plant is full of energy and ready to send out strong new shoots. Trying to do this too late in the summer or during the heat of autumn can be a bit of a gamble, as the plant might not have enough time to establish before the cooler weather sets in.
Supplies You’ll Need
Gathering your supplies beforehand makes the whole process smoother, like setting out your ingredients before you bake. Here’s what I usually have on hand:
- Sharp Pruning Shears or a Clean Knife: For making precise cuts.
- Potting Mix: A well-draining mix is crucial. I often use a blend of peat moss, perlite, and compost in roughly equal parts, or a good quality seed starting mix will do nicely.
- Small Pots or Trays: Clean pots with drainage holes are essential.
- Rooting Hormone (Optional but Recommended): A powdered hormone can give your cuttings a little boost.
- Watering Can with a Fine Rose: For gentle watering.
- Labels and a Pen: So you don’t forget what you’ve planted!
- Gravel or Small Stones (for water propagation): To help support the cuttings.
Propagation Methods
The most straightforward way to multiply your Kniphofia rooperi is through division in early spring. It’s like giving the plant a healthy haircut and getting new plants from the pieces!
Propagation by Division:
- Dig it Up Gently: As soon as the ground is workable in early spring, carefully dig around the base of your established Kniphofia rooperi clump. Try not to disturb the roots too much. You can gently lift the entire plant out of the ground.
- Clean Off the Soil: Gently shake or brush away as much soil as you can from the root ball. This allows you to clearly see the divisions.
- Identify the Divisions: You’ll see where the plant has naturally grown outwards, forming multiple crowns or shoots attached by fleshy rhizomes (underground stems).
- Separate the Divisions: Using your sharp pruning shears or a clean, sturdy knife, carefully cut through the rhizomes to separate the individual shoots. Make sure each division has at least one or two healthy growing points (the buds from which new leaves will emerge) and some good roots attached.
- Inspect and Trim: Remove any dead or damaged leaves or roots. If the rhizomes are very long, you can trim them back a bit.
- Replant or Pot Up: You can immediately replant the divisions back into their desired spot in the garden, making sure they are planted at the same depth they were previously growing. Alternatively, pot them up into containers filled with your well-draining potting mix. Water them in thoroughly.
For those who love a bit of a experiment, stem cuttings taken from new shoots can also work, though division is generally more reliable for this particular plant.
Propagation by Stem Cuttings (New Shoots):
- Take the Cutting: In early spring, look for new, non-flowering shoots emerging from the base of the plant. Use your clean shears to cut a healthy shoot that is about 4-6 inches long. Make the cut just below a leaf node (where a leaf joins the stem).
- Prepare the Cutting: Gently remove the lower leaves, leaving just a couple of leaves at the top. If you’re using rooting hormone, dip the cut end into it.
- Plant the Cutting: Fill a small pot with your prepared, well-draining potting mix. Make a small hole with your finger or a pencil. Insert the cutting so that the leaf nodes that were in the soil are covered.
- Water and Cover: Water gently to settle the soil around the cutting. You can then place the pot inside a plastic bag or cover it with a clear dome to create a mini-greenhouse, which helps maintain humidity.
The “Secret Sauce” (Pro Tips)
Over the years, I’ve picked up a few tricks that seem to make all the difference.
- When dividing, don’t be afraid to get your hands dirty and really inspect those rhizomes. Sometimes, the best divisions are hidden a bit, and you might miss a potential new plant if you’re too tentative.
- If you’re trying stem cuttings, avoid taking cuttings from flowering stalks. You want the plant’s energy focused on growing roots, not setting seed. Stick to those plump, green basal shoots.
- For division, if you live in a region with very hot summers, giving newly divided plants a light mulch of straw or shredded bark can help them retain moisture and stay cooler.
Aftercare & Troubleshooting
Once your new divisions or cuttings are happily planted, gentle care is key. Keep the soil consistently moist, but not waterlogged. Overwatering is the quickest way to invite trouble.
You’ll know your division is establishing when you start to see new leaf growth appearing from the crown. For cuttings, this might take a bit longer – look for tiny new leaves or resistance when you gently tug on the cutting.
The most common problem you might encounter is rot, which usually stems from too much moisture and poor drainage. If you see your cutting or division looking limp, mushy, or developing black spots, it’s a sign that conditions are too wet. In this case, you might need to pull it out, trim away the rotted parts with a clean knife, and repot it in completely dry, fresh potting mix. Sometimes, unfortunately, a cutting that has rotted is a goner, but don’t let that discourage you. Just try again!
A Little Encouragement
Growing new Kniphofia rooperi from your existing plants is such a satisfying endeavor. It’s a chance to connect with your garden on a deeper level and share its beauty with friends. Be patient with the process; gardening is always a journey. Enjoy the gentle rhythm of tending to your new green babies, and soon you’ll have more of those glorious fiery torches gracing your garden than you know what to do with! Happy planting!
Resource:
https://identify.plantnet.org/k-world-flora/species/Kniphofia%20rooperi%20(T.Moore)%20Lem./data