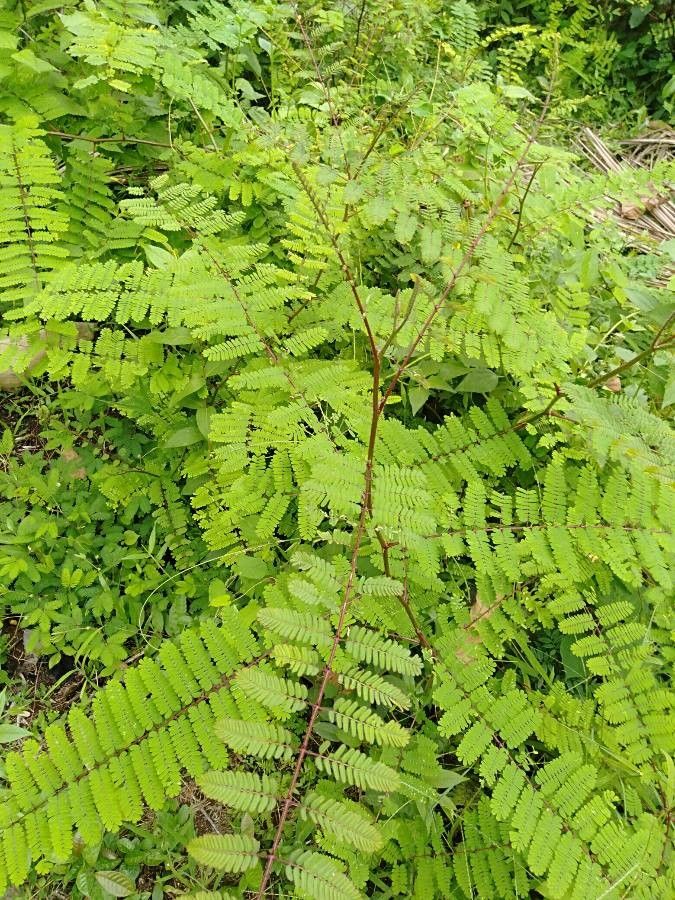
Hey there, fellow plant lovers! It’s so good to have you here in my little corner of the internet. Today, we’re diving into the wonderful world of Hultholia mimosoides. If you’ve ever admired its delicate, fern-like foliage and the way it dances in the breeze, you’re not alone! This charmer brings a touch of the tropics to our gardens and homes, and for me, there’s just something incredibly satisfying about creating new life from an existing plant. It’s a bit like sharing a secret with nature.
Now, I know you might be wondering if Hultholia mimosoides is a tricky plant to propagate. Honestly, I find it to be quite amenable, even for those of you who are just starting out on your propagation journey. With a little patience and the right approach, you’ll be well on your way to success.
The Best Time to Start
My go-to time for propagating Hultholia mimosoides is during its active growing season. This usually means late spring through early to mid-summer. The plant is brimming with energy at this point, making it more likely for cuttings to root. You’ll find that new growth looks lush and vibrant – that’s your cue! Trying to propagate when the plant is dormant or struggling will just be a recipe for disappointment.
Supplies You’ll Need
Gathering your tools beforehand makes the whole process so much smoother. Here’s what I like to have on hand:
- Sharp Pruning Shears or a Clean Knife: For making clean cuts.
- Rooting Hormone (Optional, but Recommended): This can give your cuttings a real boost. Look for one specifically for stem cuttings.
- Potting Mix: A light, well-draining mix is key. I often use a blend of equal parts seed starting mix and perlite or coarse sand.
- Small Pots or Seedling Trays: Clean containers are crucial to prevent disease.
- Clear Plastic Bag or Dome: To create a humid environment for your cuttings.
- Spray Bottle: For misting.
- Labels and a Pen: So you don’t forget what’s what!
Propagation Methods
Hultholia mimosoides is pretty easy to propagate from stem cuttings. This is my favorite method because it’s straightforward and yields great results.
- Select Your Cuttings: Look for healthy, non-flowering stems. You want pieces that are about 4-6 inches long. Make sure each cutting has at least two sets of leaves.
- Make the Cut: Using your sharp shears or knife, make a clean cut just below a leaf node. A leaf node is where a leaf attaches to the stem – this is where roots tend to emerge.
- Prepare the Cutting: Gently remove the lower leaves from the cutting, leaving just the top set or two. This prevents them from rotting when they are buried in the soil.
- Apply Rooting Hormone (If Using): Dip the cut end of the stem into your rooting hormone, tapping off any excess. This step isn’t strictly necessary, but it can speed up rooting and increase success rates.
- Plant Your Cuttings: Fill your small pots or trays with your prepared potting mix. Make a small hole in the center of the mix with your finger or a pencil.
- Insert the Cutting: Gently place the prepared cutting into the hole, making sure the leaf nodes are covered by the soil. Firm the soil gently around the base of the cutting.
- Water Gently: Water the soil thoroughly but gently. You don’t want to dislodge your cuttings.
The “Secret Sauce” (Pro Tips)
Here are a few things I’ve learned over the years that can really make a difference:
- Humidity is Your Friend: Hultholia mimosoides loves moisture. Once you’ve planted your cuttings, cover the pot loosely with a clear plastic bag or place it under a clear dome. This traps humidity, which is vital for root development. Make sure the leaves don’t touch the plastic, as this can encourage rot. I often use a few stakes to prop up the bag.
- Bottom Heat (When Available): If you have a heat mat designed for seedlings, placing your pots on it can be a game-changer. Warm soil encourages quicker root formation. Just ensure the mat isn’t too hot – you want gentle warmth, not a bake!
- Avoid Direct Sun: Place your cuttings in a bright, indirect light location. Direct sunlight can scorch the delicate leaves and dry out the cuttings too quickly. A bright windowsill away from harsh afternoon sun is usually perfect.
Aftercare & Troubleshooting
Once your cuttings are planted and covered, be patient! Check the moisture level of the soil every few days. You want it to be consistently moist but not waterlogged. Lightly mist the leaves if they look a bit dry, especially if you’ve removed the plastic cover for a peek.
You’ll know your cuttings are rooting when you see new leaf growth. This can take anywhere from a few weeks to a couple of months, so don’t get discouraged if it takes time.
The main thing to watch out for is rot. If a cutting turns mushy, yellow, or black and seems to be wilting away, it’s likely rotted. This is often caused by too much moisture, poor drainage, or lack of air circulation. If you see this happening, remove the affected cutting immediately to prevent it from spreading to others.
A Encouraging Closing
Propagating Hultholia mimosoides is a wonderfully rewarding experience. It’s a chance to deepen your connection with your plants and fill your home with more of their beautiful greenery. Remember to be patient, observe your cuttings, and don’t be afraid to experiment a little. Every gardener learns through trial and error, and that’s part of the joy. Happy propagating, and may your new Hultholia mimosoides thrive!
Resource: