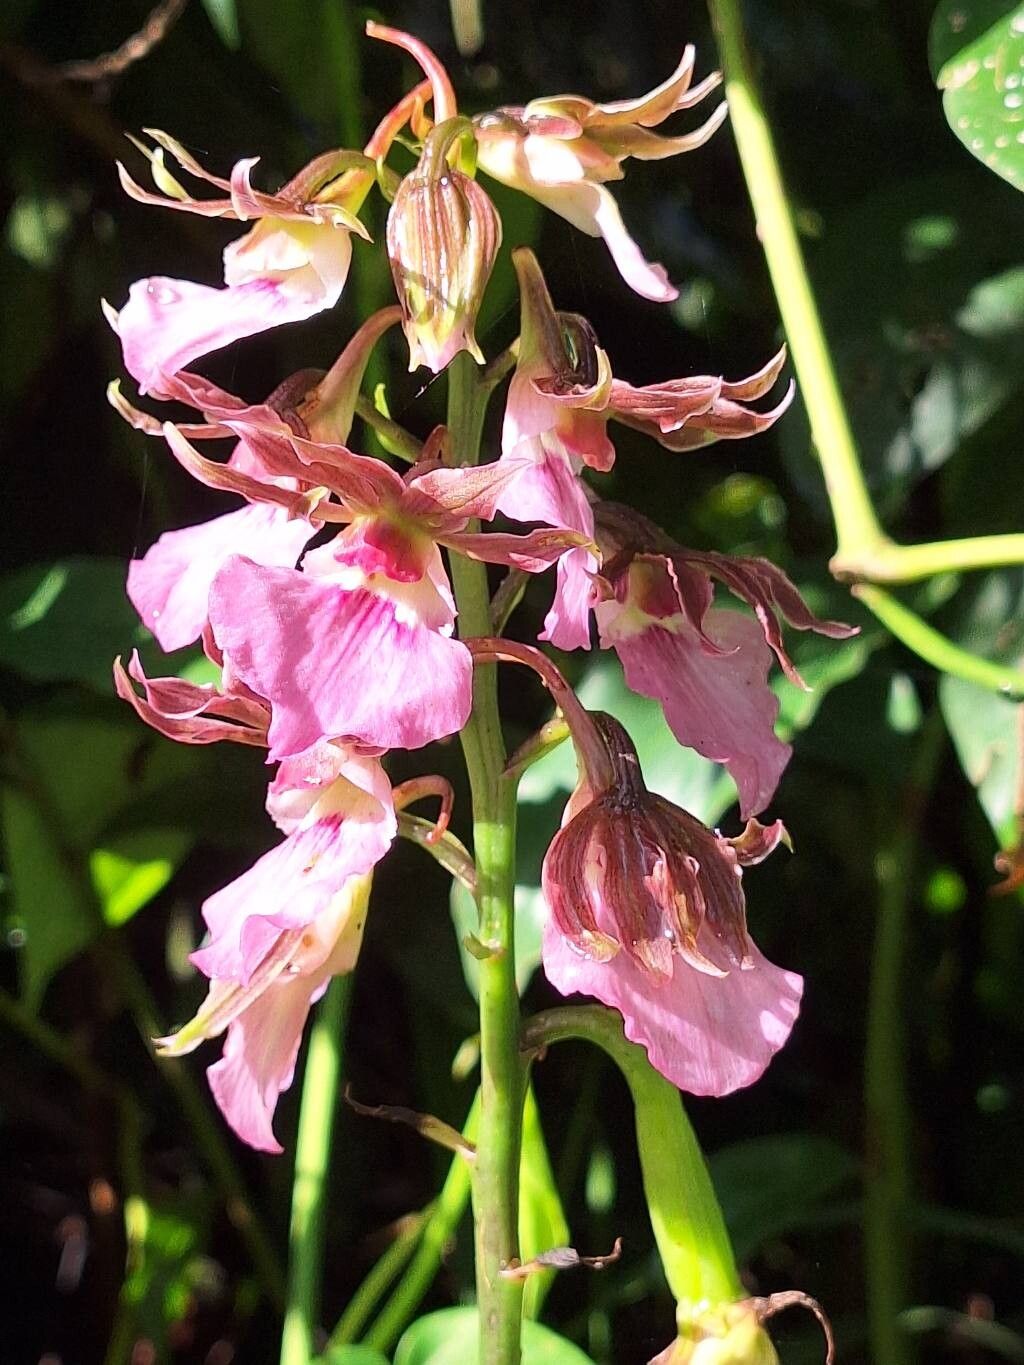
Hello there, fellow plant lovers! I’m so excited to chat with you today about a rather fascinating orchid: Eulophia guineensis. If you’re looking for a touch of the exotic to brighten your space, this is a wonderful choice. Its elegant blooms carry a certain allure, and the joy of coaxing a new life from an existing plant is truly something special. Now, for the big question: is it easy for beginners? I’d say it’s approachable, but like many orchids, it prefers a bit of specific care. But don’t let that deter you – with a little know-how, you’ll be sharing these beauties in no time.
The Best Time to Start
For Eulophia guineensis, the late spring to early summer is your golden window. This is when the plant is typically in active growth after its resting period. You’ll often see new shoots or pseudobulbs forming, which are brimming with energy and ready to be encouraged into new adventures. Trying to propagate when the plant is dormant can make it a bit more sluggish and less likely to succeed.
Supplies You’ll Need
Gathering your tools beforehand makes the whole process much smoother. Here’s what I usually have on hand:
- Clean, sharp pruning shears or a sterile knife: Essential for making clean cuts.
- Well-draining potting mix: A good orchid bark mix, or a blend of coco coir, perlite, and bark, works wonderfully. I often add a touch of sphagnum moss for moisture retention.
- Rooting hormone (optional but recommended): A powder or gel can give those cuttings a helpful boost.
- Small pots or propagation trays: Something to house your new babies. Make sure they have drainage holes!
- Clear plastic bags or propagation dome: To create a humid environment.
- Watering can with a fine rose or mister: Gentle watering is key.
- Patience! This is the most important tool of all.
Propagation Methods
The most reliable way I’ve found to propagate Eulophia guineensis is through division. These orchids tend to form clumps, which makes them perfect candidates for this technique.
Here’s how to do it:
- Gently remove the plant from its pot. If it’s stuck, you might need to carefully loosen the edges of the pot or even gently tap it.
- Inspect the root system and pseudobulbs. You’re looking for distinct sections that have their own healthy roots attached.
- Using your clean shears or knife, carefully separate the divisions. Make sure each piece you take has at least two or three healthy pseudobulbs and a good amount of roots. It’s okay if some roots get a little disturbed; they’ll recover.
- Allow your divisions to air dry for a day or two. This helps any cut surfaces callous over, reducing the risk of rot. You can place them in a shaded, well-ventilated spot.
- Pot up your divisions. Plant each division in its own small pot filled with your chosen well-draining mix. Just tuck them in so the base of the pseudobulbs is nestled against the mix.
- Don’t water immediately. Wait a few days after potting before giving them their first gentle watering. This gives any minor root damage a chance to heal.
For those adventurous souls who might have a piece that naturally separated, or if you’re willing to risk a bit more: stem cuttings can sometimes work, though it’s less common for Eulophia guineensis than division. If you have a stem with a node and a healthy leaf, you can try cutting it, dipping the end in rooting hormone, and placing it in moist potting mix. Keep it humid and warm, and be patient!
The “Secret Sauce” (Pro Tips)
Here are a few little tricks I’ve picked up over the years that can really help your Eulophia guineensis propagate successfully:
- Don’t be afraid to get your hands dirty. Sometimes, gently teasing apart existing root systems is better than a harsh cut. I often find a few stubborn roots that can be worked apart with my fingers.
- Bottom heat is your friend. If you have a seedling heat mat, placing your newly potted divisions or cuttings on it can significantly speed up root development without drying out the plant too quickly. It mimics a lovely warm soil environment.
- The “tenting” method is crucial for humidity. Once potted, cover your divisions with a clear plastic bag or place them under a propagation dome. This creates that steamy microclimate they crave. Just make sure to open it daily for a few minutes to allow for air exchange – this prevents mold and mildew from taking hold.
Aftercare & Troubleshooting
Once your divisions have settled in and you see signs of new growth – a tiny new leaf or shoot emerging from a pseudobulb – it’s time for a little extra TLC.
Continue to keep them in a bright, indirect light location. Water only when the potting mix starts to feel dry. Overwatering is the quickest way to invite trouble.
The most common issue you’ll encounter is rot. If you notice a pseudobulb becoming soft, mushy, or blackening, it’s a sign of too much moisture. If it’s just one section, you can try carefully removing the rotted part with a sterile knife and repotting the healthy portion. If the whole plant is affected, it’s sadly time to say goodbye and learn from the experience. Another sign things aren’t going well is if the leaves start to yellow and droop without any visible new growth. This could indicate insufficient light or simply that the plant hasn’t established its roots yet.
A Word of Encouragement
Propagating plants is a journey, and Eulophia guineensis is a rewarding one to embark on. There will be moments of doubt, but trust in the process. Be patient, observe your plant carefully, and celebrate every tiny sign of success. Before you know it, you’ll have a whole new generation of these magnificent orchids to enjoy and share. Happy growing!
Resource:
https://identify.plantnet.org/k-world-flora/species/Eulophia%20guineensis%20Lindl./data