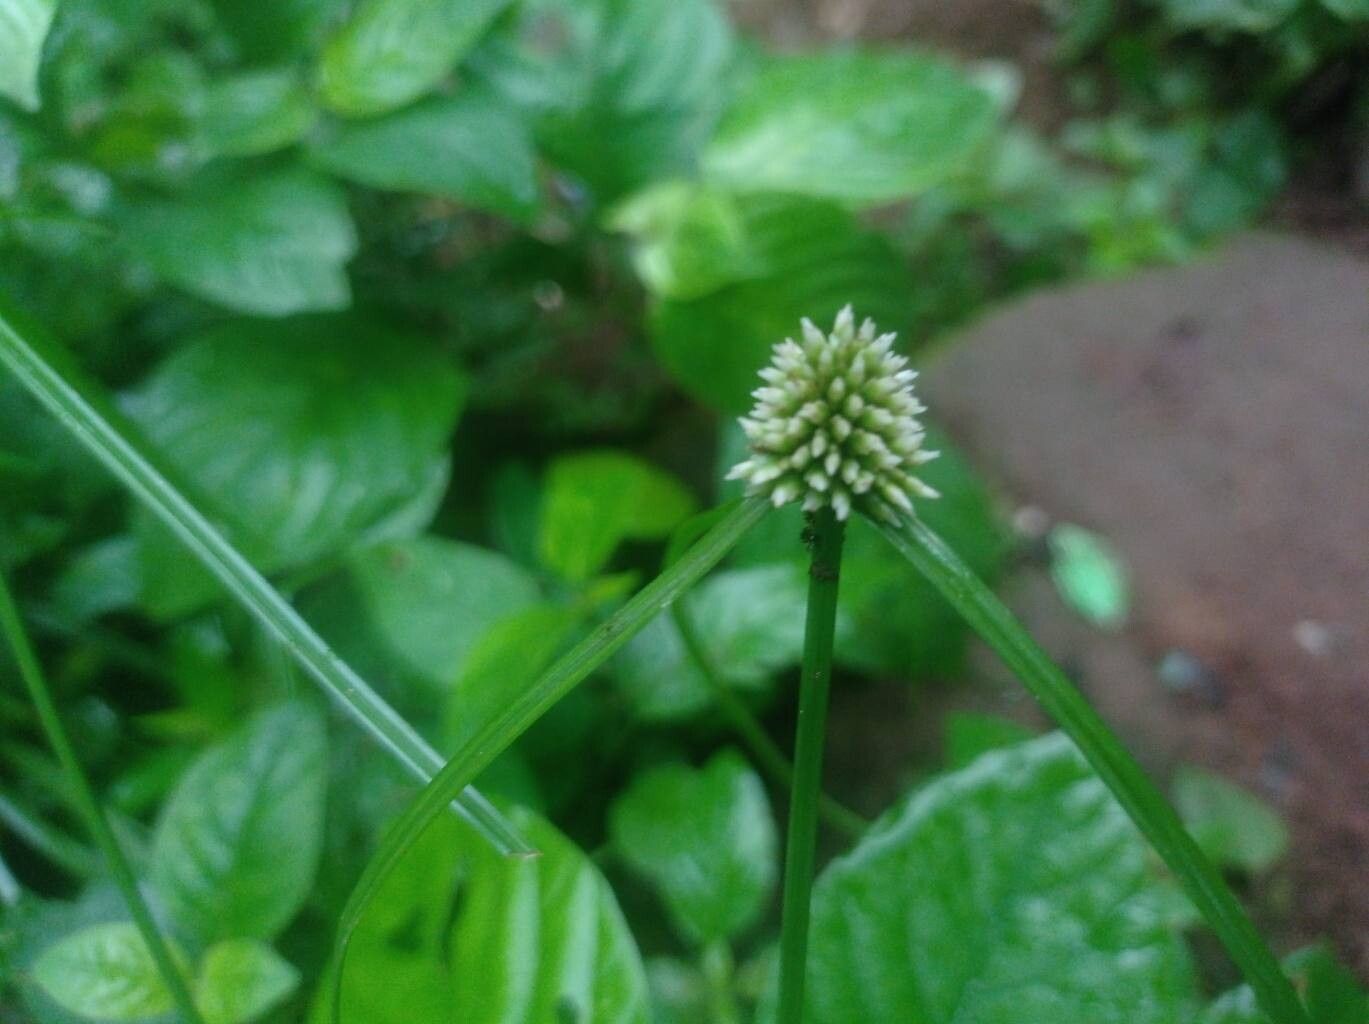
Hey there, fellow plant lovers! I’m so excited to chat with you today about a truly wonderful plant: Cyperus dubius, often called Dwarf Papyrus or Marsh Reed. This beauty brings such a lush, tropical feel to any space, whether it’s a sunny spot in the garden or a bright windowsill indoors. Its elegant, upright green stems topped with feathery umbels are simply captivating. And the best part? Propagating it is a really rewarding experience. Don’t fret if you’re new to this; while it demands a little attention, I’ve found Cyperus dubius to be quite forgiving once you get the hang of it.
The Best Time to Start
For the highest success rate, I’ve found that the late spring or early summer is your sweet spot. This is when the plant is actively growing, bursting with energy, and just itching to create new life. It mirrors the warmth and lengthening days that naturally encourage plant growth.
Supplies You’ll Need
Gathering your tools beforehand makes the whole process smoother. Here’s what I always have on hand:
- Sharp pruning shears or a clean knife: For making clean cuts.
- Well-draining potting mix: A blend of peat moss, perlite, and compost works wonderfully. You can also find specific mixes for marginal plants if you’re planting it in a pot that will sit in water.
- Small pots or trays: For your new cuttings or divisions.
- Watering can with a fine rose: To avoid disturbing new roots.
- Rooting hormone (optional but helpful): A powder or gel to boost root development.
- Clear plastic bag or cloche: To create a humid environment for cuttings.
- Small plant labels: To keep track of what you’ve propagated!
Propagation Methods
Let’s get our hands dirty! Here are the methods I’ve found most effective for Cyperus dubius.
Division
This is my go-to method for Cyperus dubius because it’s incredibly straightforward and usually yields multiple new plants.
- Gently remove the plant from its pot. If it’s in the ground, carefully dig around the root ball.
- Inspect the root system. You’ll see that the plant forms dense clumps.
- Gently tease apart the clumps. You can use your fingers for this, or if it’s very tight, a clean trowel or knife can help. Aim to separate sections that have both roots and some top growth.
- Pot up the divisions into their own small pots filled with your well-draining potting mix.
- Water thoroughly and place them in a bright spot, but out of direct, harsh sun for the first week or so.
Stem Cuttings (Umbel Propagation)
This is a fun and often surprising method! You’re essentially using the flower heads to create new plants.
- Select a healthy mature stem with a well-formed umbel (the umbrella-like cluster of florets at the top).
- Carefully cut the stem about an inch or two below the umbel.
- Remove the leaves from the stem below the umbel. You want minimal leaf surface area to reduce water loss.
- Trim the umbel itself slightly, removing some of the outer, potentially dried-out florets.
- Place the cut stem, umbel-side down, in a glass of fresh water. Make sure the cut end is submerged.
- Place the glass in a bright location away from direct sunlight.
- Watch for tiny white roots to emerge from the cut stem. This can take a few weeks!
- Once the roots are about an inch long, you can carefully pot up the new plant in a small pot with moist potting mix.
The “Secret Sauce” (Pro Tips)
Here are a couple of little tricks I’ve learned over the years that can make a big difference.
- Don’t let those delicate umbels touch the water directly. When you’re doing the stem cutting method, I find it’s best to ensure the stem itself is submerged, but the feathery umbels are lifted above the waterline. They can get a bit mushy and rot if they sit in water for too long.
- Bottom heat is your friend! For stem cuttings especially, if you have a seedling mat or can place your pots in a warm spot (like on top of a refrigerator), this extra warmth encourages root formation much faster. It mimics the soil temperature of a warm summer day.
- Keep it humid for cuttings. Those stem cuttings need a really humid environment to thrive before they form roots. Covering your propagation pots with a clear plastic bag or a mini cloche traps that moisture beautifully. Just make sure to open it daily for a few minutes to allow for air circulation and prevent fungal issues.
Aftercare & Troubleshooting
Once you see signs of new growth or a healthy root system, congratulations!
- Gradually acclimate your new plants to normal conditions. If they’ve been in a humid environment, slowly reduce the plastic covering over a few days.
- Keep the soil consistently moist but not waterlogged for divisions and potted cuttings. Cyperus dubius loves moisture!
- Avoid strong fertilizers until the plant is well-established. A weak, diluted liquid fertilizer can be introduced after a few weeks.
Now, what if things go wrong? The most common culprit is rot. If you see your cuttings going mushy and brown, or if divisions look limp and never recover despite being watered, it’s usually a sign of too much moisture coupled with poor air circulation. A clean cut and a well-draining mix are your best defenses against this. Sometimes, despite our best efforts, a cutting just doesn’t take. Don’t get discouraged! It’s a natural part of the process.
A Encouraging Closing
Propagating plants is a journey, and with Cyperus dubius, it’s a particularly rewarding one. Be patient with your new green babies, give them the right conditions, and enjoy the magic of watching them grow. Happy propagating!
Resource:
https://identify.plantnet.org/k-world-flora/species/Cyperus%20dubius%20Rottb./data