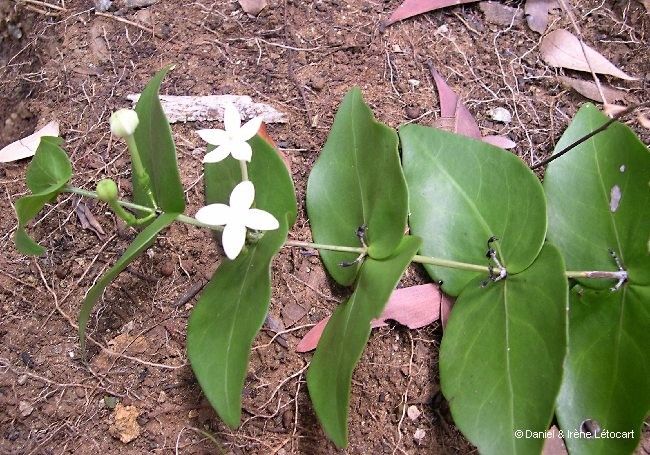
Oh, hello there! So glad you stopped by. I’ve been meaning to chat about Cyclophyllum sagittatum with you. It’s one of those plants that just brings a smile to my face. You know, those lovely, arrow-shaped leaves? Absolutely gorgeous. And the best part? There’s a real thrill in coaxing a brand-new plant into existence from a piece of the parent. It’s like a little bit of magic unfolding right in your hands. Now, if you’re new to this gardening gig, I’d say Cyclophyllum sagittatum is a moderately easy plant to propagate. It requires a little attention to detail, but nothing that will leave you tearing your hair out, I promise.
The Best Time to Start
For the highest success rate with our Cyclophyllum sagittatum, I always aim for the late spring or early summer. This is when the plant is in its most vigorous growth phase. New growth is softer and more pliable, which makes it ideal for taking cuttings. Plus, the warmer temperatures and longer daylight hours provide the perfect conditions for roots to develop quickly. Think of it as giving your little plant babies the best possible start.
Supplies You’ll Need
Gathering your tools beforehand always makes the process smoother. Here’s what I find indispensable:
- Sharp Pruning Shears or a Clean Knife: Crucial for making clean cuts that minimize damage and disease.
- Rooting Hormone (Optional but Recommended): A good quality rooting powder or gel can significantly boost your success rate.
- Potting Mix: I prefer a well-draining mix. A good blend of peat or coco coir, perlite, and a bit of compost works wonders. You can also buy specialized succulent or cactus mixes.
- Small Pots or Trays: Clean containers with drainage holes are a must. Small to medium-sized pots usually work best for cuttings.
- Clear Plastic Bag or Propagation Dome: This creates a mini-greenhouse environment to keep humidity high.
- Watering Can with a Fine Rose: For gentle watering.
- Labels: You’ll want to know what you planted, and when!
Propagation Methods
Let’s get our hands dirty! For Cyclophyllum sagittatum, I find stem cuttings to be the most reliable and rewarding method.
Stem Cuttings:
- Select a Healthy Stem: Look for a piece of stem that’s not too woody but also not too soft and new. About 4-6 inches long is typically a good length. You want a stem with a few leaves on it.
- Make the Cut: Using your sharp pruning shears or knife, make a clean cut just below a leaf node. A leaf node is where a leaf or bud emerges from the stem. This is where the root-forming cells are concentrated.
- Prepare the Cutting: Gently remove the lower leaves from the cutting, leaving at least two or three leaves at the top. If the leaves are very large, you can even cut them in half to reduce water loss.
- Apply Rooting Hormone (If Using): Dip the cut end of the stem into your rooting hormone, tapping off any excess. This stuff really helps trigger root development.
- Plant Your Cutting: Fill your pot or tray with your prepared potting mix. Make a small hole in the center with your finger or a pencil. Insert the cut end of the stem into the hole, ensuring it’s snug. Gently firm the soil around the stem.
- Water Gently: Water the potting mix thoroughly but avoid waterlogging. You want the soil to be moist but not soggy.
- Create a Humid Environment: Cover the pot with a clear plastic bag or place it under a propagation dome. This traps moisture and keeps the humidity high, which is vital for cuttings. Make sure the bag doesn’t touch the leaves if possible.
- Provide Light and Warmth: Place the pot in a bright spot out of direct sunlight. A bit of gentle warmth from underneath (using a heat mat) can speed things up considerably, but it’s not strictly necessary if your room is warm enough.
Water Propagation (An Alternative Approach):
While I often lean towards soil, some gardeners have great success with water propagation for Cyclophyllum sagittatum.
- Follow steps 1-3 from the stem cuttings method.
- Place the prepared cutting in a clean jar or glass of water.
- Ensure that no leaves are submerged in the water. Any leaves in the water will rot and can infect the cutting.
- Place the jar in a bright location away from direct sun.
- Change the water every few days to keep it fresh.
- Once you see visible roots forming (you’ll likely see little white nubs), you can then carefully transition the cutting into soil as described in step 5 of the stem cuttings method.
The “Secret Sauce” (Pro Tips)
Over the years, I’ve learned a few tricks that really make a difference.
- Bottom Heat is Your Friend: If you can swing it, a gentle heat mat placed beneath your pots can dramatically speed up the rooting process. It mimics the warmth of spring soil, encouraging those roots to explore.
- Don’t Over-Water the Soil: This is a big one. Cuttings are prone to rot if the soil stays too wet for too long. It’s better to err on the side of slightly too dry than too wet. Check the soil moisture regularly, and only water when the top inch feels dry.
- Patience is Key with Leafy Cuttings: Sometimes, if you have a cutting with large leaves, you might be tempted to panic if it looks a bit droopy. Give it time! The plant is working to establish roots, and it might temporarily sacrifice some leaf turgor. As long as the stem and leaves aren’t visibly rotting or yellowing, hang in there.
Aftercare & Troubleshooting
Once you start seeing those new roots appear – usually after a few weeks, but sometimes longer – it’s time for a little adjustment. Gently lift the pot to feel the weight, or carefully tease out the soil at the edge to see if roots are peeking through. This is your signal that your baby plant is ready to be treated more like a mature specimen.
Start to gradually remove the plastic bag or dome over a few days to acclimate the new plant to lower humidity. Continue to water when the top inch of soil feels dry. Keep it in that bright, indirect light.
Now, for the troubleshooting. The most common sign of failure is rotting. If your cutting turns mushy, black, or starts to smell off, it’s likely succumbed to rot. This usually happens from overwatering or a lack of air circulation. If you see this, unfortunately, it’s usually best to discard the cutting and start again. Another sign of trouble is if the cutting simply refuses to root and eventually dries up or becomes completely limp. This can happen if the cutting wasn’t viable to begin with, or if conditions weren’t quite right. Don’t be discouraged! It happens to the best of us.
A Little Encouragement
Propagating plants is such a rewarding journey. It’s a chance to connect with nature on a deeper level and to multiply the beauty in your home and garden. Be patient with yourself and with your Cyclophyllum sagittatum cuttings. Some will thrive, and some might not, but each attempt is a learning experience. So, go forth, get your hands dirty, and enjoy the process of bringing new life into the world! You’ve got this.
Resource: