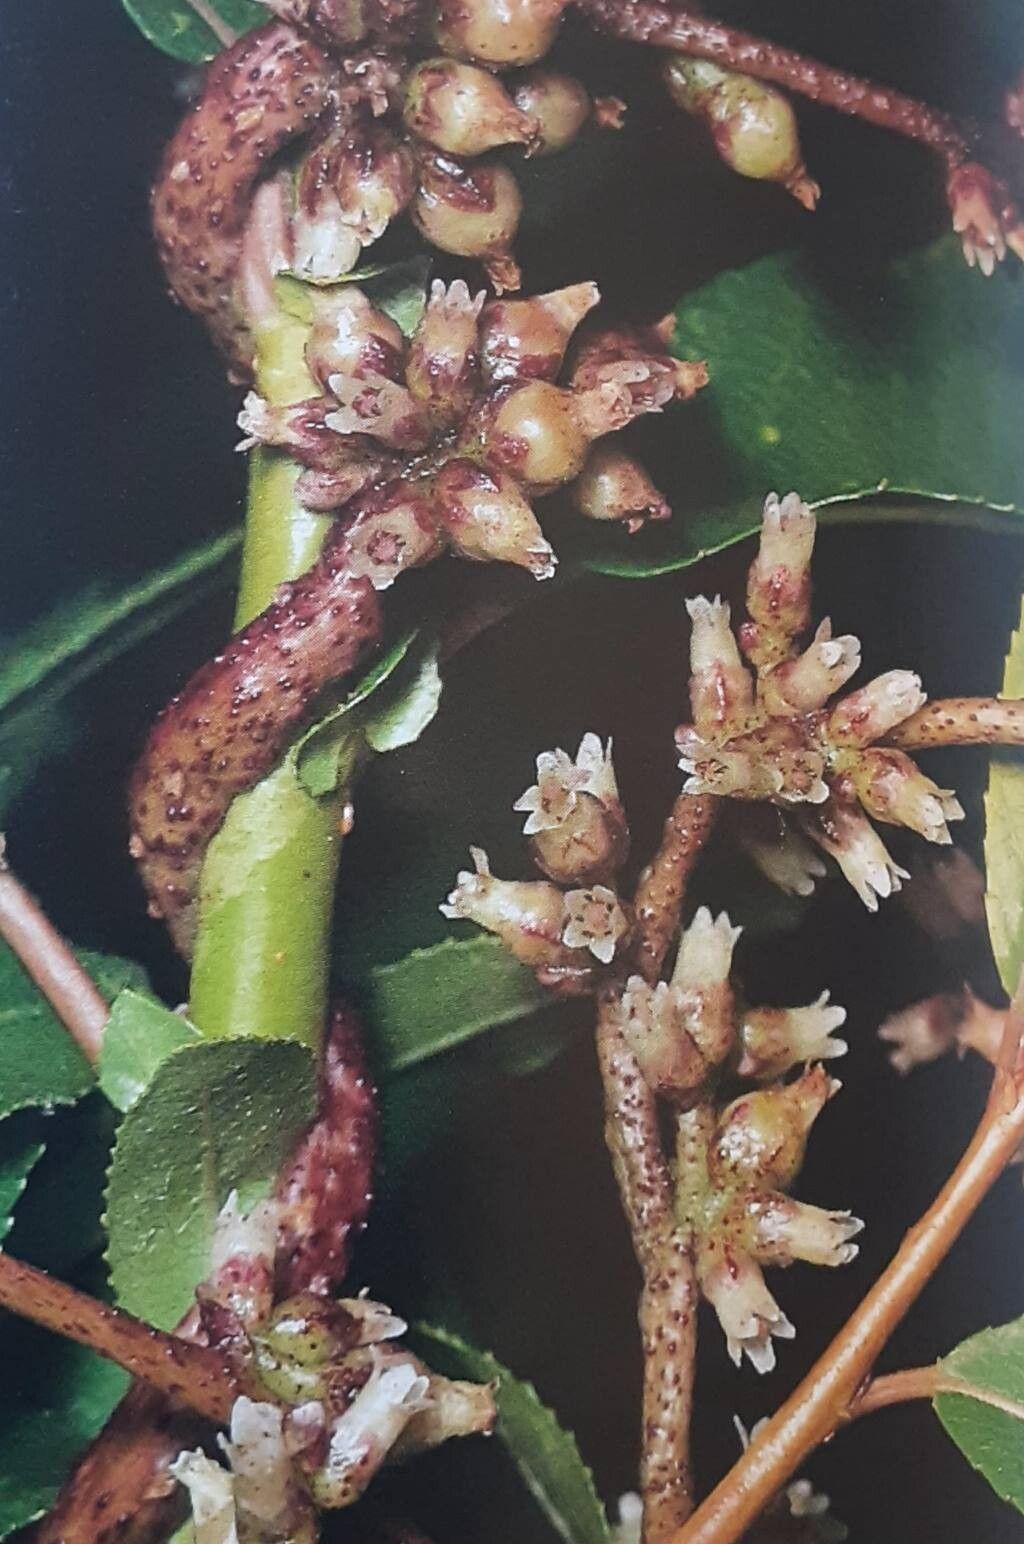
Hello everyone, and welcome back to the garden! Today, I want to chat about a plant that’s a little bit… different. We’re diving into the world of Cuscuta lupuliformis, or as it’s often called, European dodder. Now, before you get any ideas, this isn’t your typical houseplant. This is a fascinating parasitic vine.
Why would we want to propagate a parasite, you ask? Well, there’s an undeniable allure to understanding and working with such unique plant strategies. Watching this vine attach itself to a host and thrive can be a real eye-opener. For beginners, I’ll be honest, propagating Cuscuta lupuliformis can be a bit of a challenge. It’s not as straightforward as rooting a tradescantia, but with a bit of care and attention, it’s certainly achievable!
The Best Time to Start
Timing is everything, right? For Cuscuta lupuliformis, your best bet for propagation is during its active growing season. Think late spring through early summer. This is when the plant is full of vigor and has the energy reserves needed to develop new roots. Trying to propagate from dormant stems is like asking someone to run a marathon with no breakfast – not ideal!
Supplies You’ll Need
Gathering your tools before you begin always makes the process smoother. Here’s what you’ll want on hand:
- Healthy, actively growing Cuscuta lupuliformis stems: Choose stems that are free from pests or diseases.
- Sterilized pruning shears or a sharp knife: Cleanliness is key to preventing infection.
- A well-draining propagation mix: A 50/50 blend of perlite and a good quality seed starting mix or coco coir works beautifully. Standard potting soil is too dense.
- Small pots or trays: Clean containers with drainage holes are essential.
- (Optional) Rooting hormone: While not always strictly necessary for Cuscuta, it can give your cuttings a helpful boost.
- Plastic bags or a propagation dome: To maintain high humidity around your cuttings.
- Labels and a permanent marker: To keep track of your projects!
Propagation Methods
Cuscuta lupuliformis is most commonly and successfully propagated from stem cuttings. It’s straightforward, but requires a delicate touch.
-
Take Your Cuttings: Using your sterilized shears or knife, select healthy, non-flowering stems that are at least 4-6 inches long. Make your cuts just below a node (where a leaf or branch emerges).
-
Prepare the Cuttings: Gently remove the lower leaves from your cuttings. You want to expose the nodes, as this is where roots will form. If your stems are very thin, you can even lightly scrape the outer layer of your nodes to encourage rooting.
-
Apply Rooting Hormone (Optional): If you’re using rooting hormone, dip the cut end of each stem into it. Tap off any excess.
-
Plant Your Cuttings: Fill your clean pots or trays with your propagation mix. Make small holes in the mix with a pencil or your finger, and carefully insert the prepared end of each cutting into the mix. You want at least one node buried beneath the surface.
-
Water Gently: Water your cuttings thoroughly but gently. You don’t want to dislodge them.
-
Create a Humid Environment: Cover the pots or trays with a plastic bag or a propagation dome. This creates a humid microclimate, which is crucial for preventing the cuttings from drying out before they can form roots. You can use stakes to keep the plastic from touching the leaves.
The “Secret Sauce” (Pro Tips)
Now for a couple of little tricks that have helped me over the years with trickier propagations:
- Don’t let the leaves touch the water/mix: If you’re experimenting with water propagation (which is less common for Cuscuta but possible), ensure that only the cut end of the stem is submerged, not the leaves. Leaves in stagnant water tend to rot and can take the whole cutting down with them. For soil propagation, this means ensuring your prepared soil has good drainage and doesn’t stay waterlogged.
- Bottom Heat is Your Friend: If you have a seedling heat mat, using bottom heat can significantly speed up root development. A consistent temperature from below encourages those roots to start exploring the soil. Just place your pots on the mat.
Aftercare & Troubleshooting
Once your cuttings are planted, the real waiting game begins. Keep the propagation mix consistently moist but not soggy. Check the humidity under the plastic regularly; if you see condensation, it’s good! You can periodically open the cover to allow for some air circulation.
The first sign of success will be new growth emerging from the stem. This typically happens within 3-6 weeks, but don’t be discouraged if it takes a little longer.
The most common sign of failure is rot. If your cuttings turn mushy, black, or develop a foul smell, it’s usually a sign of too much moisture and not enough air circulation, or the presence of a pathogen. In this case, it’s best to discard the affected cuttings to prevent it from spreading. Another sign is wilting and drying out, which means your humidity wasn’t high enough or the cuttings were taken too late in the season.
A Encouraging Closing
Propagating Cuscuta lupuliformis might feel a little unconventional, but it’s a rewarding way to learn about plant adaptation. Be patient with yourself and your cuttings. Sometimes plants have their own timeline! Enjoy the process, observe what happens, and don’t be afraid to experiment. Happy gardening!
Resource:
https://identify.plantnet.org/k-world-flora/species/Cuscuta%20lupuliformis%20Krock./data