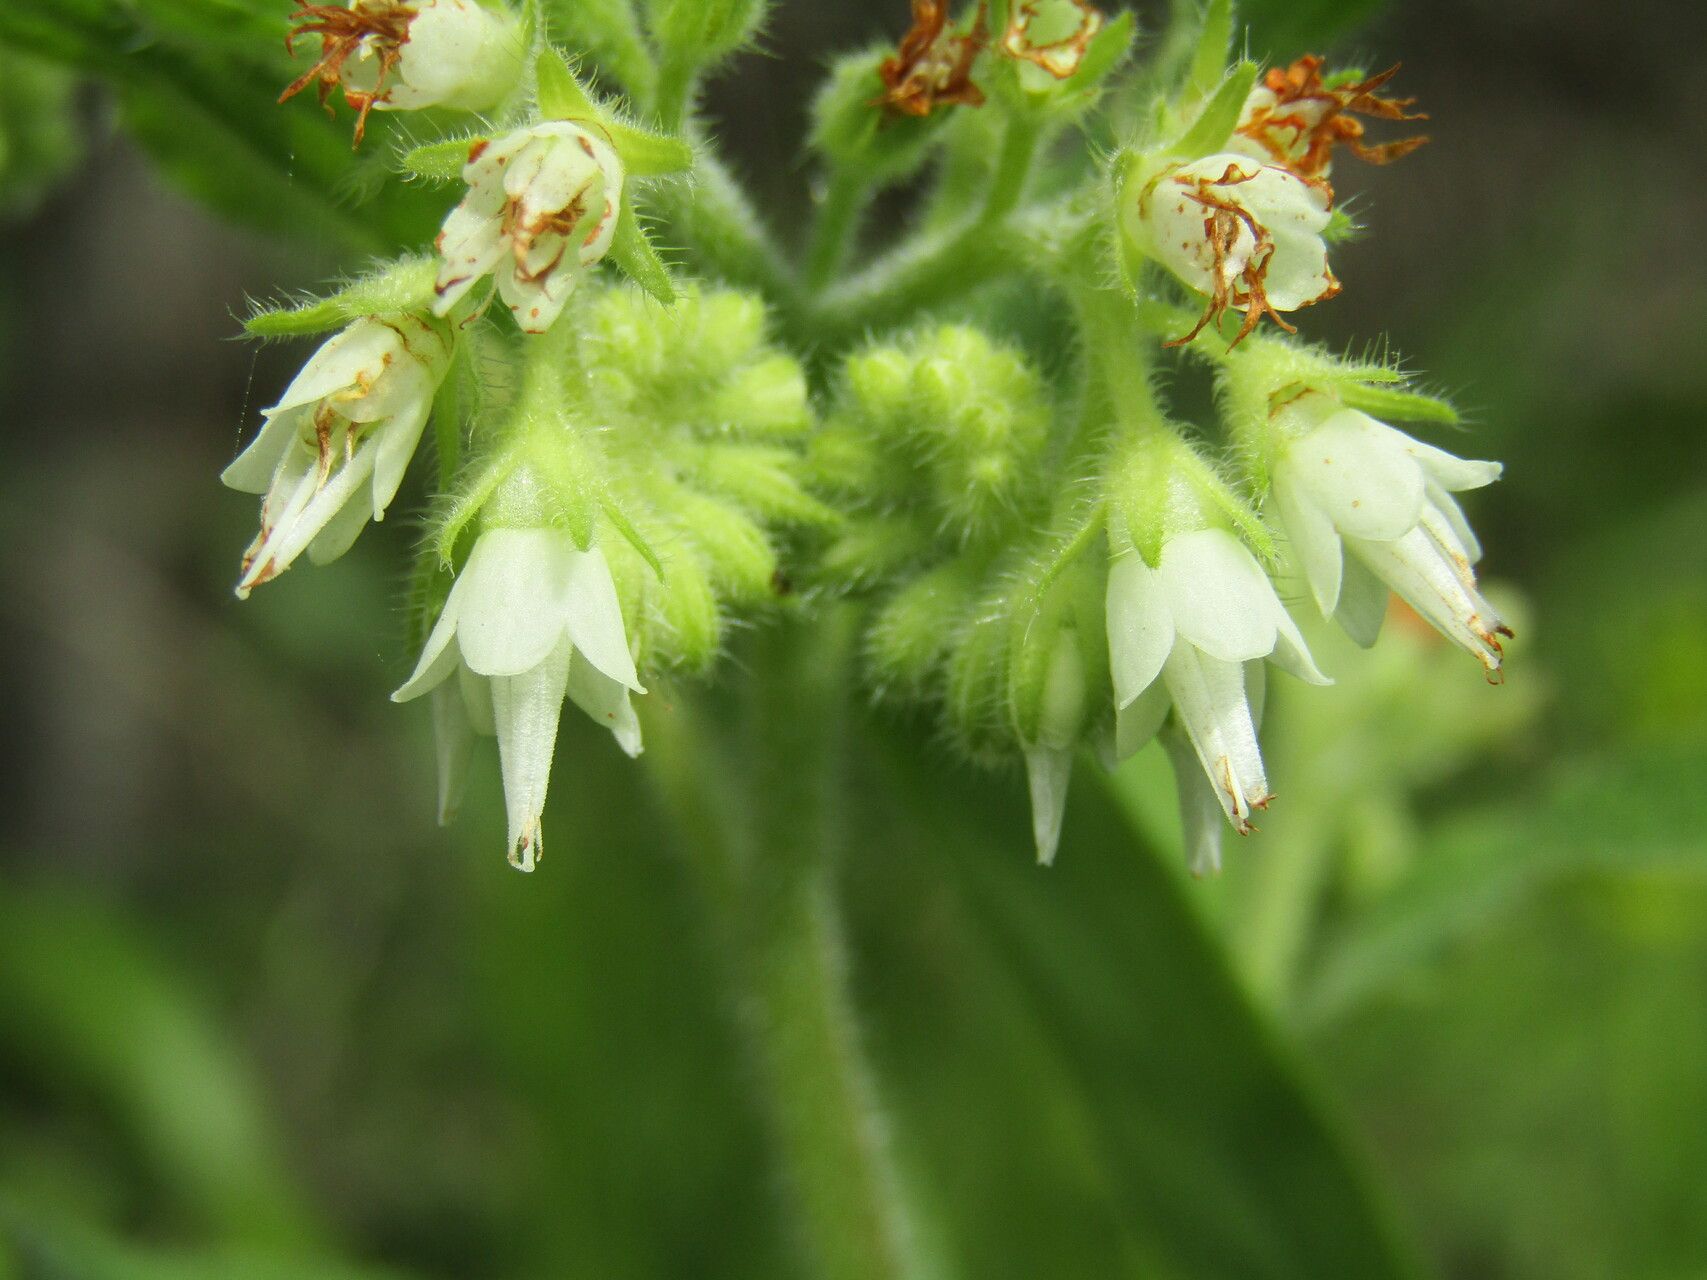
Oh, Symphytum ottomanum – what a beauty! You know, I’ve always had a soft spot for this plant. With its lovely, fuzzy leaves and those delicate, nodding bell-shaped flowers, it just brings a charming, old-fashioned feel to any garden. Plus, it’s a magnet for bees and other pollinators, which makes it a real joy to have around. And the best part? Sharing this beauty is incredibly easy. If you’re new to the gardening game, you’ll be delighted to know that Symphytum ottomanum is wonderfully forgiving. You can absolutely jump right in with propagating it.
The Best Time to Start
When it comes to getting the most bang for your buck with Symphytum ottomanum, I’ve found late spring to early summer is often the sweet spot. Your plant will be in full swing, growing vigorously, and those fresh, new shoots will have plenty of energy for rooting. You can certainly try division in the early autumn as well, after the heat of summer has passed but before the real chill sets in. It gives the divisions a chance to establish before winter.
Supplies You’ll Need
Before we get our hands dirty, let’s gather our tools:
- Sharp Pruning Shears or a Clean Knife: For making clean cuts.
- Rooting Hormone (Optional but Recommended): A little boost never hurts! I prefer the powder form.
- Well-Draining Potting Mix: A good blend of peat moss, perlite, and a bit of compost works wonders. You can also use a seed-starting mix.
- Small Pots or Trays: For your new plant babies. Make sure they have drainage holes!
- Watering Can with a Fine Rose: For gentle watering.
- Labels and a Pen: So you don’t forget what you’ve planted and where!
- Plastic Bags or Cloches (Optional): To create a mini-greenhouse effect.
Propagation Methods
Let’s dive into how you can multiply your Symphytum ottomanum. I find these two methods are the most straightforward and successful.
Stem Cuttings
This is my go-to!
- Select Your Stems: Look for healthy, non-flowering shoots that are about 4-6 inches long. You want stems that are new growth but not so soft they’ll flop over.
- Make the Cut: Using your clean shears or knife, make a cut just below a leaf node. This is the point where a leaf attaches to the stem, and it’s where roots are most likely to form.
- Prepare the Cutting: Gently remove the lower leaves, leaving just one or two at the top. This prevents them from rotting in the soil. If you have a larger leaf, you can even cut it in half horizontally to reduce water loss.
- Apply Rooting Hormone (Optional): Dip the cut end of the stem into your rooting hormone, tapping off any excess.
- Plant It Up: Fill your pots with your well-draining mix. Make a little hole with your finger or a pencil and insert the cutting, ensuring the node where you made the cut is buried. Gently firm the soil around it.
- Water Gently: Water thoroughly but gently. You don’t want to dislodge your cutting.
- Create a Humid Environment: Tent a clear plastic bag over the pot or use a propagator lid. This traps moisture and encourages rooting. Place it in a bright spot out of direct sunlight.
Division
This is a fantastic option when your established plant needs a little tidying up anyway.
- Dig It Up: In spring or early autumn, carefully dig up your Symphytum ottomanum clump. Try to disturb the roots as little as possible.
- Clean and Separate: Gently shake off excess soil from the roots. You should be able to see where the clump naturally divides.
- Divide the Clump: Use your hands or a clean spade to separate the clump into smaller sections. Each section should have at least one or two healthy shoots and a good portion of the root system.
- Replant: Replant the divisions immediately into their new spots in the garden or into pots filled with good potting mix. Water them in well.
The “Secret Sauce” (Pro Tips)
Now, for a couple of little tricks I’ve picked up over the years that can really up your success rate.
First, when you’re doing stem cuttings, don’t let any leaves droop down and touch the soil or the water if you were doing water propagation. Those leaves will start to rot and can introduce all sorts of unsavory characters that will harm your cutting before it even has a chance to root. It’s a small detail, but it makes a big difference.
Second, while not strictly necessary for Symphytum ottomanum, I’ve found that providing a little gentle bottom heat can really speed up root development for cuttings. A seed-starting mat set on a low setting can work wonders. It encourages those roots to start reaching out from the bottom of the cutting. You don’t want it too hot, just a nice, cozy warmth.
Aftercare & Troubleshooting
Once your cuttings have rooted (you’ll usually see new leaf growth, or you can gently tug to feel resistance), you can remove the plastic bag or propagator lid gradually to help them acclimatize. Keep them consistently moist but not waterlogged. As they grow stronger, you can pot them up into slightly larger containers if needed.
The main thing to watch out for is rot. If your cuttings look mushy, black, or just plain sad, it’s often a sign of too much moisture and not enough air circulation. Make sure your potting mix is draining well and don’t overwater. If you see signs of rot, it’s usually best to discard the affected cutting and start again, perhaps by adjusting your watering schedule or ensuring better drainage.
A Gentle Encouragement
Propagating plants is such a rewarding endeavor. It’s a wonderful way to fill your garden with more of what you love, or to share the joy with friends and family. Be patient with your new Symphytum ottomanum plants. They take their own sweet time, and that’s part of the magic. Enjoy the process, celebrate every tiny new leaf, and soon you’ll have a whole patch of these beauties to admire. Happy propagating!
Resource:
https://identify.plantnet.org/k-world-flora/species/Symphytum%20ottomanum%20Friv./data