Oh, hello there! Come on in, pull up a chair. I’ve got a fresh pot of coffee brewed, and I’m just itching to chat about one of my absolute favorite plants: Dyckia brevifolia.
Your Little Bromeliad Buddy: Why Propagate Dyckia Brevifolia?
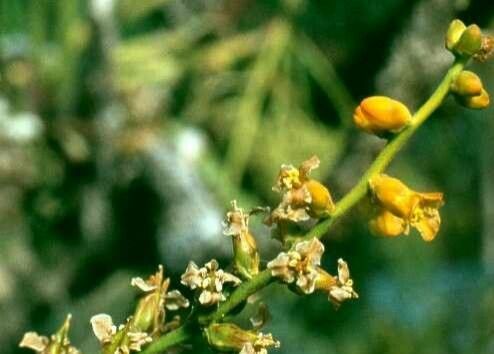
If you’ve ever seen a Dyckia brevifolia in its full glory, you know exactly why I’m so smitten. These spiky beauties, with their rosette-forming leaves and often dramatic flower spikes, bring such a unique, architectural element to any garden or home. They’re like little living sculptures! And the best part? They’re surprisingly rewarding to propagate. While they might seem a little intimidating with all those sharp edges, honestly, propagating them is a fantastic way to multiply your collection without breaking the bank. For beginners, it’s a good starting point, though a touch of patience is always helpful with any new plant endeavor.
When is the Sweet Spot for Propagation?
The absolute best time to get your hands dirty with Dyckia brevifolia propagation is during spring and early summer. Think of it as their prime growing season. The days are getting longer, the temperatures are warming up, and the plants are just bursting with energy. This gives your new babies the best chance to establish roots before the cooler weather sets in. You can often see little pups starting to form around the base of a mature plant during this time, which signals it’s ready for action.
What You’ll Need for Your Propagation Adventure
Gathering your supplies is half the fun, right? It’s like prepping for a creative project! Here’s what I always have on hand:
- Well-draining potting mix: This is non-negotiable for succulents and bromeliads. A cactus and succulent mix is perfect, or you can make your own by combining potting soil with perlite or coarse sand.
- Sharp, clean pruning shears or a knife: You want a clean cut to avoid introducing any diseases.
- Rooting hormone (optional but helpful): A little dab can give your cuttings a significant boost.
- Small pots or cell trays: Something with drainage holes, of course!
- Watering can with a fine rose or spray bottle: Gentle watering is key!
- A sunny spot with bright, indirect light: Too much direct sun can scorch delicate new growth.
- Gloves: Save your hands from those prickly leaves!
Let’s Get Propagating: The How-To
Dyckia brevifolia is a prolific grower, and the most common and easiest way to propagate it is through division of pups.
Method 1: Dividing Pups
This is my go-to method, and it’s incredibly satisfying!
- Assess your plant: Look for offsets, or “pups,” that have formed around the base of your mother plant. You’ll want pups that are at least a few inches tall and have started to develop their own root system.
- Gently remove the pup: You can often loosen the soil around the base of the pup. If it’s still attached firmly, it’s time for your clean pruning shears or knife. Carefully cut the pup away from the mother plant, trying to get as much of its own root system as possible.
- Let it callus: This is important! Let the cut end of the pup dry out and callus over for 24-48 hours. This helps prevent rot when you plant it. You can place it on a paper towel in a dry, shaded spot.
- Potting up: Fill your small pots with your well-draining mix. Make a little well in the center of the soil.
- Plant your pup: Gently place the callused end of the pup into the soil. You can use a bit of rooting hormone on the cut end before planting if you like. Firm the soil very gently around the base.
- Initial watering: Water your newly potted pup very sparingly. You want the soil to be just barely moist.
What about stem cuttings or water propagation? For Dyckia brevifolia, these aren’t generally the preferred methods. Their structure lends itself much better to the natural offsets they produce. Sticking a leaf or stem into water is more likely to lead to rot than successful rooting with this particular plant.
Unlocking the “Secret Sauce”: My Insider Tips
Over the years, I’ve learned a few little tricks that can make all the difference.
- Don’t crowd your pups: When you’re potting up, give each pup its own little space. Overcrowding can lead to poor air circulation and potential rot for these guys.
- Bottom heat is your friend: If you can, place your newly potted pups on a gentle heating mat or in a warm spot. This consistently warm soil encourages root development beautifully. Just ensure it’s not too hot.
- Patience is a virtue, and so is observation: Don’t be tempted to tug on your new pups to see if they have roots! Wait at least 2-3 weeks, and you’ll start seeing signs of new growth or resistance when gently nudged.
Aftercare and What to Watch For
Once your pup is happily settled in its new pot, give it a bright spot with indirect light. Water very sparingly – only when the soil is completely dry. Overwatering is the quickest way to disaster!
Common signs of failure include:
- Rotting: If the base of your pup turns mushy and black, it’s a sure sign of rot, usually from too much moisture or a poorly draining mix. Sadly, in most cases, this is irreversible.
- Wilting and shriveling: This can also indicate too little water, but sometimes it’s a sign the plant is struggling to establish itself. Keep an eye on it, and ensure it’s not in direct harsh sun.
If you see signs of growth – new leaves unfurling or the pup looking plumper and more vibrant – you’re on the right track!
Go Forth and Propagate!
Seeing those little pups turn into healthy, established plants is a truly special feeling. My best advice is to be patient. Nature has its own timetable, and your Dyckia brevifolia will let you know when it’s ready. Enjoy the process, learn from each attempt, and soon you’ll have a whole brood of these spiky marvels to enjoy! Happy gardening!
Resource:
https://identify.plantnet.org/k-world-flora/species/Dyckia%20brevifolia%20Baker/data