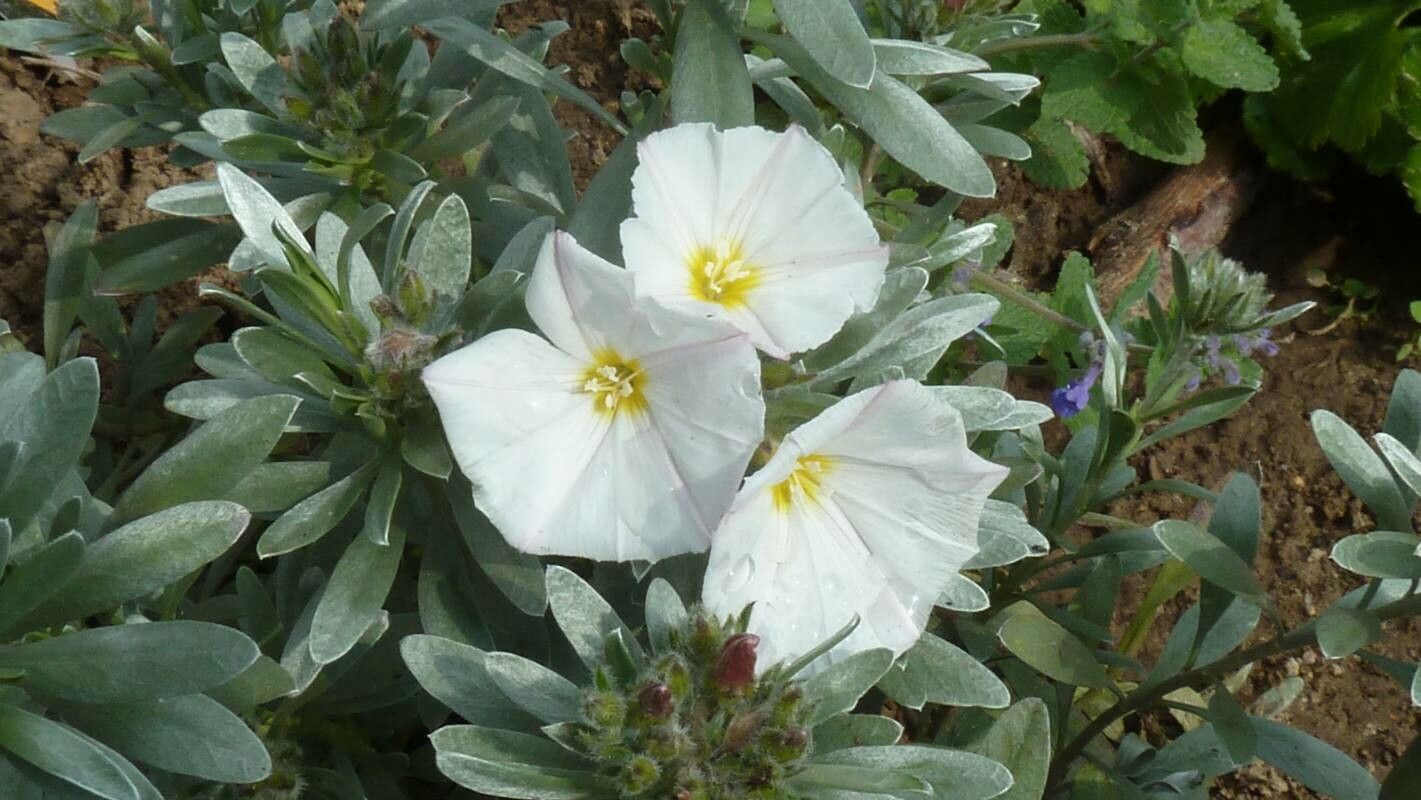
Oh, Convolvulus cneorum! If you’ve ever seen a mature specimen of this beauty, you know why it’s so captivating. Its silvery foliage is like spun moonlight, and those pure white, trumpet-shaped flowers? Absolutely stunning. It brings a touch of Mediterranean charm right into our gardens. And the best part? Sharing that beauty by propagating it is incredibly rewarding. You might be wondering if it’s something beginners can tackle. I’d say with a little care, yes! It’s not the absolute easiest plant out there, but definitely within reach for those willing to get their hands a little dirty.
The Best Time to Start
For Convolvulus cneorum, I find that the late spring or early summer is the sweet spot. Think of it as when the plant has built up good energy after winter, and the days are getting longer and warmer. You’re looking for new growth that’s just starting to firm up – not the super soft, floppy tips, but not the old, woody stems either. That tender, slightly hardened growth has the best chance of rooting for you.
Supplies You’ll Need
Here’s a quick rundown of what I like to have on hand:
- Sharp pruning shears or a clean knife: For making nice, clean cuts.
- A good potting mix: I usually mix equal parts perlite and sterile seed-starting mix. The perlite provides excellent drainage, which is crucial for these plants.
- Small pots or trays: Clean ones, please!
- Rooting hormone powder or gel (optional but helpful): This really gives cuttings a boost.
- A spray bottle: For keeping things a bit humid.
- A clear plastic bag or dome: To create a mini-greenhouse effect.
- A tray of water: If you’re opting for water propagation.
Propagation Methods
I’ve had the most success with Convolvulus cneorum using stem cuttings. It’s straightforward and generally yields great results.
Stem Cuttings:
- Take Your Cuttings: Select healthy stems that are about 4-6 inches long. Make a clean cut just below a leaf node (where a leaf meets the stem). Gently remove the lower leaves, leaving just a few at the top.
- Prepare the Cuttings: If you’re using rooting hormone, dip the cut end into the powder or gel. Tap off any excess.
- Plant the Cuttings: Fill your small pots or trays with your prepared potting mix. Make a small hole with a pencil or your finger, and gently insert the cutting. Firm the soil around the stem so it stands upright.
- Water and Cover: Water the soil until it’s moist but not soggy. Then, cover the pots with a clear plastic bag or a humidity dome. This helps maintain moisture around the leaves and prevents the cuttings from drying out.
Water Propagation (Use with Caution):
While I prefer soil, some people have success with water.
- Prepare Cuttings: Follow steps 1 and 2 from the stem cutting method.
- Place in Water: Put the cuttings in a clean jar or glass of fresh water. Make sure that no leaves are submerged; remove any that would touch the water.
- Monitor Carefully: Change the water every few days. You’ll be looking for root development.
The “Secret Sauce” (Pro Tips)
Here are a couple of things I’ve learned over the years that really make a difference:
- Don’t Overwater! This is perhaps the biggest pitfall with Convolvulus cneorum. Excellent drainage is non-negotiable. If the soil stays too wet, those cuttings will rot faster than you can say “silver foliage.” I always err on the side of slightly too dry rather than too wet.
- Consider Bottom Heat: If you have a propagation mat or can place your pots on top of a router or a warm windowsill, a little gentle bottom heat can dramatically speed up root formation. It mimics the warmth of spring soil.
- Be Patient with the Leaves: If you notice yellowing leaves on your cuttings, it’s often a sign they’re trying to adapt. Don’t be too quick to discard them. As long as the stem itself looks firm, there’s still hope. Sometimes they drop a few leaves to conserve energy for root growth.
Aftercare & Troubleshooting
Once you start seeing new growth pushing out from the top or signs of roots emerging from the drainage holes, you know your cuttings are happy! When that happens, it’s time to gradually acclimate them to less humid conditions. Start by taking the cover off for a few hours each day, then remove it entirely. Continue to keep the soil consistently moist but not waterlogged.
The most common issue you’ll face is rot. If a cutting turns mushy, black, and smells unpleasant, it’s succumbing to rot. This is usually due to too much moisture, poor air circulation, or non-sterile conditions. If you catch it early, you might be able to salvage part of the stem, but often it’s best to discard it to prevent any spread.
A Encouraging Closing
Growing new plants from cuttings is such a magical process. It takes a bit of patience, a keen eye, and a willingness to learn from each attempt. Don’t be discouraged if your first try isn’t perfect. Just keep at it, enjoy the journey of nurturing these tiny new lives, and before you know it, you’ll have a whole collection of your own beautiful Convolvulus cneorum to admire and share. Happy gardening!
Resource:
https://identify.plantnet.org/k-world-flora/species/Convolvulus%20cneorum%20L./data