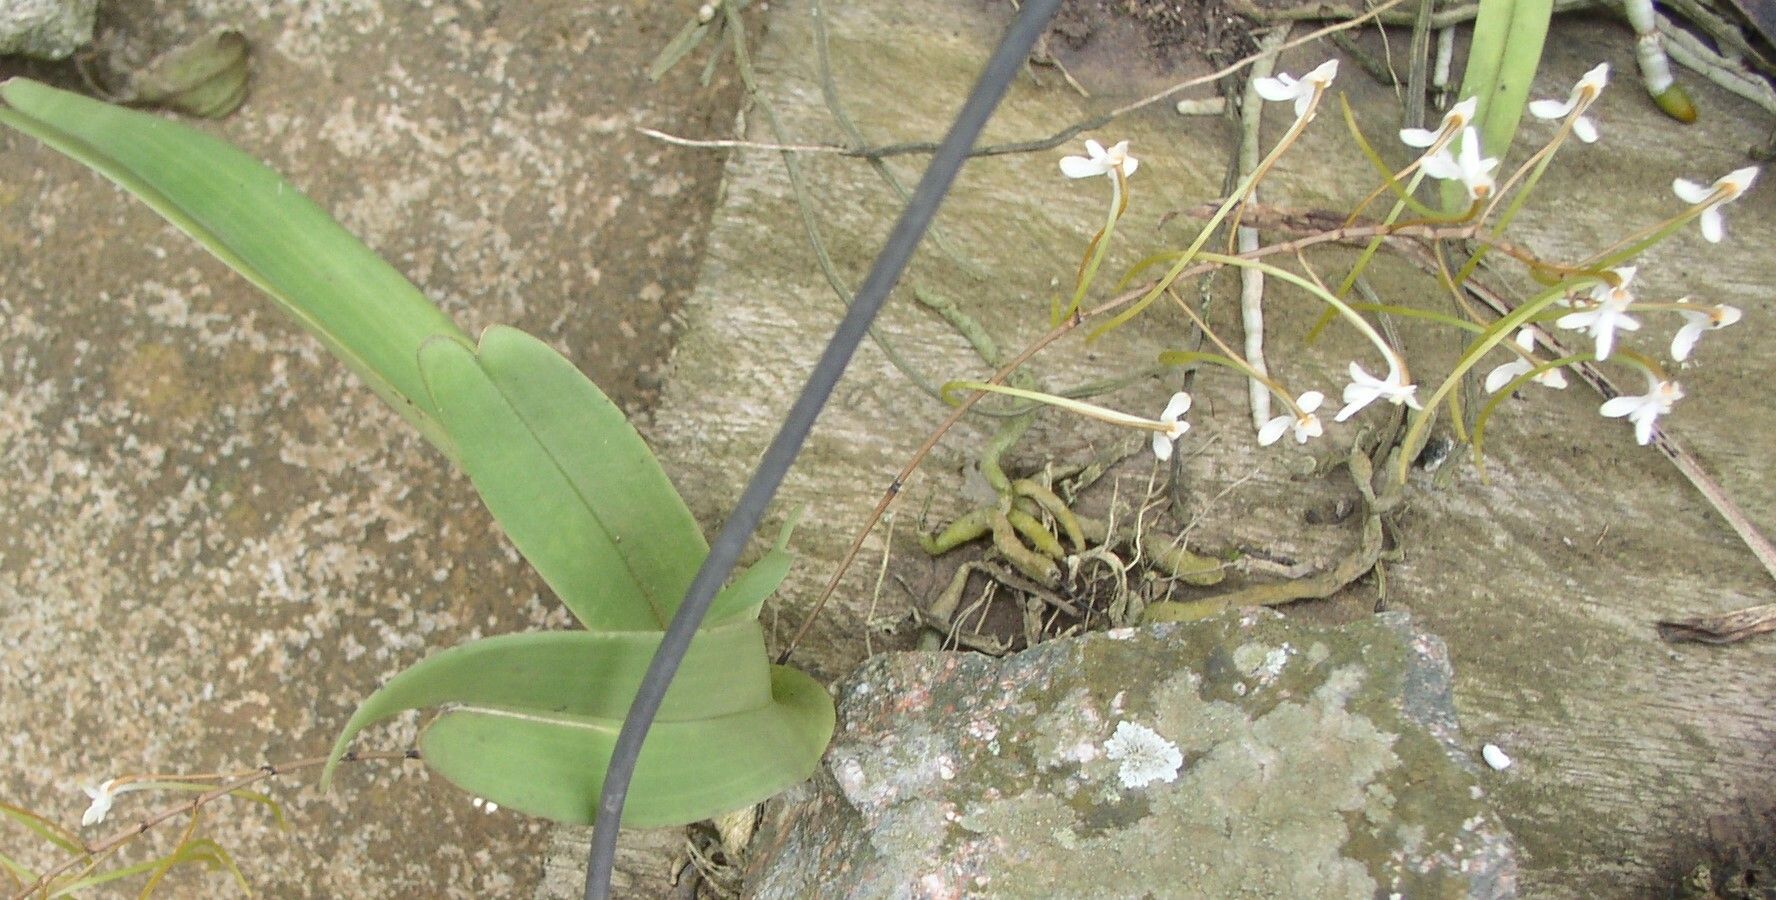
Hello green thumb friends! Today, we’re diving into the delightful world of Angraecopsis lisowskii. If you’ve ever marveled at its unique, star-shaped blooms and wondered how to get more of these beauties, you’re in the right place. Propagating this little gem is incredibly rewarding, and while it might seem a tad intimidating at first, I promise, with a little guidance, you’ll be on your way to a small Angraecopsis army! For beginners, I’d say it’s moderately easy – a good stepping stone into orchid propagation.
The Best Time to Start
The sweet spot for propagating Angraecopsis lisowskii is during its active growth period. Think spring and summer. After the plant has finished blooming and you see new roots or leaf growth emerging, that’s your cue. This is when the plant has the most energy reserves to put into developing new life.
Supplies You’ll Need
Gathering your tools beforehand makes the whole process much smoother. Here’s what I always have on hand:
- Sharp, sterile pruning shears or a clean knife: For making precise cuts. Sterilize with rubbing alcohol between every cut to prevent disease.
- Well-draining potting mix: A bark-based orchid mix is usually perfect. I often add a bit of perlite for extra aeration.
- Sphagnum moss: Great for keeping humidity up around cuttings.
- Small pots or containers: Clean and with drainage holes. Terracotta pots are my favorite for orchids; they breathe well.
- Rooting hormone (optional but helpful): A powdered hormone can give your cuttings a bit of a head start.
- Watering can with a fine spray: For gentle watering.
- A mister or spray bottle: For maintaining humidity.
- Clear plastic bags or a mini-greenhouse: To create a humid environment for your cuttings.
Propagation Methods
Angraecopsis lisowskii is most often propagated through division. This involves carefully separating mature plants into smaller sections, each with its own roots and at least a few healthy leaves.
Here’s how I do it:
- Gently remove the parent plant from its pot. You might need to loosen the edges with a knife if it’s tightly bound.
- Carefully tease away the old potting medium. You want to expose the root system as much as possible.
- Inspect the plant for natural division points. Look for areas where a new growth shoot is emerging from the base of an older pseudobulb, and ideally has its own set of roots.
- Using your sterile shears or knife, make a clean cut to separate the divisions. Ensure each piece has at least two healthy pseudobulbs and some good roots.
- Allow the cut surfaces to air dry for a few hours, or even overnight. This helps to callous over the wound, reducing the risk of rot. This is a crucial step!
- Pot each division into its own small, well-draining pot. Use fresh orchid mix. You want the new plant to be snug but not overcrowded.
- Water lightly and place the pot in a bright spot with good air circulation. Avoid direct, harsh sunlight initially.
The “Secret Sauce” (Pro Tips)
Over the years, I’ve learned a few tricks that seem to make all the difference.
- Think about the “air roots” as well as the potting roots. Sometimes, new growths will sprout aerial roots that are quite developed. If a division has a good aerial root system, even if its potting roots are a bit sparse, it still has a great chance of survival.
- Don’t overwater newly divided plants. They have fewer roots to absorb moisture, so it’s easy to drown them. Mist the foliage lightly and water sparingly until you see signs of new growth and the roots begin to re-establish. Patience is key here!
- Provide a gentle humidity boost. After potting, I often place the new divisions in a plastic bag with a few holes poked in it, or in a small propagation box. This creates a mini-greenhouse effect, keeping the humidity elevated and helping the plant conserve moisture while it hardens off. Just be sure to open it for a bit of air circulation every day or two to prevent mold.
Aftercare & Troubleshooting
Once your newly divided Angraecopsis starts to show signs of life – like new leaves emerging or roots actively growing – you’re golden! Continue to water when the potting mix is nearly dry and provide good light. Avoid fertilizing immediately; wait until you see solid new growth.
The most common hitch you might encounter is rot. This usually happens from overwatering or poor air circulation around the wound. If you see a pseudobulb turning black and mushy, or a leaf yellowing and dropping, it’s a sign things aren’t quite right. If rot sets in, you’ll need to cut away the affected parts with sterile tools, allow the healthy sections to callous, and then repot into fresh, dry mix. Sometimes, unfortunately, a severely rotted division can’t be saved, but I always encourage you to try to salvage any healthy bits!
A Encouraging Closing
Propagating plants is a journey, and with Angraecopsis lisowskii, it’s a journey filled with the promise of beautiful blooms. Be patient with your new divisions, observe them closely, and learn from each step. You’ve got this! Enjoy the process, and soon you’ll have more of these charming orchids to share. Happy growing!
Resource: