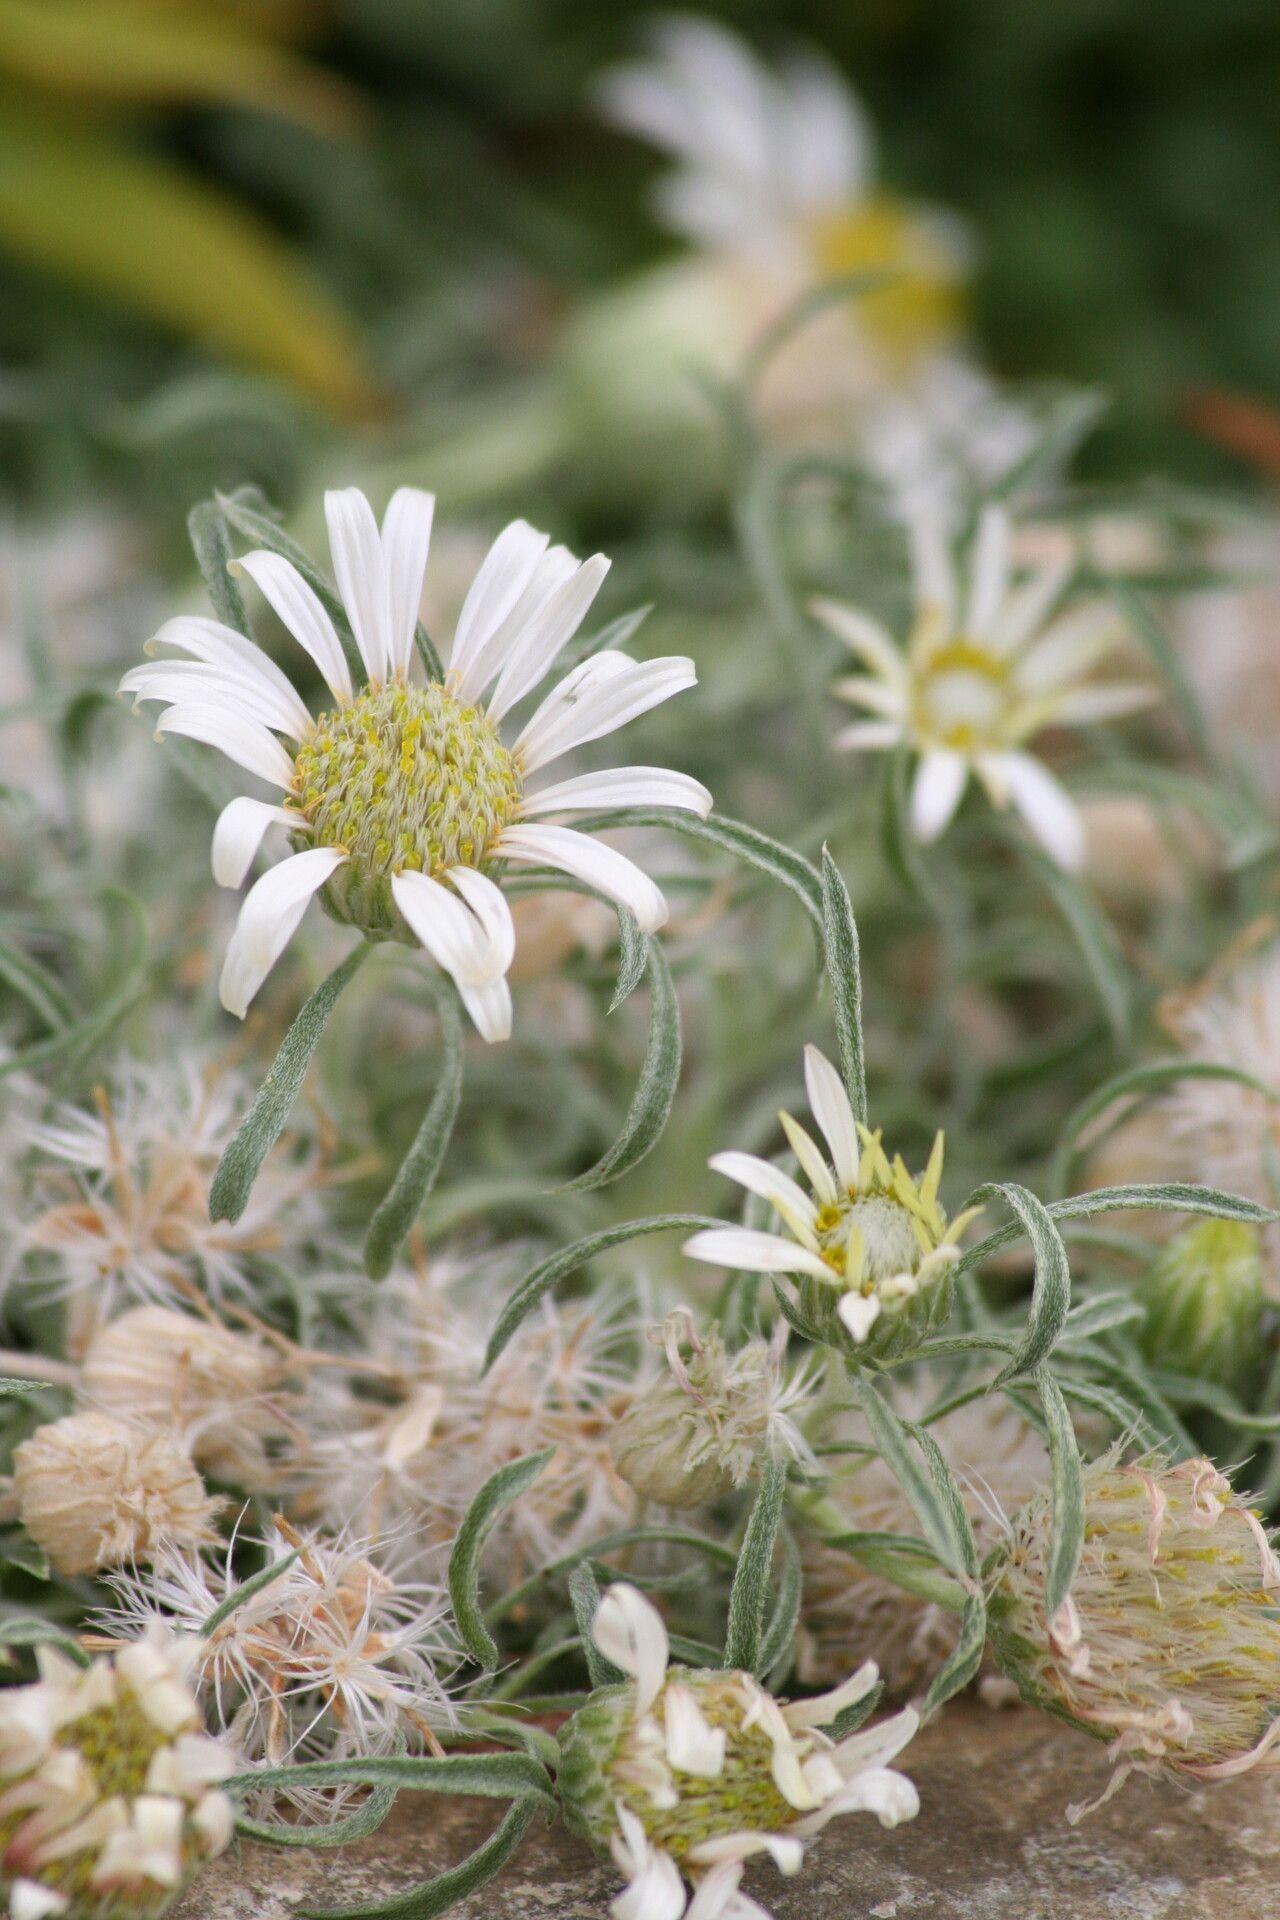
Oh, Townsendia jonesii! If you’ve ever seen this little stunner gracing a rocky slope or a sunny border, you know exactly why I’m so excited to talk about it. Those darling daisy-like flowers, often in shades of soft pink or white, peeking out from tidy mounds of foliage—they just bring a smile to your face. And the best part? You can absolutely bring that joy into your own garden by propagating it! It’s a truly rewarding experience, seeing a tiny piece of a plant grow into something magnificent. Now, is it a breeze for absolute beginners? Honestly, it can be a little bit of a delicate dance. It’s not the most forgiving plant out there, but with a little patience and a few key pointers, you’ll be well on your way to success.
The Best Time to Start
For Townsendia jonesii, my go-to time to start new plants is late spring to early summer. This is when the plant is actively growing and has plenty of energy reserves to put into developing new roots. Waiting until after the initial flush of spring flowers has faded, but before the intense heat of mid-summer, gives the cuttings or divisions the best chance to establish themselves without getting stressed.
Supplies You’ll Need
Here’s a little checklist of what I like to have on hand:
- Sharp, clean pruning shears or a sharp knife: Essential for making clean cuts.
- Rooting hormone powder or gel: This isn’t always strictly necessary for Townsendia, but it can give your cuttings a helpful boost.
- Well-draining potting mix: A good blend for us is about 50% perlite and 50% seed-starting mix or a fine bark. Avoid anything too heavy that will hold excess moisture.
- Small pots or trays: Clean containers with drainage holes are a must.
- A watering can with a fine rose or a mister: Gentle watering is key.
- Labels and a permanent marker: To keep track of what you’ve planted and when!
- (Optional) A heat mat: This can really speed up root formation, especially if your propagation area is on the cooler side.
Propagation Methods
Townsendia jonesii is most commonly propagated by stem cuttings and division. Let’s dive into those!
Stem Cuttings
This is often my preferred method for Townsendia. It’s a great way to get multiple plants from a single parent.
- Source Your Cuttings: Look for healthy, non-flowering stems on your established plant. You want stems that are firm but not woody.
- Make Your Cuts: Using your sharp, clean shears, take cuttings that are about 3-4 inches long. Make the cut just below a leaf node (where a leaf attaches to the stem). This is where the magic of rooting hormones is most effective.
- Prepare the Cuttings: Gently remove the lower leaves from the cutting. You can leave a couple of leaves at the top. If the leaves are large, you can even cut them in half horizontally to reduce water loss through transpiration.
- Apply Rooting Hormone: Dip the cut end of the stem into your rooting hormone, tapping off any excess.
- Plant Your Cuttings: Fill your small pots with your well-draining mix. Make a small hole in the center with a pencil or your finger. Gently insert the bottom inch or so of the cutting into the hole, making sure the leaf nodes are below the surface of the soil. Gently firm the soil around the cutting.
- Water Gently: Water the pots lightly to settle the soil.
Division
If your Townsendia has become a bit of a clump, division is a wonderful way to rejuvenate it and create new plants.
- Excavate Your Plant: In late spring or early summer, gently dig up your established Townsendia plant. Try to get as much of the root ball intact as possible.
- Inspect and Separate: Gently shake off excess soil from the roots. You should be able to see natural divisions in the plant, with root systems naturally separating.
- Divide Carefully: Using your fingers, a clean trowel, or even a sharp knife if the roots are tough, gently pull or cut the plant apart into smaller sections. Each division should have a good amount of roots and at least one healthy shoot.
- Replant Immediately: Pot up your divisions into their own containers using your well-draining mix, or replant them directly into their new garden spots. Water them in well.
The “Secret Sauce” (Pro Tips)
Here are a couple of things I’ve learned over the years that really seem to help Townsendia cuttings take off:
- Avoid Over-Wetting the Leaves: When you water your cuttings, especially if they’re in a tray, try your best not to let the leaves sit in water. This is a sure-fire way to encourage rot. A mister can be your best friend for keeping the foliage moist without waterlogging the soil.
- Embrace Bottom Heat: Townsendia roots really appreciate a little warmth. If you’re using cuttings, placing your pots on a heated propagator or a seed starting mat set to around 70-75°F (21-24°C) can significantly speed up root development. You’ll be amazed at how much faster they respond.
Aftercare & Troubleshooting
Once your cuttings or divisions are planted, the real work begins!
- Provide Bright, Indirect Light: Place your new plants in a location that gets plenty of bright light, but avoid direct, hot sun, especially at first. A greenhouse, a bright windowsill, or a shaded spot outdoors can work well.
- Maintain Consistent Moisture: The soil should be kept consistently moist but not soggy. You should be able to feel a slight give when you poke the soil, but it shouldn’t feel waterlogged.
- Check for Roots: This is the exciting part! After a few weeks, you can gently tug on a cutting. If it offers resistance, it’s likely rooted. You might also see new leaf growth, which is a good sign. Divisions will typically show new growth quite quickly.
- Signs of Trouble: The most common issue you’ll face is rot. If a cutting wilts dramatically, turns mushy and black at the base, or if the leaves start to yellow and drop off despite consistent watering, rot is likely. This usually means it’s too wet and not enough airflow. If you see this happening, remove the affected cutting immediately to prevent it from spreading to others. Sometimes, you can salvage a cutting if you catch it very early by trimming away the rotted part and dipping the healthy bit in rooting hormone again, but honestly, it’s often a sign that the conditions weren’t quite right.
A Encouraging Closing
Propagating Townsendia jonesii is a journey, and like any good garden project, it requires a bit of patience. Don’t be discouraged if your first attempt isn’t a resounding success. Every gardener has their plant casualties! Just keep observing, keep learning, and enjoy the process of nurturing new life. Those little blooms will be so worth it, and you’ll feel an extra special connection to them because you helped them grow. Happy propagating!
Resource:
https://identify.plantnet.org/k-world-flora/species/Townsendia%20jonesii%20(Beaman)%20Reveal/data