Oh, hello there, fellow plant enthusiast! Come on in, pull up a chair. I’ve got some fresh coffee brewing, and I’m just itching to chat with you about one of my absolute favorite sundews: Drosera capensis, the Cape Sundew.
A Little Dazzle for Your Desktop (or Conservatory!)
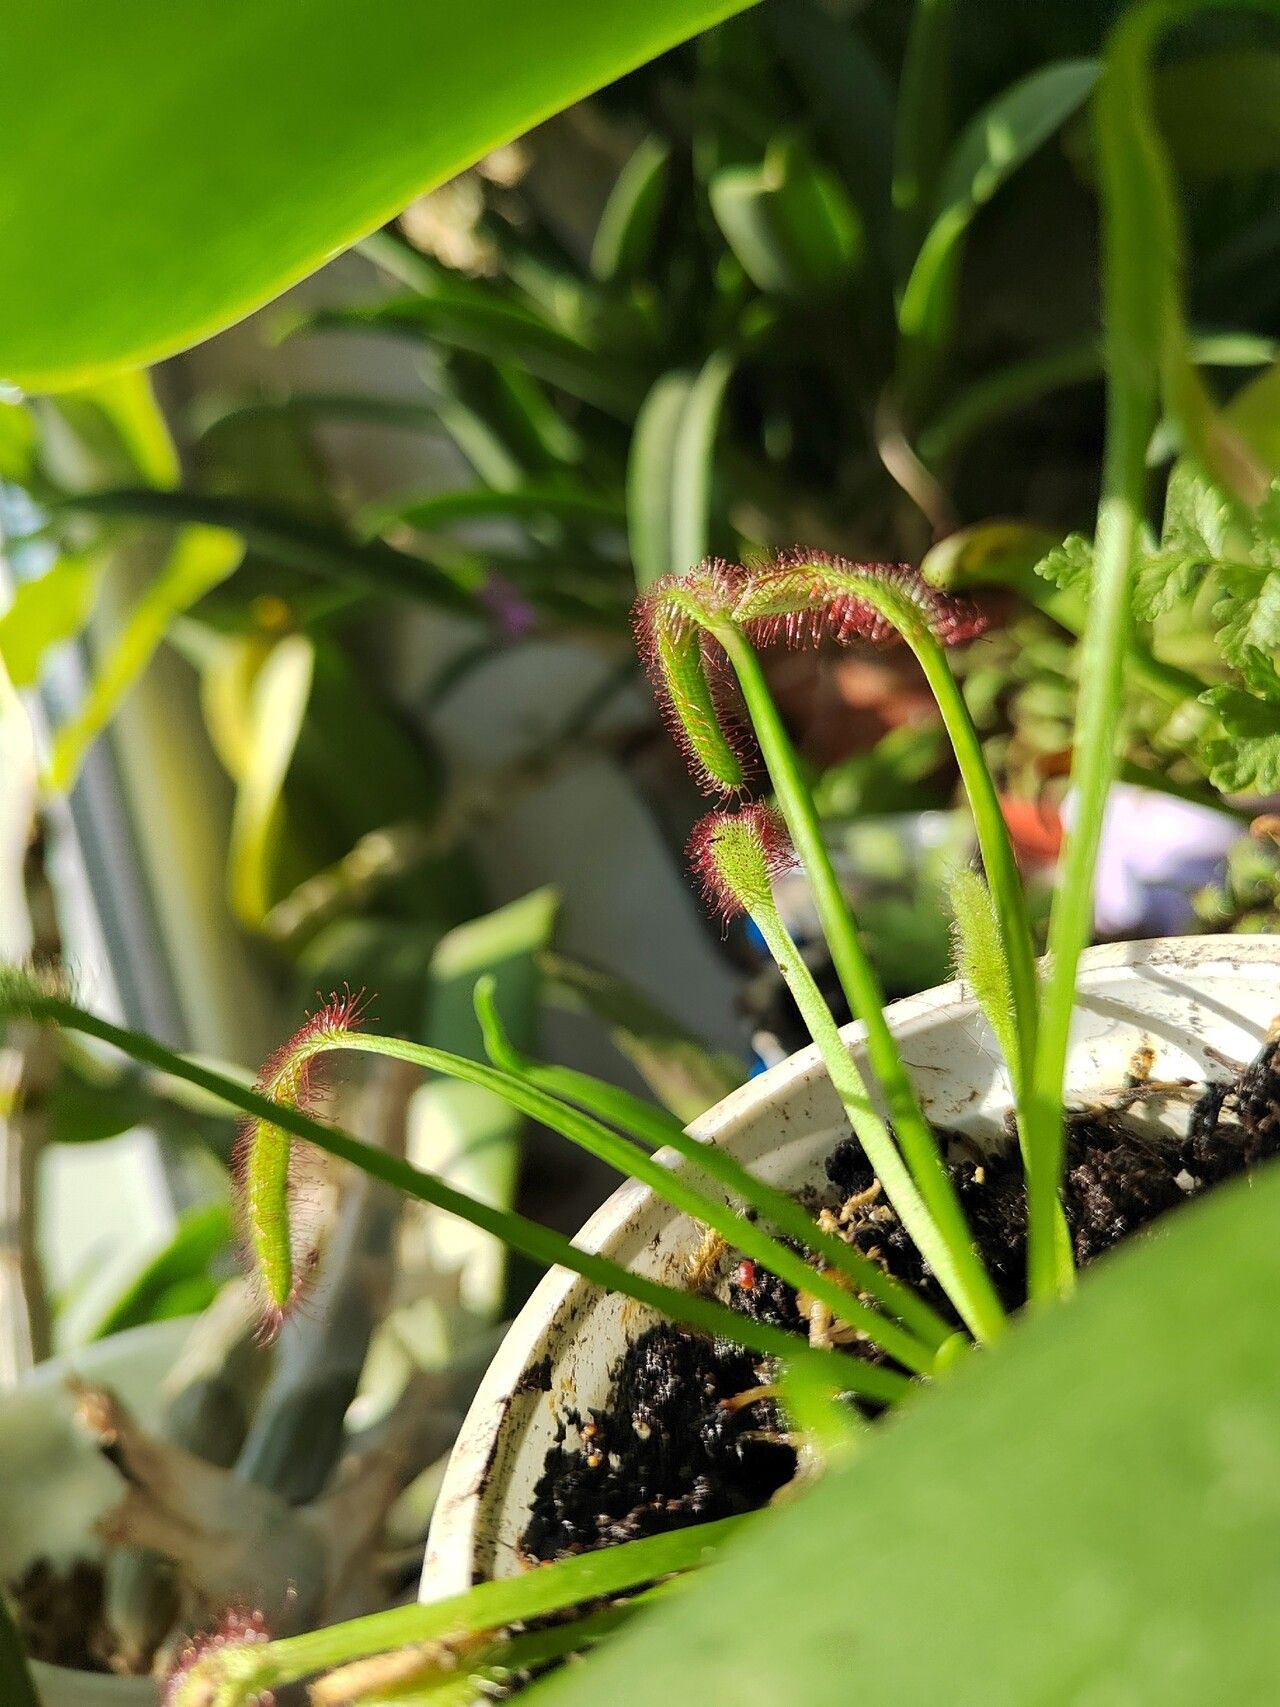
There’s something truly magical about Drosera capensis. Its long, elegant leaves are adorned with glistening dew drops that aren’t just pretty; they’re a deadly lure for tiny insects! Watching this plant catch its food is endlessly fascinating. And the best part? Propagating them is surprisingly straightforward. Even if you’re just dipping your toes into the world of carnivorous plants, you’ll find this one to be incredibly rewarding.
When to Get Your Hands Dirty
The happiest time to propagate your Drosera capensis is during its active growing season. Think late spring through summer. This is when the plant is bursting with energy, and your cuttings will be more inclined to get started on their new life. You can also have success in early autumn, but I find the summer months give you a little extra nudge.
Your Essential Propagation Toolkit
Getting ready for a propagation session is half the fun! Here’s what I always have on hand:
- Peat Moss and Perlite (or Sand): A 50/50 mix is my go-to. It needs to be water-retentive but also airy. Avoid regular potting soil; it’s too heavy for these sensitive little guys.
- Sterile Potting Mix: Sometimes I opt for a pre-made carnivorous plant mix, which is already perfectly balanced.
- Sharp, Clean Scissors or a Razor Blade: A sterile cutting tool is crucial to prevent disease. I like to wipe mine down with rubbing alcohol before and after.
- Distilled Water, Rainwater, or Reverse Osmosis (RO) Water: This is non-negotiable for carnivorous plants. Tap water minerals can harm them.
- Small Pots or Trays: Seedling trays or small plastic containers work beautifully.
- Optional: Clear Plastic Bag or Dome: This creates a humid mini-greenhouse, which is a real boost for cuttings.
- Optional: Long Tweezers: These are handy for gently placing cuttings or moving them around.
Let’s Get Propagating!
There are a couple of super effective ways to make more Drosera capensis. I’ll walk you through my favorites.
Method 1: The Leaf Pulling & Water Trick
This is often the easiest and most satisfying method for Drosera capensis.
- Select a Healthy Leaf: Look for a mature, vibrant leaf near the base of the plant.
- Gently Pull: Hold the main stem of the leaf firmly and gently pull it downwards. You want to get a small bit of the white basal tissue attached to the leaf. It should detach with a slight tearing sensation. If you don’t get any white tissue, it probably won’t root well.
- Prepare Your Water: Get a shallow dish or tray and fill it with your distilled, rain, or RO water. You only need about a half-inch of water.
- Place the Leaf: Lay the leaf on top of the water, making sure the entire leaf blade is out of the water but the white basal end is submerged. This is important! The water keeps the end moist while the air allows the leaf to breathe.
- Find the Right Spot: Place the tray in a bright location, but out of direct, scorching sun. Bright, indirect light is perfect.
- Patience is Key: Within a few weeks, you’ll start to see tiny plantlets emerging from the white end of the leaf. They’ll grow roots and eventually detach themselves.
Method 2: Stem Cuttings (for the Bushier Plants)
If your plant is getting a bit leggy or you want to propagate a specific variety, stem cuttings are great.
- Take a Cutting: Using your sterilized scissors or razor blade, cut a healthy stem section that is about 2-3 inches long. Try to get a piece with a few leaves on it. I like to make my cut just below a node (where a leaf attaches to the stem).
- Prepare the Potting Mix: Fill a small pot or tray with your peat moss and perlite mix. Moisten it thoroughly with your pure water.
- Plant the Cutting: Make a small hole in the soil with your finger or a pencil. Gently insert the cut end of the stem into the hole. Firm the soil gently around it to ensure good contact.
- Create Humidity: This is where the clear plastic bag or dome comes in handy. Cover the pot to create a high-humidity environment.
- Placement: Just like with the leaf method, place the pot in a bright spot with indirect light.
- Watering: Keep the soil consistently moist but not waterlogged. You can water from the bottom by placing the pot in a tray with water.
The “Secret Sauce” from My Garden to Yours
Alright, let’s talk about those little secrets that can make all the difference.
- Don’t Let the Leaves Touch the Water: When I first started, I used to plunge the whole leaf in. Big mistake! The dew is what attracts the bugs, and the leaf needs to breathe. Just the white basal end should be in contact with the water.
- Bottom Heat is Your Friend: If you find your cuttings are taking an awfully long time to root, consider a seedling heat mat. Just place your propagation tray on top of it. A little warmth can really speed things up, especially if your indoor temperatures are on the cooler side.
- The Water Level: For the leaf method, I prefer to keep the water level very low – just enough to cover the white part of the leaf. Fresh water is key, so I change it every few days to prevent stagnation and potential fungal issues.
Nurturing Your New Sprouts & What to Do if Things Go Wrong
Once you see those little roots appearing, it’s time for a new phase of care.
- Transitioning: When the new plantlets are a decent size and have developed their own roots (you’ll see them!), you can carefully transplant them into their own small pots filled with your standard carnivorous plant mix.
- Keep it Humid (Initially): For the first week or two after transplanting, continue to keep them in a humid environment. You might still use a plastic bag or dome, gradually removing it as they acclimatize.
- Light: Gradually introduce them to brighter light. They’ll thrive in bright, indirect light.
- Watering: Always keep them watered with your pure water, using the tray method (sitting the pot in a shallow tray of water).
Now, what about when things don’t go as planned? The most common issue is rot. If you see the cutting turning black and mushy, it’s usually a sign of too much moisture and not enough air circulation, or a contaminated cutting. This is why sterile tools and the right soil mix are so vital. If rot sets in, unfortunately, that particular cutting is likely lost. Don’t get discouraged; just try again with a fresh one!
Happy Growing!
Propagating Drosera capensis is a wonderful way to multiply these captivating plants. It takes a little patience, a touch of observation, and the right conditions, but the reward of seeing new life emerge is truly special. Don’t be afraid to experiment and learn from each attempt. Before you know it, you’ll have a whole collection of these delightful sundews to admire! Happy propagating!
Resource:
https://identify.plantnet.org/k-world-flora/species/Drosera%20capensis%20L./data