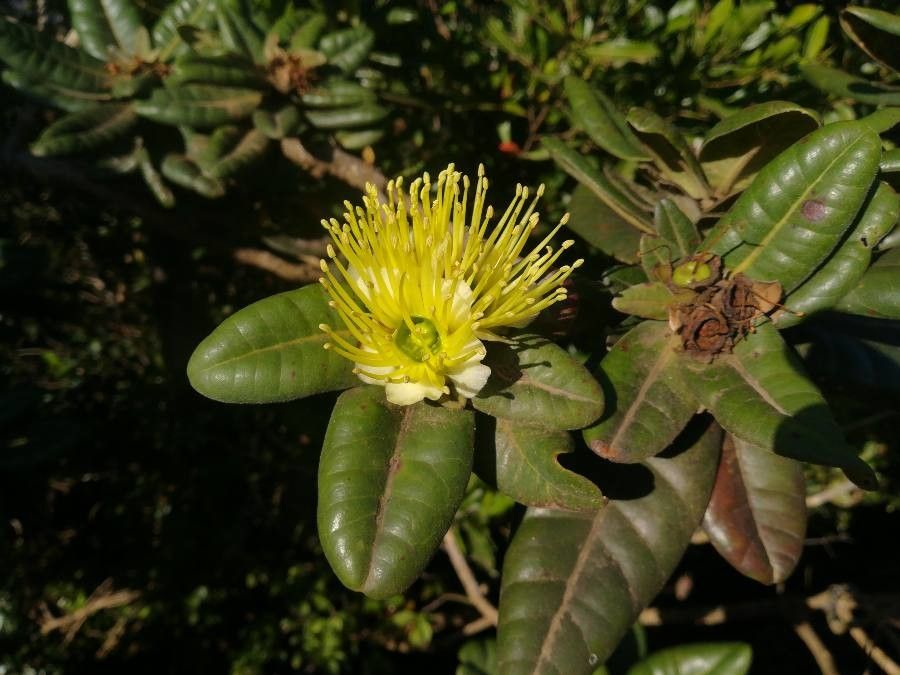
Oh, hello there! Come on in, grab a mug. Let’s chat about a truly stunning plant: Xanthostemon macrophyllus. You know, the one with those glorious, vibrant yellow bottlebrush-like blooms? They truly are a sight for sore eyes, aren’t they? I’ve always been captivated by their cheerful display, and trust me, coaxing them into new life is one of the most rewarding gardening experiences. Now, if you’re new to the propagation game, Xanthostemon macrophyllus can be a little… temperamental. It’s not the absolute easiest to start from scratch, but with a bit of patience and the right approach, you’ll be well on your way.
The Best Time to Start
My personal favorite time to get my hands dirty with Xanthostemon macrophyllus is during its active growth phase, generally in late spring or early summer. The plant is full of energy then, and cuttings taken at this time tend to root more readily. You’re looking for stems that are firm and semi-hardwood, not brand new, floppy growth, nor wood that’s too old and stiff. Think of it like a firm pencil – that’s the sweet spot.
Supplies You’ll Need
Here’s what I always have on hand to make this process smooth sailing:
- Sharp pruning shears or secateurs: Clean cuts are crucial.
- Rooting hormone: This is a lifesaver for encouraging those roots to sprout. I prefer a powdered type for stem cuttings.
- A well-draining potting mix: I like a blend of equal parts peat moss (or coco coir), perlite, and coarse sand. This ensures plenty of air around the roots.
- Small pots or seedling trays: Cleanliness is key!
- A plastic bag or propagator: To create a humid microclimate.
- Spray bottle: For misting.
- Optional but highly recommended: A heat mat: Consistent warmth really gives those roots a boost.
Propagation Methods
For Xanthostemon macrophyllus, I’ve found stem cuttings to be the most reliable method.
- Take Your Cuttings: Select a healthy, vigorous stem from your parent plant. Using your clean pruning shears, cut a piece that’s about 4 to 6 inches long. Make the cut just below a leaf node (where a leaf attaches to the stem).
- Prepare the Cuttings: Gently remove the lower leaves from your cutting, leaving just a few at the tip. If the leaves are large, you can even gently cut them in half to reduce water loss.
- Apply Rooting Hormone: Dip the cut end of the stem into your rooting hormone, ensuring it’s coated well. Tap off any excess.
- Plant Your Cuttings: Fill your clean pots or trays with your prepared potting mix. Make a hole in the center with a pencil or your finger, then gently insert the cutting, making sure the rooting hormone stays on the stem. Firm the soil gently around the base.
- Create Humidity: Water the soil lightly until it’s evenly moist, but not soggy. Then, cover the pot or tray with a clear plastic bag or place it in a propagator. This traps moisture and creates a humid environment, which is vital for cuttings. If you’re using individual pots, I often pop each one into a clear plastic bag secured with a rubber band.
- Provide Warmth: Place your cuttings in a bright spot that receives indirect light. Ideally, you’ll have them on a heat mat, as consistent, gentle warmth from below really encourages root development.
The “Secret Sauce” (Pro Tips)
Here are a couple of things I’ve learned over the years that make a difference:
- Don’t Let Those Lower Leaves Touch the Soil: I can’t stress this enough! Any leaves submerged in the potting mix are an invitation for rot. Either remove them completely or ensure they are well above the soil line.
- Mist, Don’t Drench: While humidity is key, you don’t want standing water on the leaves. Give them a light misting with your spray bottle every day or two, just to keep them looking perky. You’ll get a feel for it!
- Patience with the Heat: If you can use a heat mat, do it. That consistent bottom heat is like giving your cuttings a warm hug, signaling them it’s time to get rooting. It’s often the difference between success and waiting around forever.
Aftercare & Troubleshooting
Once you start seeing new growth appearing on your cuttings, that’s a good sign that roots are forming! You can gently try to tug on a cutting – if there’s resistance, roots are developing. You can then gradually acclimate your new plants to drier air by opening the plastic bag or propagator a little each day over a week. Keep the soil consistently moist but never waterlogged.
The biggest enemy here is rot. If your cuttings suddenly turn mushy, black, or fall over, that’s a sign of too much moisture and not enough air circulation. If you see this happening, remove the affected cutting immediately to prevent it from spreading. Overwatering is the usual culprit, so dial it back and ensure your potting mix is indeed well-draining. Also, ensure they aren’t sitting in a chilly draft.
A Encouraging Closing
So there you have it! Propagating Xanthostemon macrophyllus takes a little care, but watching those tiny roots emerge and seeing your new plants develop is incredibly satisfying. Be patient, observe your cuttings, and don’t be discouraged if every single one doesn’t make it. Gardening is a journey, and every little success is worth celebrating. Happy propagating!
Resource:
https://identify.plantnet.org/k-world-flora/species/Xanthostemon%20macrophyllus%20Pamp./data