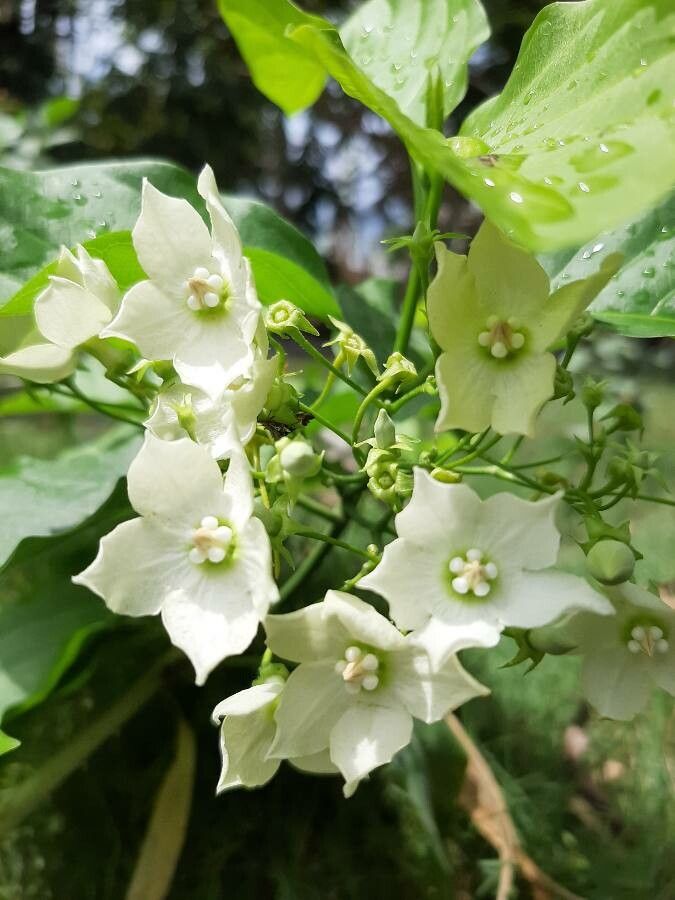
Hello fellow plant lovers! Today, we’re diving into the delightful world of Vallaris glabra, often called “Bread Flower” for its wonderfully fragrant, waxy white blooms that indeed carry a sweet, almost milky aroma. If you love a plant that fills your garden or home with intoxicating scent—and don’t we all?—then Vallaris glabra is a must-have. It’s a vining beauty that absolutely thrives in warmer climates, a real showstopper with its delicate flowers. I’m happy to report that propagating this gem is surprisingly accessible, even for those of you just starting your gardening journey. It’s a wonderfully rewarding way to share this fragrant treasure with friends or simply expand your own collection.
The Best Time to Start
The sweet spot for propagating Vallaris glabra is definitely late spring through early summer. This is when the plant is in its most vigorous growth phase. You’ll be looking for healthy, relatively new stems that are not yet woody. Think of them as still being a bit flexible, not stiff and brittle. Giving your cuttings a good start during this active growing period significantly boosts their chances of success.
Supplies You’ll Need
Before we get our hands dirty, let’s gather our tools:
- Sharp Pruning Shears or a Clean Knife: Essential for making clean cuts. Dull tools can crush the stems, making it harder for them to root.
- Rooting Hormone (Optional but Recommended): A little sprinkle can really give your cuttings a boost. Look for one formulated for softwood cuttings.
- Light, Well-Draining Potting Mix: A good blend is typically 50% peat moss or coco coir and 50% perlite or coarse sand. This ensures excellent aeration and prevents waterlogging.
- Small Pots or Seedling Trays: Clean pots with drainage holes are key. Small nursery pots work perfectly.
- Clear Plastic Bag or Humidity Dome: To maintain a humid environment for your cuttings while they root.
- Watering Can with a Fine Rose Attachment: For gentle watering.
Propagation Methods
My go-to method for Vallaris glabra is stem cuttings, and it’s quite straightforward.
- Take Your Cuttings: Select a healthy stem and make a clean cut just below a leaf node (where a leaf attaches to the stem). Each cutting should be about 4-6 inches long and have at least two or three sets of leaves.
- Prepare the Cuttings: Gently remove the lower leaves, leaving just one or two sets at the top. This prevents leaves from rotting in the soil and encourages root development. You can even carefully slice the base of the stem diagonally to expose more surface area for rooting.
- Apply Rooting Hormone (If Using): Dip the cut end into your rooting hormone. Tap off any excess.
- Plant Your Cuttings: Fill your small pots with your prepared potting mix. Moisten the soil lightly. Make a little hole with your finger or a pencil and insert the cutting, ensuring at least one leaf node is buried in the soil. Gently firm the soil around the stem.
- Create a Humid Environment: Water the soil gently. Then, cover the pot with a clear plastic bag (supported by stakes so it doesn’t touch the leaves) or place it under a humidity dome. Place the pots in a bright spot, but out of direct, harsh sunlight.
The “Secret Sauce” (Pro Tips)
Here are a few little tricks I’ve picked up over the years that make a big difference:
- Bottom Heat is Your Friend: If you have a heating mat designed for seedlings, placing your pots on it can significantly speed up rooting. The warmth encourages root formation from the base of the cutting.
- Don’t Drown Your Cuttings: While they need moisture, soggy soil is the enemy. It breeds fungus and rot. Water only when the top inch of soil feels dry to the touch. It’s better to be slightly too dry than too wet.
- Rotate Your Pots: Sometimes, one side of the cutting gets more light than the other. Gently rotating your pots every few days ensures even growth and encourages the cutting to root uniformly.
Aftercare & Troubleshooting
Once your cuttings have started to root—you’ll see new leaf growth or feel a slight resistance when you gently tug on the stem—it’s time for a little extra attention. Gradually acclimate them to normal room humidity by opening the plastic bag a little more each day over a week. Continue to water them when the top soil dries out.
The most common problem you might encounter is rot. If you notice your cutting turning black and mushy, it’s likely due to too much moisture or a lack of air circulation. Unfortunately, rotted cuttings rarely recover. On the flip side, if a cutting simply fails to root and looks dried out, it might not have been vigorous enough to begin with. Don’t get discouraged; gardening is a process of learning and trying again!
A Encouraging Closing
Propagating Vallaris glabra is a journey, my friends. Be patient with your new little plants. Observe them, provide them with consistent care, and celebrate every sign of new growth. There’s a unique joy in nurturing a plant from a tiny cutting into a thriving specimen, and the sweet scent of your home-grown Bread Flower will be all the reward you need. Happy propagating!
Resource:
https://identify.plantnet.org/k-world-flora/species/Vallaris%20glabra%20(L.)%20Kuntze/data