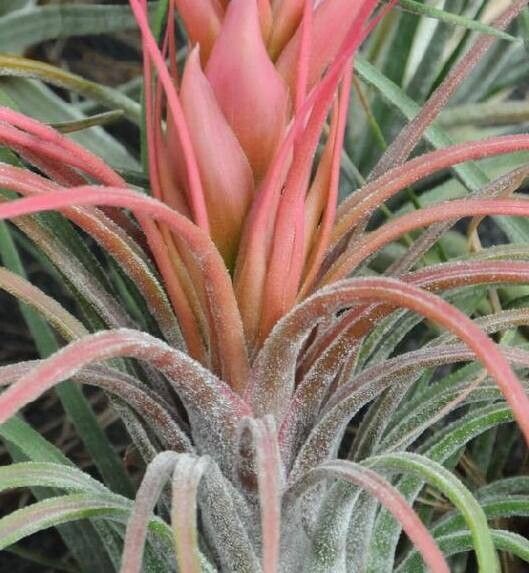
Hello there, fellow plant lovers! It’s so good to have you join me today. We’re going to dive into the wonderful world of Tillandsia delicata, a plant that brings such a delicate charm to any space. If you’re like me, you find it incredibly satisfying to nudge a new plant into existence. And with Tillandsia delicata, it’s a truly rewarding journey. Now, are they an easy breezy propagation for absolute beginners? Honestly, they can be a little finicky, but nothing we can’t tackle together with a bit of care and a sprinkle of patience.
The Best Time to Start
Timing is everything, as they say, and it’s especially true when propagating! For Tillandsia delicata, the sweet spot is late spring to early summer. This is when the plant is actively growing, brimming with energy, and the warmer temperatures create a happy environment for new roots to develop. You’ll have the most success if you can propagate from plants that are already mature and showing signs of vigorous growth.
Supplies You’ll Need
Gathering your supplies beforehand makes the whole process much smoother. Here’s what you’ll want to have on hand:
- Sharp, sterile pruning shears or a clean knife: Crucial for making clean cuts.
- Fine-mist spray bottle: For gentle watering.
- Small pots or containers: About 4-6 inches in diameter, with good drainage.
- Chunky, well-draining potting mix: I like a mix of perlite, orchid bark, and a tiny bit of coco coir. Think airy!
- Optional: Hormone rooting powder: While not strictly necessary for all Tillandsia, it can give a little boost.
- Optional: A small pebble or porous material: To help stabilize very young pups.
Propagation Methods
Tillandsia delicata primarily propagates through offsets, often called “pups.” These are miniature versions of the mother plant that grow from the base.
-
Identify the Pups: Look for small plantlets emerging from the base of your mature Tillandsia. They usually appear when the mother plant is healthy and well-established. You want to wait until these pups are at least a third the size of the mother plant before attempting to separate them. This ensures they have enough stored energy to survive on their own.
-
Gentle Separation: This is the most critical step. Using your sterile pruning shears or knife, carefully make a clean cut as close to the base of the pup as possible, separating it from the mother plant. Try to get a little bit of the pup’s own base attached. Sometimes, with very young pups, you can gently twist them off if they are already developing their own root structure. Be patient and don’t force it.
-
Allow to Callus: After separating the pup, place it on a dry paper towel in a well-ventilated spot, out of direct sunlight, for about 24-48 hours. This allows the cut end to callus over, which helps prevent rot from setting in once you plant it.
-
Planting Your Pup: Fill your small pot with your chunky, well-draining mix. Make a small indentation in the center and gently place the callused end of the pup into it. You can lightly firm the mix around the base to help it stand upright. If it’s wobbly, a small pebble placed against its base can provide support.
The “Secret Sauce” (Pro Tips)
Here are a few things I’ve learned over the years that make a big difference:
- Don’t Bury the Base Too Deep: While you want the pup to feel secure, resist the urge to bury its leaves. The base needs air circulation to prevent rot. Just tuck the very bottom part into the mix.
- Mimic Natural Humidity: Tillandsia love a good misty environment. Once planted, I like to give the air around the new pups a gentle misting every other day, but I avoid directly saturating the soil. This helps encourage root development without waterlogging the young plant.
- Warmth Encourages Growth: If you have a heat mat for seedlings, placing the pot on it can provide gentle bottom heat. This helps kickstart root formation. Just make sure it’s not too hot – think lukewarm bath, not a hot tub!
Aftercare & Troubleshooting
Once your pup is planted and callused, the real waiting game begins.
- Watering: Water sparingly. When you do water, aim to moisten the potting mix, but let it dry out thoroughly between waterings. Overwatering is the most common killer of new propagations. I usually mist the leaves every few days, and if the potting mix feels bone dry, I’ll give it a very light watering.
- Light: Place your new pup in bright, indirect light. No scorching sun for these delicate youngsters!
- Signs of Trouble: The biggest red flag is rot. If the base of your pup starts to turn mushy or black, it’s a sign of too much moisture. You might also see wilting or yellowing leaves. If you spot rot, try to remove the affected part with a sterile knife. If it’s widespread, it might be time to start again. If you see no signs of new growth after a month or two, don’t despair! They can be slow starters. Perhaps try misting a little more often, or if you have one, try that gentle bottom heat.
A Word of Encouragement
Propagating Tillandsia delicata is a journey that requires a bit of finesse, but it’s incredibly rewarding. Be patient, observe your little ones, and celebrate every tiny sign of progress. You’ve got this! Happy propagating!
Resource:
https://identify.plantnet.org/k-world-flora/species/Tillandsia%20delicata%20Ehlers/data