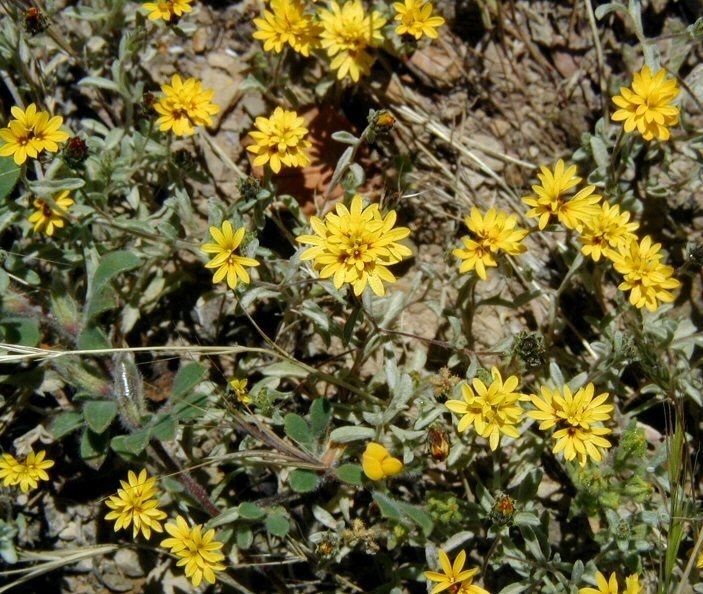
Hey there, fellow plant lovers! I’m so excited to chat with you today about a real gem: Lessingia tenuis. If you’re looking for a splash of delicate beauty, a plant that whispers rather than shouts, this might just be your next garden obsession. Its fine, almost airy foliage and charming little flowers are simply lovely, especially when they catch the sunlight. And the best part? Growing more of these beauties yourself is incredibly rewarding. Now, I’ll be honest, Lessingia tenuis isn’t the absolute easiest plant for a total beginner to propagate, but with a little patience and these tips, you’ll be well on your way.
The Best Time to Start
For this delicate California native, spring is your champion. Specifically, I like to start taking cuttings just as the plant is waking up from its winter slumber and before the intense summer heat really kicks in. Late spring, when the days are getting longer and warmer, is often when you’ll see the most vigorous, healthy new growth – the perfect stuff for taking cuttings.
Supplies You’ll Need
Gathering your tools beforehand makes the whole process so much smoother. Here’s what I usually have on hand:
- Sharp Pruning Shears or a Craft Knife: Cleanliness is key to preventing disease. Sterilize them with rubbing alcohol.
- Rooting Hormone (Optional but Recommended): A powder or gel helps encourage faster root development.
- Well-Draining Potting Mix: I often use a mix of equal parts peat moss or coco coir, perlite, and a bit of coarse sand. For Lessingia, good drainage is non-negotiable.
- Small Pots or Trays: Clean, small containers with drainage holes are perfect.
- Plastic Bag or Humidity Dome: To create a mini-greenhouse effect.
- Clear Water: For rinsing your tools and, if you go that route, for water propagation.
- Labels: To remember what you’ve planted and when!
Propagation Methods
While division can work for some plants, for Lessingia tenuis, stem cuttings are generally the most successful method.
Stem Cuttings
- Select Your Cuttings: On a healthy, actively growing plant, choose non-flowering, softwood stem tips that are about 3-4 inches long. Look for stems that are flexible but not floppy. Gently snap or cut just below a leaf node. A leaf node is where a leaf attaches to the stem, and this is where roots are most likely to form.
- Prepare the Cuttings: Carefully remove the lower leaves from the cutting, leaving only a few at the very top. This prevents them from rotting when buried in the soil.
- Apply Rooting Hormone (If Using): Dip the cut end of the stem into the rooting hormone, tapping off any excess powder.
- Plant Your Cuttings: Moisten your well-draining potting mix. Make a small hole in the center of the pot with your finger or a pencil. Gently insert the cut end of the prepared cutting into the hole, and firm the soil around it. Don’t plant too many cuttings too close together; give them a little space.
- Create a Humid Environment: Water the soil lightly until it’s evenly moist, but not soggy. Then, cover the pot with a clear plastic bag or a humidity dome, making sure the leaves don’t touch the plastic. You can use stakes to keep the bag from collapsing onto the cuttings.
- Place in Bright, Indirect Light: Find a warm spot that receives bright, filtered sunlight. Avoid direct sun, which can scorch the delicate cuttings.
The “Secret Sauce” (Pro Tips)
Here are a couple of things I’ve learned over the years that really make a difference with plants like Lessingia:
- Bottom Heat is Your Friend: If you have a heat mat designed for seedlings, placing your pots on it can significantly speed up the rooting process. A gently warmed soil encourages those roots to form much faster.
- Patience with Airflow: While you want to keep them humid, it’s crucial to “vent” your cuttings daily for a few minutes. Just lift the plastic bag or dome. This allows for air circulation and helps prevent fungal diseases from taking hold, which is a common pitfall with cuttings.
Aftercare & Troubleshooting
Once you start to see a little bit of new growth emerging from the top of your cutting – usually after 4-6 weeks, but sometimes longer – that’s a good sign the roots are developing! You can tug very gently on the cutting. If you feel resistance, it’s rooted!
- Gradually Acclimate: Once roots have formed, slowly begin to acclimate your new plants to lower humidity. Start by removing the plastic bag for longer periods each day.
- Watering: Continue to water when the top inch of soil feels dry. It’s better to underwater slightly than to overwater at this stage.
- Troubleshooting Rot: The biggest enemy of stem cuttings is rot. If you notice your cuttings are turning mushy, black, or mushy at the base, it’s usually a sign of overwatering or poor air circulation. Unfortunately, once rot sets in, it’s very difficult to save the cutting. Don’t be discouraged if some don’t make it – it’s all part of learning! If you suspect rot, remove the affected cutting immediately and check your watering and ventilation habits.
So there you have it! Propagating Lessingia tenuis is a wonderful way to expand your garden and share its charm. Remember to be patient, observe your cuttings closely, and celebrate every bit of progress. Happy growing!
Resource:
https://identify.plantnet.org/k-world-flora/species/Lessingia%20tenuis%20(A.Gray)%20Coville/data