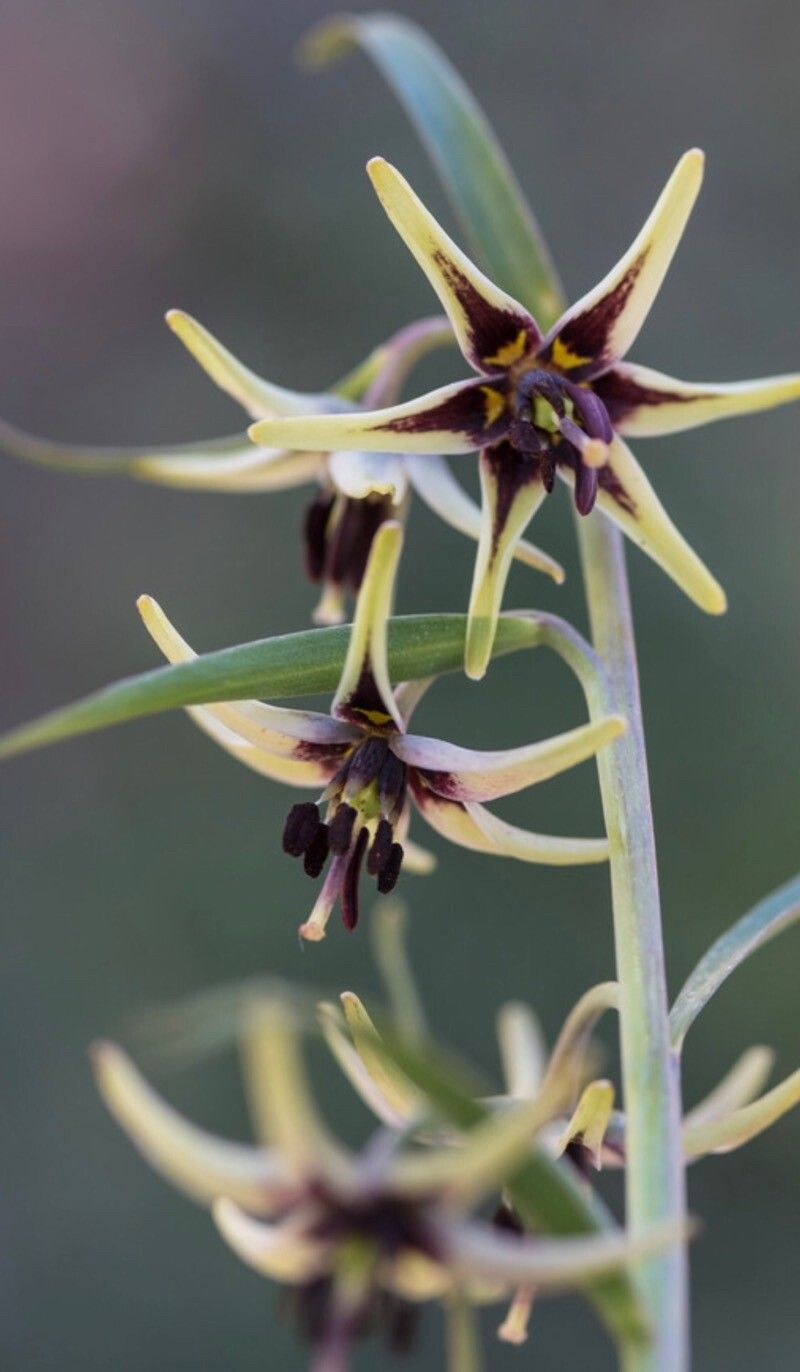
Hello fellow garden lovers! Today, we’re diving into the charming world of Fritillaria brandegeei. If you’ve ever been captivated by its delicate, bell-shaped flowers and unique charm, you know why it’s such a sought-after treasure. I’ve spent years admiring these beauties, and let me tell you, propagating them is a truly rewarding journey. It’s not always the easiest plant to begin with, but with a little patience and some insider know-how, you’ll be well on your way.
The Best Time to Start
For Fritillaria brandegeei, timing is everything! The absolute sweet spot for propagation is late summer to early fall, just as the plant is finishing its active growth and beginning to go dormant. You’ll notice the foliage starting to yellow and die back – this is your cue! Waiting until this stage ensures the bulbs have stored enough energy to support new growth and root development.
Supplies You’ll Need
Gathering your tools beforehand makes the whole process smoother. Here’s what I usually have on hand:
- Well-draining potting mix: A blend of perlite, grit, and a good quality potting soil works wonders. You want to avoid anything that holds too much moisture.
- Small pots or trays: Clean pots are a must to prevent disease.
- Sharp, sterile pruning shears or a clean knife: For making precise cuts. Always sterilize with rubbing alcohol between cuts!
- Dibber or pencil: To make planting holes.
- Watering can with a fine rose: For gentle watering.
- Optional: Rooting hormone: While not always essential for Fritillaria, it can give an extra boost.
- Optional: Small labels: To keep track of your new seedlings.
Propagation Methods
Fritillaria brandegeei is primarily propagated through division of bulbs and, with a bit more patience, from offsets (bulblets).
Division of Bulbs
This is the most straightforward method.
- Unearth the bulbs: Gently dig up your Fritillaria plant in late summer or early fall. Be careful not to damage the bulbs! You’ll likely find one main bulb with smaller ones attached or nearby.
- Separate the bulbs: Carefully tease apart any offsets or smaller bulblets from the main bulb. If they are firmly attached, use your sterile knife or shears to make a clean cut.
- Inspect and trim: Remove any damaged or diseased parts of the bulbs. You can trim any excessively long roots, but avoid going overboard.
- Replant immediately: Fill your chosen pots with your well-draining mix. Make planting holes with your dibber or pencil, ensuring the hole is deep enough for the bulb. Plant the bulbs about 2-3 inches deep, with the pointed end facing upwards.
- Water gently: Water lightly to settle the soil around the bulbs.
Growing from Offsets (Bulblets)
If your main bulb has produced numerous tiny bulblets, these can be carefully separated and grown on. It will take a bit longer for these to mature into flowering-sized bulbs.
- Separate the bulblets: As described above, gently detach these smaller bulbs during the division process.
- Plant in a dedicated tray: Use a shallow tray filled with your well-draining mix. Plant the tiny bulblets just beneath the surface, giving them a little space.
- Water and wait: Water gently and place the tray in a cool, dry location, like a shaded part of the garden or an unheated greenhouse. They might not show much top growth for a while, but the roots will be developing underground.
The “Secret Sauce” (Pro Tips)
Here are a couple of little tricks I’ve learned over the years that can make a big difference:
- Don’t overwater dormant bulbs! This is probably the most common mistake. When the bulbs are dormant and you’ve just potted them, they need barely any moisture. Just enough to keep them from shriveling. Excess water at this stage is a fast track to rot. Let them settle in and start showing signs of active growth before increasing watering.
- Consider a light dusting of cinnamon. After dividing the bulbs and before replanting, I sometimes lightly dust the cut surfaces with ground cinnamon. It acts as a natural antifungal agent and can help prevent rot, especially if you’ve had to make any larger cuts.
Aftercare & Troubleshooting
Once your newly planted bulbs start to show signs of life – little green shoots pushing through the soil – you can begin to water more regularly. Keep the soil consistently moist but never waterlogged. As they grow, ensure they receive good light, but avoid harsh, direct midday sun.
The biggest challenge with Fritillaria begins with rot. If you see your shoot wilting and turning mushy, or if the bulb itself feels soft and discolored when you gently probe the soil, it’s likely rot. This is almost always due to overwatering or poor drainage. If it’s localized, you might be able to trim away the rotten bits and replant in fresh, dry soil. If the rot has taken hold of the whole bulb, sadly, it’s time to discard it.
Another sign of trouble can be a lack of growth. If you’ve planted at the right time and followed the steps but see absolutely nothing after several weeks, it could be that the bulb was compromised before you even started, or it didn’t get enough of a dormant period. Don’t despair; some bulbs are just shy!
A Encouraging Closing
Propagating Fritillaria brandegeei is a beautiful dance with nature. It asks for a bit of knowledge, precise timing, and a whole lot of patience. Don’t be discouraged if your first few attempts aren’t perfect. Every gardener has had their share of losses. Observe, learn, and most importantly, enjoy the process of coaxing new life from these enchanting bulbs. Happy gardening!
Resource:
https://identify.plantnet.org/k-world-flora/species/Fritillaria%20brandegeei%20Eastw./data