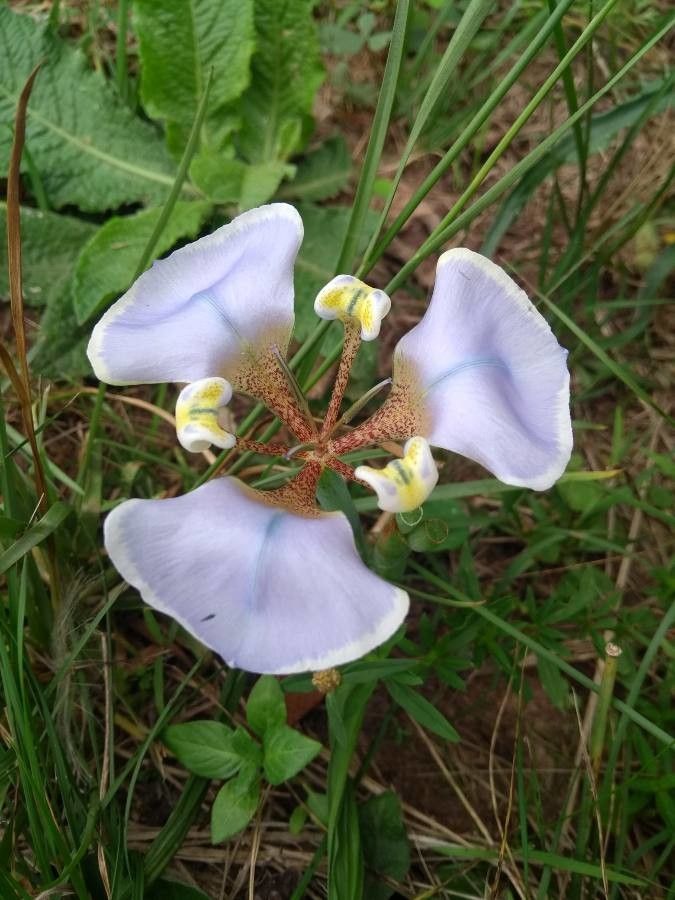
Hello, fellow garden enthusiasts! Today, we’re diving into the delightful world of Cypella unguiculata. If you’re anything like me, you adore those exotic, iris-like blooms that add a touch of the tropics to our gardens. They unfurl with such grace, often in vibrant shades of orange, yellow, or purple, and they have this wonderful habit of blooming sequentially, meaning a long show of color. Propagating these beauties is a fantastic way to expand your collection, share them with friends, or simply enjoy the magic of creating new life. Cypella unguiculata can be a tad on the fussy side, so it’s not always the easiest for absolute beginners, but with a little patience and these tips, I promise you can succeed!
The Best Time to Start
For Cypella unguiculata, the sweet spot for propagation is typically late spring or early summer. This is when the plants are actively growing after their winter dormancy. You’ll want to look for healthy, vigorous shoots or, if you’re dividing, a plant that’s showing good new growth. Starting too early in the spring, before the nights warm up, can lead to damping off, and trying it in late summer might not give the new cuttings enough time to establish before cooler weather arrives.
Supplies You’ll Need
Here’s what I usually have on hand when I’m getting ready to propagate:
- Sharp, clean pruning shears or a sharp knife: Essential for making clean cuts without crushing stems or roots. Sterilize them with rubbing alcohol between uses!
- Rooting hormone (powder or gel): While not always strictly necessary, it can significantly boost your success rate.
- Well-draining potting mix: A good blend for me is equal parts peat moss, perlite, and a little bit of seed-starting mix. You want it to hold moisture but not get waterlogged.
- Small pots or trays: Clean containers are a must. I like to use seedling trays or small individual pots with drainage holes.
- Watering can or spray bottle: For gentle watering.
- Labels and a marker: Trust me, you’ll thank yourself later for labeling your efforts!
- Clear plastic bags or domes: To create a humid environment for cuttings.
- Gloves (optional): To keep your hands clean.
Propagation Methods
Cypella unguiculata can be propagated primarily through division and, with a bit more care, stem cuttings.
Division (My Preferred Method)
This is usually the most straightforward and successful way to propagate Cypellas.
- Gently excavate: In late spring or early summer, when the plant is actively growing, gently dig up the entire clump. You want to disturb the roots as little as possible.
- Clean the roots: Carefully shake off excess soil. You might need to rinse the roots with water to clearly see the divisions.
- Identify the divisions: Look for natural breaks in the root structure. You’ll see where new shoots are emerging from older rhizomes or root masses. Each section with at least one healthy shoot and a good portion of root is a potential new plant.
- Separate the divisions: Using your hands or a clean knife, carefully pull or cut the clump apart. Avoid forcing it if it feels like it will damage the roots. If you’re having trouble, don’t be afraid to use your knife.
- Trim if necessary: If any roots are broken or damaged, trim them back with your clean shears. You can also trim back the foliage by about a third if it looks leggy.
- Pot them up: Plant each division in its own pot filled with your well-draining potting mix. Ensure the top of the rhizome or root crown is just at or slightly below the soil surface.
- Water gently: Water them in well, but avoid saturating the soil.
Stem Cuttings (A Bit More Adventurous)
This method is a bit trickier with Cypellas, but entirely doable if you’re feeling ambitious.
- Select your cuttings: In late spring or early summer, choose healthy, non-flowering stems. Look for stems that are about 4-6 inches long and have at least two sets of leaves.
- Make the cut: Using your clean shears or knife, make a clean cut just below a leaf node (where a leaf attaches to the stem).
- Prepare the cutting: Remove the lower leaves from the cutting, leaving just the top couple of sets. This prevents them from rotting in the soil. You can also dip the cut end into rooting hormone.
- Plant the cuttings: Fill small pots with your well-draining potting mix. Gently insert the prepared cuttings into the soil, ensuring the leaf nodes are buried.
- Create a humid environment: Water the soil lightly and then cover the pots with clear plastic bags, a plastic dome, or place the pots in a propagator. This traps moisture and humidity, which is crucial for cuttings to root.
- Provide warmth and light: Place the pots in a warm location with bright, indirect light. Avoid direct sun, which can scorch the delicate cuttings.
The “Secret Sauce”
- Don’t let the leaves touch the water (for stem cuttings): If your cuttings happen to be in a situation where leaves might dip into water (like if you’re using a propagation jar), this is a fast track to rot. Leaves in stagnant water just don’t fare well.
- Bottom heat works wonders: For stem cuttings, warmth from below really encourages root development. A heated propagation mat set to a temperature around 70-75°F (21-24°C) can make a huge difference in how quickly and successfully your cuttings root.
- Patience with divisions: Even with divisions, sometimes it takes a little while for the plant to show significant new growth. Don’t be tempted to dig them up too soon to check for roots. Give them at least 4-6 weeks to settle in.
Aftercare & Troubleshooting
Once your divisions or cuttings show signs of rooting (you’ll see new leaf growth or feel resistance when gently tugging on a cutting), it’s time for continued care.
- Gradual acclimation: If you’ve covered your cuttings, gradually remove the plastic over a week or so to let them adjust to normal humidity.
- Watering: Keep the soil consistently moist but not soggy. Water when the top inch of soil feels dry.
- Light: Continue to provide bright, indirect light. As they get stronger, you can gradually introduce them to more direct sunlight, but avoid harsh midday sun.
- Potting up cuttings: Once your stem cuttings have a good root system (you might see roots peeking through the drainage holes), you can pot them up into larger individual pots.
- Troubleshooting: The most common issue you’ll face is rot, which is usually a sign of overwatering or poor drainage. If a cutting turns mushy and black, it’s likely lost. For divisions, if a clump looks sickly, check the roots. Healthy roots are firm and white or tan; mushy, dark roots are a cause for concern. Ensure good air circulation around your plants.
A Bit More Patience, A Lot More Blooms
Propagating Cypella unguiculata might require a little extra attention, but the reward of seeing those beautiful blooms multiply in your garden is absolutely worth it. Be patient with your new plants, enjoy the process of nurturing them, and don’t be discouraged if every attempt isn’t a roaring success. Gardening is a journey of learning, and each experience teaches us something new. Happy propagating, and may your gardens be filled with stunning Cypellas!
Resource: