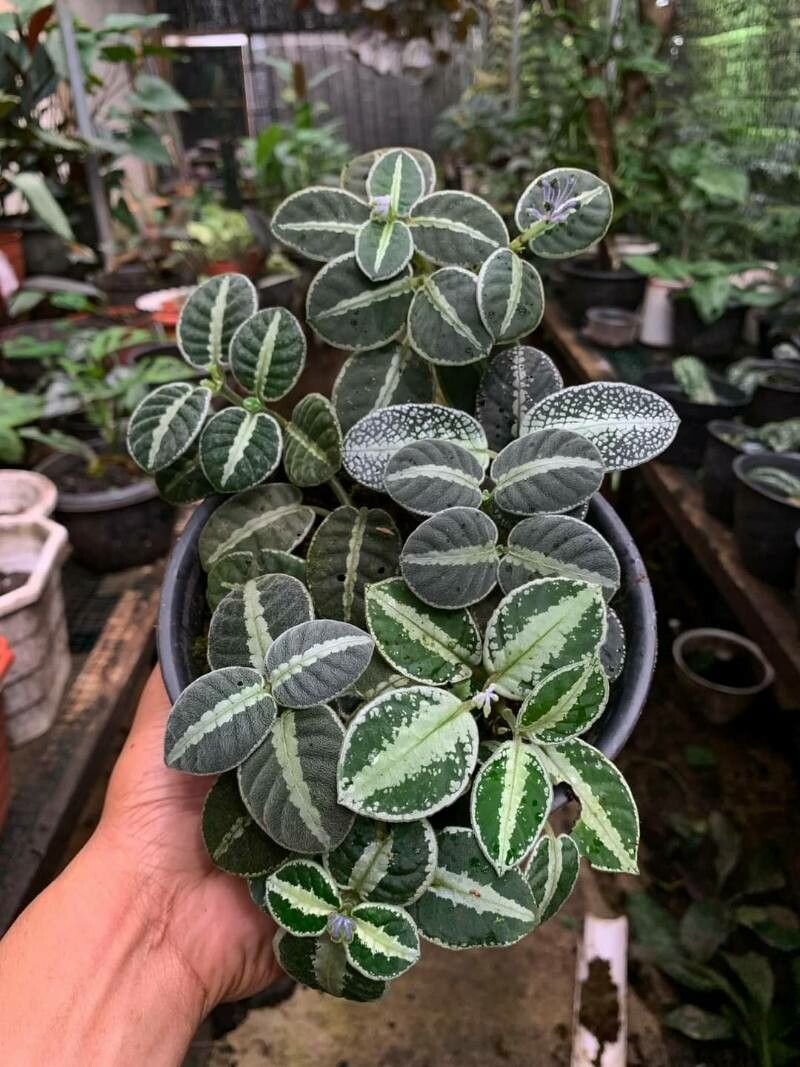
Hello fellow plant lovers! Today, I want to chat about a truly special gem in the plant world: Argostemma bicolor. If you’ve ever spotted this beauty with its striking variegated leaves and thought, “How can I get more of those?”, you’ve come to the right place. Propagating them is incredibly rewarding, and thankfully, it’s not as daunting as it might seem! While it requires a little attention to detail, I’d say it’s a fantastic project for intermediate plant parents, or even adventurous beginners willing to learn.
The Best Time to Start
My favorite time to embark on propagation adventures with Argostemma bicolor is during active growth periods. Think late spring through early summer. The plant is sending out plenty of energy, and the new cuttings have a better chance of establishing themselves quickly. You can also have success in early autumn, but just be mindful that growth will slow down as light levels decrease.
Supplies You’ll Need
Here’s what you’ll want to have on hand before we get started:
- Sharp, clean pruning shears or a razor blade: Cleanliness is crucial to prevent disease transfer.
- A well-draining potting mix: I love a blend of perlite, coco coir, and a little bit of orchid bark. Regular potting soil can often be too dense.
- Small pots or propagation trays: Something that fits comfortably in your space.
- Rooting hormone (optional but helpful): A powder or gel can give your cuttings an extra boost.
- A clear plastic bag or propagation dome: This creates a humid environment, which is key.
- Watering can or spray bottle: For gentle moisture.
- Activated charcoal (optional): A tiny sprinkle in the potting mix can help keep things fresh.
Propagation Methods
For Argostemma bicolor, stem cuttings are my go-to method. They’re reliable and give you a good chance of success.
- Selecting Your Cuttings: Look for healthy, mature stems on your existing plant. You want stems that have at least two to three sets of leaves. Avoid anything that looks leggy or has yellowing leaves.
- Making the Cut: Using your sharp, clean shears, make a cut just below a leaf node. A leaf node is that little bump where a leaf emerges from the stem. This is where new roots will form. Aim for cuttings that are about 3-5 inches long.
- Preparing the Cutting: Gently strip off the bottom leaf or two. This prevents them from rotting once in the soil. If your stem is long, you can even cut the leaves in half horizontally to reduce water loss through transpiration.
- Applying Rooting Hormone (Optional): Dip the cut end of the stem into your rooting hormone, tapping off any excess.
- **Planting the Cuttings:** Fill your small pots or trays with your prepared potting mix. Make a small hole in the center with your finger or a pencil. Gently insert the cut end of the stem into the hole, ensuring the nodes are buried.
- Watering and Covering: Lightly water the soil until it’s evenly moist but not waterlogged. Then, cover the pot with a clear plastic bag or pop on a propagation dome. This will trap in humidity, which is essential for the cuttings to develop roots before they dry out.
The “Secret Sauce” (Pro Tips)
Here are a few tricks I’ve learned over the years that make a big difference:
- Bottom Heat is Your Friend: If you have a propagation mat or can place your pots on a slightly warm surface (like a gently heated windowsill, but not direct sun!), it can significantly speed up root development. The warmth mimics ideal soil temperatures for rooting.
- Don’t Over-Water: This is a common mistake. The goal is consistently moist soil, not soggy. Too much water can lead to rot, which is the enemy of propagation. I often find myself misting the leaves gently through the plastic when the humidity seems to be dropping, rather than watering the soil again too soon.
- Bright, Indirect Light is Key: Place your cuttings in a spot that gets plenty of bright light, but absolutely no direct sunlight. Direct sun will scorch the delicate leaves and can dry out your cuttings too quickly, even under the plastic.
Aftercare & Troubleshooting
Once your cuttings have been planted, be patient! Roots can take anywhere from 4-8 weeks to develop, sometimes longer. You’ll know they’re rooting when you see new leaf growth emerging or feel a slight resistance when you gently tug on the cutting.
As soon as you see those signs of life, you can gradually introduce them to slightly less humid conditions. Loosen the plastic cover for a few hours a day, then remove it entirely over the course of a week. Continue watering as needed to keep the soil consistently moist.
The most common issue you might encounter is rot. If you see your cuttings turning black and mushy, it’s a sign of too much moisture and poor airflow. Sadly, these can’t usually be saved. This is why starting with clean tools and a good, airy soil mix is so important.
Happy Propagating!
Watching a new plant sprout from a simple cutting is one of the most satisfying experiences a gardener can have. So grab your shears, pick out those healthy stems, and give Argostemma bicolor propagation a try. Be patient, enjoy the process, and celebrate every little bit of progress. Happy growing!
Resource:
https://identify.plantnet.org/k-world-flora/species/Argostemma%20bicolor%20King/data