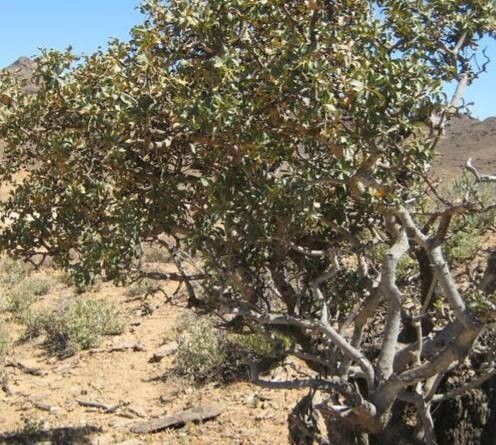
Hello there, fellow plant enthusiasts! Today, I want to talk about a plant that has truly captured my heart over the years: Boscia senegalensis, often known as the Desert Caper bush. You might be drawn to its unique, architectural form, its lovely, delicate flowers that smell so sweet in the evening, or perhaps its drought-tolerant nature. Whatever it is, growing this beauty from scratch is incredibly satisfying. Some plants can be a bit finicky when it comes to propagation, but Boscia senegalensis is actually quite forgiving, which makes it a fantastic plant to try your hand at. Don’t be intimidated; let’s get our hands dirty!
The Best Time to Start
For the highest chance of success with Boscia senegalensis, I always recommend working with semi-hardwood cuttings. This means taking cuttings from stems that are neither brand new and incredibly soft nor old and woody. The best time for this is typically in late spring or early summer, just as the plant has finished its most vigorous new growth spurt. You’ll want to select stems that have started to firm up but are still a bit flexible. Think of it as the plant being in its prime – ready to produce new life.
Supplies You’ll Need
Gathering your supplies beforehand makes the whole process much smoother. Here’s what I usually have on hand:
- Sharp Pruning Shears or a Clean Knife: For making clean cuts.
- Rooting Hormone: A powder or gel works wonders!
- Well-Draining Potting Mix: A cactus and succulent mix is ideal, or you can create your own by mixing equal parts perlite, coarse sand, and peat moss.
- Small Pots or Trays: With drainage holes, of course!
- Clear Plastic Bags or a Propagator: To create a humid environment.
- Labels: For remembering what you planted and when!
- Watering Can or Spray Bottle: For gentle watering.
Propagation Methods: Stem Cuttings
This is my go-to method for Boscia senegalensis, and it’s usually the most successful.
- Take Your Cuttings: Using your clean shears, select a healthy stem that is about 4-6 inches long. Make a clean cut just below a leaf node (where a leaf attaches to the stem). This is important because that’s where most of the rooting hormones are concentrated.
- Prepare the Cuttings: Gently remove the lower leaves from the cutting, leaving only the top few. This prevents them from rotting when buried. You can also cut any larger leaves in half to reduce water loss.
- Apply Rooting Hormone: Dip the cut end of the stem into your rooting hormone, tapping off any excess. This step really gives your cuttings a boost.
- Plant the Cuttings: Fill your small pots with your well-draining potting mix. Make a small hole with your finger or a pencil and gently insert the coated end of the cutting. Firm the soil gently around the stem.
- Create Humidity: Water the soil lightly. Then, cover the pot with a clear plastic bag, propping it up with sticks or stakes so it doesn’t touch the leaves. Alternatively, place the pots inside a propagator.
- Find the Right Spot: Place the pots in a bright location but out of direct sunlight. Warmth is a plus, but avoid intense heat.
The “Secret Sauce” (Pro Tips)
Alright, here are a few little tricks I’ve picked up that I find make a real difference:
- Bottom Heat is Your Friend: If you can, place your pots on a heat mat designed for seedlings. This warmth from below encourages root development much faster than just ambient room temperature. It’s like giving your cuttings a cozy, warm bed to grow roots in.
- Don’t Drown Them: While humidity is key, make sure the soil is moist but not soggy. Overwatering is the fastest way to invite rot. I often use a spray bottle to mist the soil and leaves regularly rather than a heavy watering.
- Patience, Young Grasshopper: This is a big one. Boscia senegalensis can sometimes take its sweet time to root. Don’t be discouraged if you don’t see results in a couple of weeks. I’ve had successful cuttings that took over a month to show good root activity.
Aftercare & Troubleshooting
Once you start to see new leaf growth or feel a gentle tug when you lightly pull on a cutting, it’s a good sign that roots are forming! At this point, you can gradually acclimate your new plant to less humid conditions by opening the plastic bag a little each day for a week. Once it’s removed from the cover, continue to water it sparingly, only when the top inch of soil feels dry.
The biggest issue you might encounter is rot. If you see your cutting turning black and mushy, it’s usually a sign of too much moisture and poor air circulation. Unfortunately, if rot sets in, it’s often too late to save the cutting, so prevention is key. Make sure your soil drains exceptionally well and that you’re not overwatering.
Let’s Get Growing!
There you have it – a simple, straightforward way to multiply your Boscia senegalensis. Propagating plants is such a rewarding part of gardening. It connects us to the natural world and allows us to share our passion with others. Be patient with your new little sprouts, give them a little love, and before you know it, you’ll have more of these wonderful desert capers to enjoy and share. Happy propagating!
Resource:
https://identify.plantnet.org/k-world-flora/species/Boscia%20senegalensis%20Lam./data