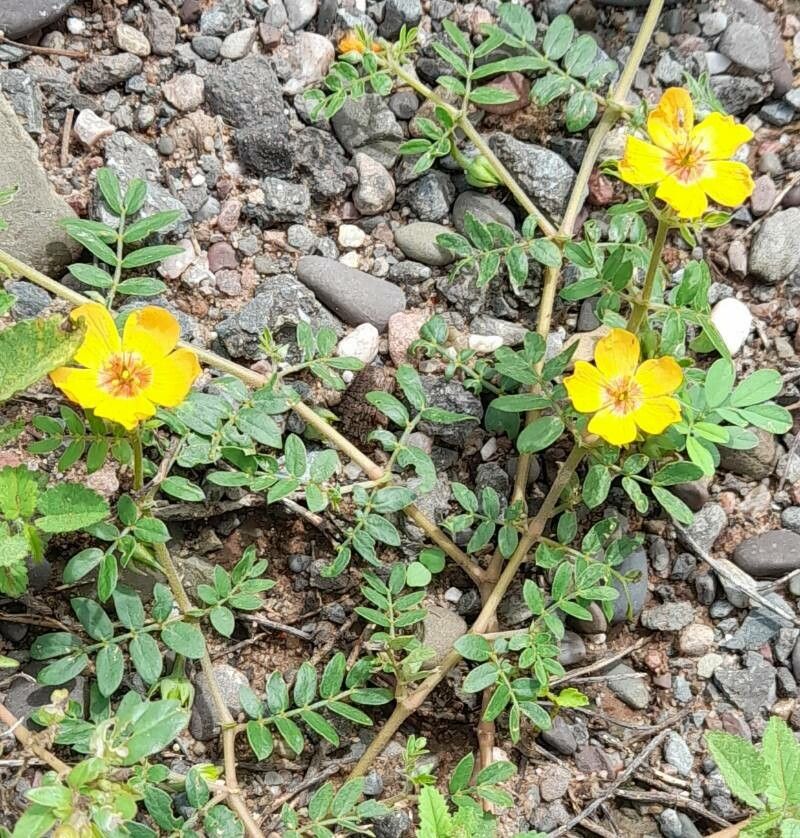
Oh, hello there! Come on in, pull up a chair. I’ve got a fresh pot of coffee brewing, and today we’re going to talk about a little gem that often gets overlooked: Kallstroemia tribuloides. You know, those cheerful little plants with the bright orange-yellow flowers that just pop in the garden? They’re like sunshine on a stem. And let me tell you, successfully coaxing a new plant from an existing one? It’s incredibly satisfying.
To be perfectly honest, Kallstroemia tribuloides is a pretty forgiving plant to propagate, even if you’re just starting out with your green thumb. It’s not one of those finicky darlings that demands a lunar eclipse and chanting to get it to root. That’s why I love sharing it!
The Best Time to Start
For the best success rate, I always aim to take cuttings in late spring or early summer. This is when the plant is actively growing and has plenty of energy to put into developing new roots. You want to choose stems that are plump and firm, but not woody. Think of them as young, vigorous shoots.
Supplies You’ll Need
Here’s what I generally have on hand when I’m ready to get my hands dirty:
- Sharp pruning shears or a clean knife: For making clean cuts. A dull tool can crush the stem, making it harder to root.
- Potting mix: I like a blend that’s well-draining. A good mix is about equal parts peat moss or coco coir and perlite or coarse sand. You can also buy specific propagation mixes.
- Small pots or seed trays: Clean ones, please! This helps prevent disease.
- Rooting hormone (optional but recommended): This stuff really gives your cuttings a boost. Look for a powdered or gel form.
- Plastic bags or a clear propagating dome: To create a humid environment.
- Water: Clean and room temperature.
Propagation Methods
While you can sometimes find seeds for Kallstroemia tribuloides, I find that taking stem cuttings is the most reliable and quickest way to multiply your plants.
Here’s how I do it:
- Select Your Stem: Find a healthy, non-flowering stem that’s about 4-6 inches long. Look for one that’s somewhere between soft and woody – that “greenwood” stage is perfect.
- Make the Cut: Using your clean shears or knife, make a clean cut just below a leaf node. A leaf node is where a leaf emerges from the stem. This is where the magic happens – the cells there are ready to form roots.
- Prepare the Cutting: Gently remove the lower leaves from the cutting, leaving just two or three at the top. This prevents them from rotting in the soil.
- Apply Rooting Hormone (Optional): Dip the cut end of the stem into your rooting hormone, tapping off any excess. If you’re using gel, just give it a dip.
- Plant Your Cuttings: Fill your small pots with your well-draining potting mix. Make a pilot hole with a pencil or your finger. Insert the cut end of your Kallstroemia cutting into the hole, making sure the nodes where you removed leaves are covered by soil. Gently firm the soil around the stem.
- Water Gently: Water the soil thoroughly but gently. You don’t want to wash the cuttings away.
- Create Humidity: This is key! Cover the pot with a clear plastic bag, sealing it around the rim with a rubber band, or place it under a clear propagating dome. This traps moisture, creating a mini-greenhouse effect.
- Find the Right Spot: Place the pots in a bright location but out of direct sunlight. Too much sun will scorch the new cuttings. A warm spot is ideal.
The “Secret Sauce” (Pro Tips)
Now for a couple of little tricks I’ve picked up over the years:
- Don’t let the leaves touch the water: If you’re ever doing water propagation (which I sometimes do for a quick check, though soil is better for long-term success), make sure the leaves stay above the water line. Submerged leaves are a fast track to rot.
- Bottom heat is your friend: If you have a heat mat designed for seedlings, using it under your pots can significantly speed up root development. It mimics the warmth of the soil surface in the summer.
Aftercare & Troubleshooting
Once your cuttings have been in their humid little world for a few weeks, you’ll want to check for roots. Gently tug on a cutting. If you feel resistance, roots are forming!
Once roots are established, you can gradually remove the plastic bag over a few days to acclimate them to lower humidity. Continue to keep the soil consistently moist but not waterlogged. If you see any new growth, that’s a fantastic sign!
The most common issue you might encounter is rot. If your cutting turns mushy and black, it’s usually a sign of too much moisture and not enough airflow. It’s a bummer, but it happens. Discard any rotten cuttings immediately to prevent it from spreading. Sometimes, if you catch it early and a stem looks a bit sad, you can try taking a fresh cutting from a healthier part.
A Encouraging Closing
So, there you have it! Propagating Kallstroemia tribuloides is a really straightforward and rewarding way to get more of those cheerful blooms into your life. Be patient, give them a good spot, and don’t be discouraged if a cutting or two doesn’t make it. Gardening is all about learning, and each little sprout is a victory. Happy propagating!
Resource: