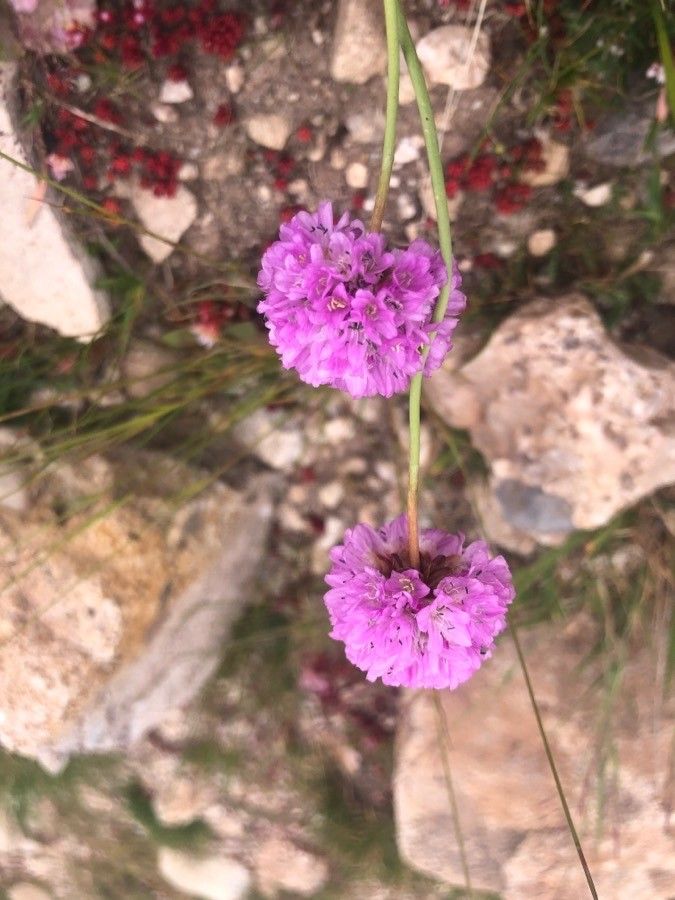
Hello, fellow plant lovers! Today, we’re diving into the charming world of Armeria castellana, often called Thrift or Sea Pink. If you’ve ever admired those delightful, globe-shaped clusters of pink or white flowers atop neat mounds of grassy foliage, you’re in for a treat. Propagating these little beauties is not only achievable but incredibly rewarding. You get to multiply that joy and fill your garden (or a friend’s!) with more of that coastal charm. And for beginners? Don’t worry, Armeria castellana is quite forgiving, making it a wonderful plant to start your propagation journey with.
The Best Time to Start
When is the sweet spot for multiplying your Armeria castellana? Generally, the late spring to early summer is your golden window. This is when the plant is actively growing and has plenty of healthy foliage to work with. You’re essentially tapping into its prime energy reserves. Waiting until after the main flowering flush is also a good idea, as the plant will be less stressed and more focused on vegetative growth.
Supplies You’ll Need
Before we get our hands dirty, let’s gather our trusty tools:
- Sharp pruning shears or a clean knife: For making those crucial cuts. Sterilize them to prevent disease!
- Small pots or seed trays: With drainage holes, of course.
- Well-draining potting mix: A good quality seed-starting mix or a blend of potting soil with perlite and sand works perfectly. We want to avoid soggy roots at all costs.
- Rooting hormone (optional but helpful): Especially if you’re going the cutting route. It gives those new roots a little extra encouragement.
- Gravel or small stones: For the bottom of pots if you’re worried about drainage.
- Watering can or spray bottle: For gentle watering.
Propagation Methods
Let’s explore the common ways to multiply your Armeria castellana.
Stem Cuttings
This is my go-to method for Armeria castellana.
- Take your cuttings: In late spring or early summer, select healthy, non-flowering shoots that are about 3-4 inches long. Make a clean cut just below a leaf node (where a leaf meets the stem).
- Prepare the cuttings: Gently remove the lower leaves, leaving about an inch or two of bare stem. This is where the roots will form. If you’re using rooting hormone, dip the cut end into it now.
- Plant your cuttings: Fill your pots with the well-draining mix. Make a small hole with a pencil or your finger. Insert the cutting, firming the soil gently around it.
- Water and mist: Water the soil lightly. You can also mist the cuttings gently to keep humidity up.
- Provide warmth and light: Place the pots in a warm spot with bright, indirect light. A greenhouse or a sunny windowsill is ideal.
Division
This is a fantastic way to rejuvenate established clumps of Armeria castellana and get more plants from one.
- Dig up the clump: In the early spring or fall, carefully dig up your Armeria castellana plant. You want to lift the entire root ball.
- Gently separate sections: Look for natural divisions within the clump. You can gently pull the sections apart with your hands. If it’s a bit stubborn, use a clean spade or knife to cut through the root ball. Each division should have some roots and shoots.
- Replant immediately: Plant the divided sections into their new homes, whether that’s back in their original spot, into pots, or to give to a friend. Water them in well.
The “Secret Sauce” (Pro Tips)
Here are a few things I’ve learned over the years that can really boost your success:
- Don’t overwater, ever: This is crucial. Armeria castellana hates wet feet. When taking cuttings, let the cut end callus over for a few hours before planting. This helps prevent rot. Also, err on the side of underwatering rather than overwatering when they’re establishing.
- Bottom heat for cuttings: If you’re serious about cuttings, consider using a propagation mat. A bit of gentle warmth from below can significantly speed up root formation. It mimics what happens naturally in warmer soils.
- Watch for the “wiggle”: For cuttings, patience is key. After a few weeks, give a very gentle tug on a cutting. If there’s resistance, you’ve got roots! If it pulls out easily, it hasn’t rooted yet.
Aftercare & Troubleshooting
Once your cuttings have rooted or you’ve divided your plant, it’s time for a little TLC.
- Watering: Water newly potted divisions or successful cuttings thoroughly. After that, allow the soil to dry out slightly between waterings.
- Light: Continue to provide bright, indirect light. As they grow stronger, you can gradually introduce them to more direct sun, especially if they were planted in a shadier spot.
- Signs of trouble: The most common culprit is rot, which appears as mushy, discolored stems or leaves. This is almost always a sign of too much moisture or poor drainage. If you see this, remove the affected part immediately. If the whole cutting is lost, don’t despair – try again with drier soil!
A Little Encouragement
Propagating your Armeria castellana is a journey of patience and observation. Don’t be discouraged if your first attempt isn’t perfect. Each plant and each season offers a new learning opportunity. Celebrate your successes, learn from your challenges, and most importantly, enjoy the wonderful feeling of nurturing new life from existing plants. Happy gardening!
Resource: