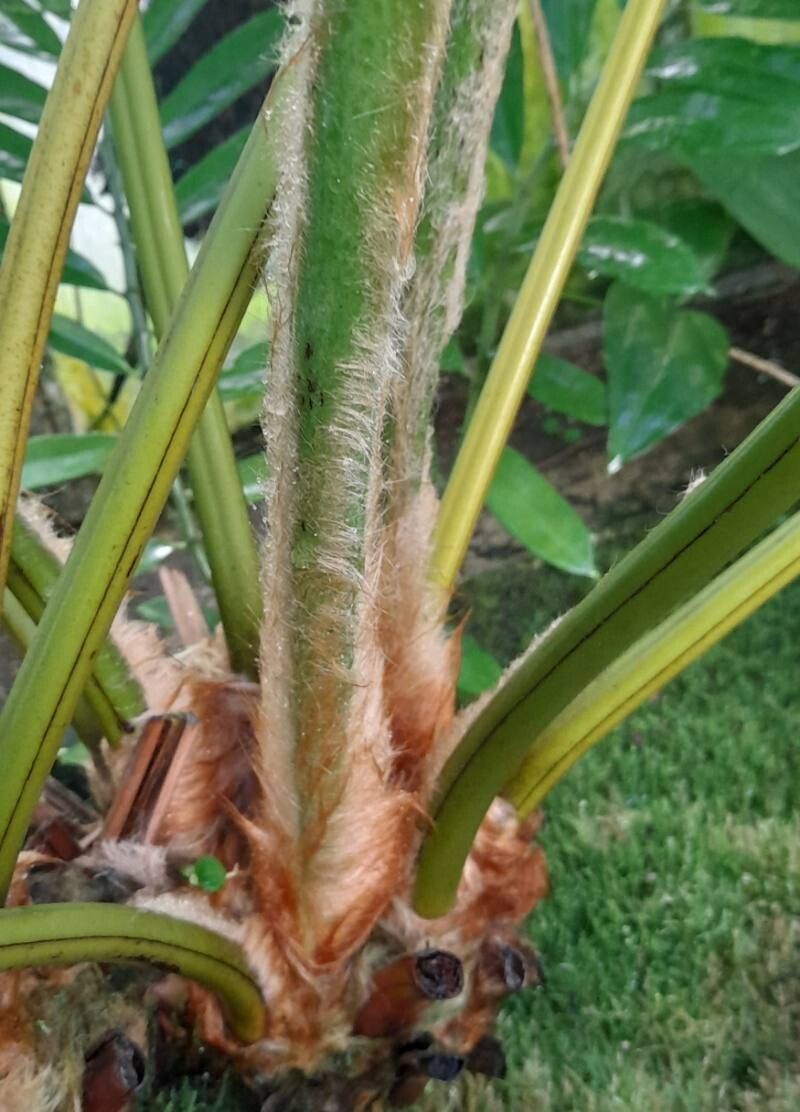
Hello, fellow plant lovers! Today, we’re diving into the magical world of Cibotium glaucum, also known as the Hawaiian tree fern. If you’ve ever marveled at their elegant, feathery fronds and that distinct fuzzy “beard” at the base of their fronds, you know they bring a touch of the tropics right into your garden. Propagating these beauties can feel like a special kind of magic, creating new life from an existing one. It’s a rewarding journey, though I’ll be honest – Cibotium glaucum isn’t the absolute easiest plant to multiply for a complete beginner, but with a little patience and the right approach, you can absolutely succeed!
The Best Time to Start
For the highest chance of success with Cibotium glaucum, I always recommend working with them in the late spring or early summer. This is when the plant is in its most vigorous growth phase, meaning it has plenty of energy to put into developing new roots. You’ll want to look for healthy, established plants that are actively producing new fronds. Sometimes, you can even identify a section that’s starting to send out new growths near the base.
Supplies You’ll Need
Before we get our hands dirty, let’s gather our trusty tools. Here’s what I keep handy:
- Sharp pruning shears or a clean knife: For making clean cuts.
- Rooting hormone powder (optional but recommended): This helps encourage root development.
- Well-draining potting mix: A good mix for ferns often includes peat moss, perlite, and orchid bark to ensure it doesn’t stay waterlogged.
- Small pots or trays: With drainage holes, of course!
- Clear plastic bags or a humidity dome: To create that essential humid environment.
- Watering can or spray bottle: For gentle watering.
- A warm location: Think a greenhouse, a bright windowsill with no direct harsh sun, or with the help of a heat mat.
Propagation Methods
While Cibotium glaucum can technically be grown from spores, for us home gardeners, division is the most straightforward and successful method.
Division: Creating New Ferns from Existing Ones
This is like splitting up a family! It’s best done when the fern is dormant or just beginning to show new growth, typically in early spring.
- Gently remove the fern from its pot. If it’s in the ground, carefully dig around the root ball.
- Inspect the base. Look for natural divisions where new stems or pups (baby ferns) are emerging from the main rhizome (the thick, stem-like structure that grows horizontally). You should see a distinct separation with its own roots.
- Carefully separate the sections. Using a clean, sharp knife or pruning shears, cut through the rhizome to separate the desired division from the parent plant. Try to get as many roots attached to the division as possible.
- Trim any damaged roots or fronds. This helps the plant focus its energy on new growth.
- Pot up the divisions. Plant each division in its own pot filled with your well-draining fern mix. Ensure the top of the rhizome is slightly exposed, not buried too deep.
- Water thoroughly. Gently water the newly potted divisions.
- Create a humid environment. Cover the pots with a clear plastic bag or a humidity dome. This is crucial! Place them in bright, indirect light.
The “Secret Sauce” (Pro Tips)
Now, for a couple of little tricks I’ve learned over the years that can really give you an edge:
- Don’t over-pot. When dividing, resist the urge to put a small division into a massive pot. Too much soil can stay wet for too long, and that’s a rot-fest waiting to happen. Start small; you can always repot later.
- Embrace the humidity… but watch for mold! The plastic bag or dome is your best friend here, creating that steamy tropical atmosphere. However, if you see tiny fuzzy bits of mold appearing, that means it’s a little too damp. Ventilate by lifting the bag for an hour or so each day to allow for air circulation.
- Patience is key with the “beard.” That fuzzy material at the base of the fronds? It can be a hiding spot for tiny insects or too dense for good airflow. While you don’t want to strip it bare, gently teasing out some of it to allow better air circulation around the rhizome can be beneficial.
Aftercare & Troubleshooting
Once your divisions are potted, the real waiting game begins. Keep the soil consistently moist but not soggy. The plastic bag will help keep the humidity high, so you won’t need to water as often, but check the soil moisture regularly.
You’re looking for signs of life – new frond unfurling, or the rhizome looking plump and healthy. This can take weeks, sometimes even a couple of months.
The most common issue you’ll face is rot. If you notice the rhizome turning mushy, black, or smelling “off,” it’s a sign of overwatering. If this happens, gently remove the division, trim away the rotted parts with a clean blade, and repot in fresh, drier soil. You might need to ventilate more aggressively. Fronds might also yellow and die back – this is pretty normal as the plant re-establishes itself, so don’t panic unless the whole division looks completely limp and sad.
A Warm Wrap-Up
Propagating Cibotium glaucum requires a bit of a gentle touch and a lot of faith. Celebrate the small victories, the tiny new fiddleheads that start to emerge, and the slow, steady growth. Be patient with the process, learn from any setbacks, and most importantly, enjoy the journey of bringing more of these magnificent ferns into your life. Happy growing!
Resource: