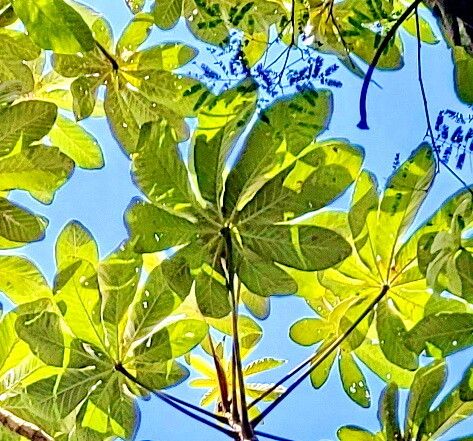
Hello, fellow garden enthusiasts! Today, I want to chat about a truly special tree: Cecropia hololeuca, often called Umbrella Tree or, more poetically, the “Tree of Life” in some regions. These giants are just breathtaking, with their massive, hand-shaped leaves and their architectural presence. Growing them from scratch feels like you’re really connecting with nature’s magic. If you’ve ever admired a Cecropia and thought, “I wish I could have one of those!” then you’re in luck. Propagating them is surprisingly accessible, even for beginners. It’s a truly rewarding journey to watch a tiny cutting transform into a future forest icon.
The Best Time to Start
When it comes to getting your Cecropia babies going, active growing season is your golden ticket. Think spring and summer. The warmer temperatures and longer days mean your cuttings will have the energy they need to focus on rooting rather than just surviving. Trying this in the dead of winter can be a struggle; the plant just isn’t as receptive to change then.
Supplies You’ll Need
To set yourself up for success, gather these essentials:
- Sharp Pruning Shears or a Clean Knife: A clean cut is crucial to prevent disease.
- Rooting Hormone (Optional but Recommended): Look for a powder or gel specifically for cuttings.
- Well-Draining Potting Mix: A blend of perlite, peat moss, and a bit of sand works wonders. You don’t want soggy feet for your cuttings!
- Small Pots or Propagation Trays: Whatever you have on hand will do. As long as they have drainage holes.
- Clear Plastic Bag or Dome: This creates a humid environment, which is vital for cuttings.
- Water: For misting and for any water propagation.
- Labels: To keep track of what’s what – trust me, it’s easy to forget!
Propagation Methods
Let’s get our hands dirty! Cecropia hololeuca is most commonly propagated from stem cuttings. This is a fantastic way to get a new plant from an existing, healthy specimen.
Stem Cuttings:
- Select Your Parent Plant: Choose a healthy, vigorous Cecropia. Look for stems that are not too woody but not too soft either – a nice semi-hardwood stage is ideal.
- Take Your Cutting: Using your sharp, clean shears, make a cut just below a leaf node (where a leaf attaches to the stem). Aim for cuttings that are about 6-10 inches long. Remove any lower leaves, leaving just a few at the top.
- Apply Rooting Hormone: Dip the cut end of the stem into your rooting hormone, tapping off any excess. This helps stimulate root development.
- Plant Your Cutting: Fill your pot with the well-draining potting mix. Make a hole in the center with your finger or a pencil. Gently insert the cut end of the Cecropia cutting into the hole, ensuring the nodes where you removed leaves are below the soil surface.
- Firm the Soil: Gently firm the soil around the cutting to ensure good contact.
- Water Lightly: Water the soil gently but thoroughly. You want it moist, not saturated.
- Create Humidity: Place the pot inside a clear plastic bag or cover it with a propagation dome. This will trap moisture and create the humid microclimate your cutting needs to root. Make sure the leaves aren’t pressing against the plastic for too long, as this can encourage rot. Give it a good misting once a day.
- Place in Bright, Indirect Light: Find a spot that gets plenty of light but avoid direct, harsh sunlight, which can cook your delicate cutting.
Water Propagation (Less common for Cecropia, but possible for smaller pieces):
If you have a smaller piece or want to try a quick experiment, you can try water propagation. Place the cut end of a stem section in a jar of water, making sure the leaf nodes are submerged but the leaves themselves are out of the water. Change the water every few days. Once you see good root growth, you can carefully transplant it into soil.
The “Secret Sauce” (Pro Tips)
Now, for a few little tricks I’ve learned over the years that can make a big difference:
- Bottom Heat is Your Friend: If you can, place your pots on a heat mat designed for plant propagation. This gentle warmth from below encourages root cells to start forming much faster. It’s like a cozy spa for your cuttings!
- Don’t Be Afraid to Mist: Kept inside that humidity dome or bag, misting the leaves lightly once a day helps them stay plump and healthy while they’re busy sending out roots. Think of it as a refreshing drink for your little plant.
- Patience for that Swell: When you gently tug on a cutting and feel a bit of resistance, that’s a good sign roots are forming! Another indicator is seeing tiny new leaves unfurling.
Aftercare & Troubleshooting
Once you see those lovely roots appearing – and you’ll know because the cutting will start to look perkier and might even show new growth – it’s time for a tiny bit more attention.
Gradually reduce the humidity by poking a few holes in your plastic bag or opening your dome a little each day. This helps the new plant acclimatize to the drier air of your home. Once it’s looking robust, you can remove it from the bag entirely. Continue to keep it in bright, indirect light and water when the top inch of soil feels dry.
The most common issue you might encounter is rot. If your cutting turns mushy, black, or starts to smell unpleasant, it’s likely rotted. This usually happens from too much moisture or not enough air circulation. If you catch it early, you can try taking a clean cutting from a healthier section and starting over, paying close attention to drainage and humidity levels. Sometimes, even with the best care, a cutting just doesn’t take. Don’t get discouraged! It happens to all of us.
A Little Encouragement
Growing Cecropia from cuttings is a deeply satisfying process. It takes patience, yes, but the reward of nurturing a new life from a simple stem is unparalleled. Enjoy the journey, learn from each attempt, and celebrate every tiny victory. Happy gardening, everyone!
Resource:
https://identify.plantnet.org/k-world-flora/species/Cecropia%20hololeuca%20Miq./data