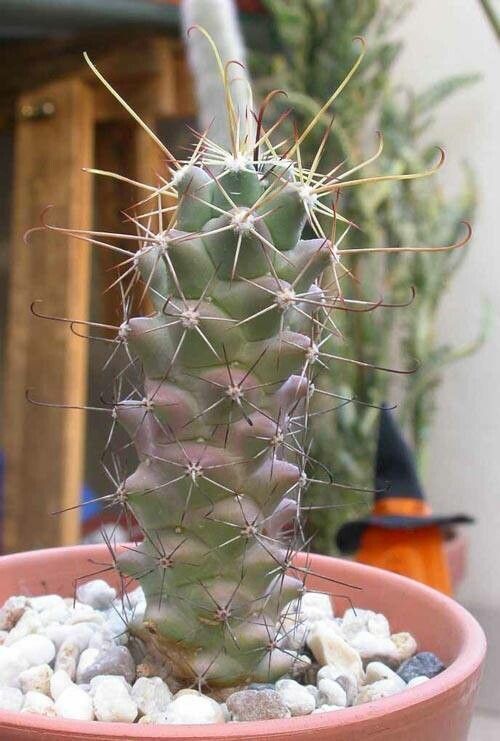
Oh, hello there, fellow plant lover! Pull up a chair and let’s chat about one of my absolute favorites: Cochemiea poselgeri, often known as the “bearded cactus” for its delightfully fuzzy areoles. If you’re looking for a plant that’s as charming as it is unique, you’ve found it. Its spiky stems, adorned with those delicate white hairs, are truly a statement piece. Propagating these beauties is incredibly rewarding, giving you more of these gorgeous plants to share – or just to keep for yourself, no judgment here! Now, I’ll be honest, Cochemiea poselgeri isn’t the absolute easiest plant for a complete beginner to propagate, but with a little care and attention, you’ll be well on your way to success.
The Best Time to Start
For the highest success rate with Cochemiea poselgeri, I always aim for late spring or early summer. This is when the plant is actively growing and has the most energy to put into developing new roots. You’ll see new growth appearing, and that’s your cue that it’s ready to be divided or have pups taken. Starting during its peak growing season just gives our little cuttings or divisions the best head start.
Supplies You’ll Need
Here’s what I like to have on hand before I get started:
- Sharp, clean pruning shears or a sharp knife: We want a clean cut to prevent disease.
- Potting mix: A well-draining cactus and succulent mix is essential. You can also make your own by combining coarse sand, perlite, and potting soil.
- Pots: Small nursery pots or even repurposed containers with drainage holes.
- Rooting hormone (optional but recommended): This can give your cuttings a helpful boost.
- Gloves: Cacti can be prickly, even the fuzzy ones!
- Newspaper or thick paper: To handle the cactus without getting pricked.
- Watering can or spray bottle: For gentle watering.
Propagation Methods
Cochemiea poselgeri is best propagated by division or by taking offsets (pups). This cactus doesn’t typically grow from stem cuttings in the same way some other cacti do.
1. Division:
This is best done when the plant has multiple stems growing from the base, creating a clump.
- Gently remove the entire plant from its pot. You might need to tap the sides of the pot or gently pull the root ball out. Be careful not to damage the roots.
- Inspect the root system. You’ll be looking for natural breaks where the plant has divided itself.
- Using your clean pruning shears or knife, carefully separate the clump into smaller sections. Try to keep as much of the root system intact as possible on each division. If there are very dense roots, you might need to carefully tease them apart with your fingers or a small tool.
- Allow the cut surfaces to callus over. This is super important with cacti! Place the divisions in a dry, well-ventilated spot away from direct sunlight for 2-5 days, or until the cut ends look dry and slightly hardened. This prevents rot when you plant them.
- Pot up your divisions. Plant each section in its own small pot filled with your cactus mix. Don’t water immediately.
- Wait a few days to a week before watering. This allows any tiny wounds on the roots to further heal and reduces the risk of rot.
2. Taking Offsets (Pups):
Sometimes, Cochemiea poselgeri will produce smaller baby plants (pups) from its base or even along the stem.
- Identify a healthy pup. Look for one that is a reasonable size and seems well-established.
- Carefully detach the pup from the mother plant. You might be able to gently twist it off. If it’s more firmly attached, use your clean knife or shears to make a clean cut, trying to get a little bit of root attached if possible.
- Allow the cut surface to callus over. Just like with division, place the pup in a dry, well-ventilated area for 2-5 days until the cut end is dry.
- Pot up the pup. Plant it in a small pot with cactus mix, just like you would a division. Again, do not water immediately.
- Wait a few days to a week before watering.
The “Secret Sauce” (Pro Tips)
- Don’t rush the callusing: This is my number one tip for cactus propagation. That dry, hardened surface is your best defense against rot. Be patient!
- Bottom heat can be your friend: If you’re propagating in a cooler environment or earlier in the season, placing your pots on a gentle seedling heat mat can really encourage root development. Just don’t let it get too hot – think cozy, not scorching!
- Embrace the awkward phase: Sometimes, divisions or pups might look a bit sad or unsteady for a while. This is normal. As long as you haven’t overwatered and the base isn’t mushy, give them time. They’re busy establishing their roots underground.
Aftercare & Troubleshooting
Once you’ve planted your divisions or pups and waited a few days, it’s time for that first bit of water. Water sparingly at first. You want to moisten the soil, but not soak it. Allow the soil to dry out almost completely between waterings.
Signs of failure to watch for:
- Rot: This is the big one. If the base of your cutting or division turns soft, mushy, and dark, it’s likely rot. This usually happens from overwatering or not allowing enough callusing time. If you catch it early, you might be able to cut away the rotten part and try again with a healthier section.
- Shriveling: While some shriveling can happen as the plant uses its stored energy before rooting, excessive or continuous shriveling might indicate it’s not taking, or it’s too dry.
Keep your new plants in a bright spot, but avoid direct, intense sunlight until they’ve well-established.
A Encouraging Closing
Propagating Cochemiea poselgeri is a beautiful way to connect with these fascinating plants. Remember that nature has its own timeline. Don’t get discouraged if a cutting takes a little while to show signs of life. Enjoy the process, observe your new plants, and celebrate each tiny root or new shoot that appears. Happy gardening!
Resource: