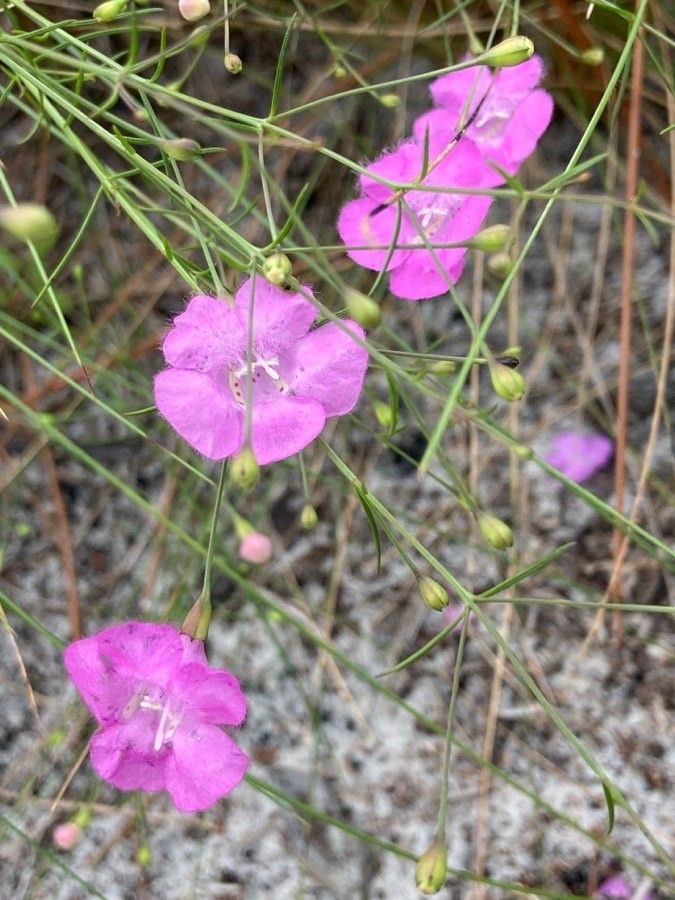
Hello, fellow garden enthusiasts! It’s wonderful to have you here. Today, we’re diving into something truly special: propagating Agalinis edwardsiana. If you’ve ever admired this delicate beauty, with its vibrant blooms and graceful presence, you’re in for a treat. There’s a special kind of joy in creating more of these treasures yourself.
My experience tells me that Agalinis edwardsiana can be a little bit of a specialist. It’s not typically a plant you’d hand to an absolute beginner for their first foray into propagation. However, with a little patience and attention, even those with a bit of gardening under their belt can achieve success. It’s a rewarding challenge, and the satisfaction of seeing tiny new plants emerge is absolutely worth it.
The Best Time to Start
For Agalinis edwardsiana, I’ve found that late spring to early summer is usually your golden window. This is when the plant is actively growing and has plenty of energy to put into developing new roots. Look for young, healthy stems that haven’t yet flowered. These are much more likely to take off than older, woodier growth.
Supplies You’ll Need
Before we get our hands dirty, let’s gather our tools. Having everything ready makes the process so much smoother:
- Sharp pruning shears or a clean knife: For making precise cuts.
- Well-draining potting mix: I often use a blend of perlite and peat moss about 50/50. You can also find specialized seed-starting or propagation mixes.
- Small pots or trays: Clean containers for your new cuttings.
- Rooting hormone (optional but recommended): A rooting powder or gel can really give your cuttings a boost.
- Plastic bags or a propagation dome: To create a humid environment.
- Spray bottle: For misting.
- Labels: So you don’t forget what you’ve planted!
Propagation Methods
Let’s talk about how to coax new life from your Agalinis edwardsiana. While it’s not a plant that readily offers itself up for division or water propagation, stem cuttings are your best bet.
Here’s how I do it:
- Take Care When Taking Cuttings: Using your sharp shears, select a healthy stem and make a clean cut just below a leaf node (where a leaf attaches to the stem). Aim for cuttings that are about 3-4 inches long. Remove the lower leaves, leaving only the top few.
- Dip in Hormone: If you’re using rooting hormone, dip the cut end of the stem into the powder or gel. Tap off any excess. This step is optional, but it can significantly improve your success rate.
- Plant Them Up: Moisten your potting mix. Make a small hole in the center of each pot with your finger or a pencil. Gently insert the cutting into the hole, ensuring the leaf nodes that were buried are in contact with the soil. Firm the soil gently around the stem.
- Create the Humid Haven: Water the pot lightly from the bottom or by gently misting the surface. Then, cover the pot with a plastic bag (propping it up with a stick so it doesn’t touch the leaves) or place it under a propagation dome. This creates a miniature greenhouse.
The “Secret Sauce” (Pro Tips)
Over the years, you learn a few tricks that really make a difference. Here are a couple of my favorites for Agalinis edwardsiana:
- Bottom Heat is Your Friend: Agalinis edwardsiana appreciates a little warmth from below. Placing your pots on a heat mat designed for seedlings can greatly encourage root development. It mimics the feeling of warm soil after a spring rain.
- Don’t Drench, Just Dampen: It’s so tempting to water generously, but overwatering is the quickest way to invite rot. Your soil should feel consistently moist but not waterlogged. I like to check the moisture levels by gently pressing the soil. If it springs back slightly, it’s good.
- Be Patient with the Mist: While you want to keep the humidity high, avoid excessive misting that causes water to pool on the leaves. If you see water droplets sitting for hours, gently dab them off with a clean paper towel. Too much moisture on the foliage can lead to fungal issues.
Aftercare & Troubleshooting
Once your cuttings have calloused over and you’ve planted them, the wait begins!
Aftercare: Keep the pots in a bright location, but out of direct, scorching sunlight. You’ll need to monitor the humidity daily and mist lightly if the soil starts to dry out or the plastic feels less steamy. After about four to six weeks, you might start to see signs of new growth. A gentle tug on the cutting will reveal resistance if roots have formed. Once they have a good root system, you can gradually acclimate them to normal air by lifting the bag or dome for increasing periods each day. Eventually, pot them up into slightly larger containers as needed.
Troubleshooting: The most common pitfall is rot. If your cutting turns mushy and black, or the leaves start to yellow and drop off rapidly, it’s a sign of too much moisture and poor air circulation. If you see signs of rot, remove the affected cutting immediately to prevent it from spreading. If your cuttings fail to root after a prolonged period, don’t be discouraged. Sometimes the conditions just aren’t quite right, or the cutting wasn’t vigorous enough to begin with.
A Little Patience Goes a Long Way
Propagating Agalinis edwardsiana is a journey, not a race. There will be times you question if anything is happening. Trust the process, keep your environment consistent, and celebrate the small successes, like that first tiny flush of new leaves. Enjoy the quiet satisfaction that comes with nurturing these delicate plants from cuttings. Happy gardening!
Resource:
https://identify.plantnet.org/k-world-flora/species/Agalinis%20edwardsiana%20Pennell/data