Hello there, fellow plant lovers! It’s me again, your friendly neighborhood plant whisperer, ready to dive into another exciting propagation adventure. Today, we’re talking about Aeoniums, specifically the charming Aeonium goochiae.
Why Grow Aeonium goochiae?
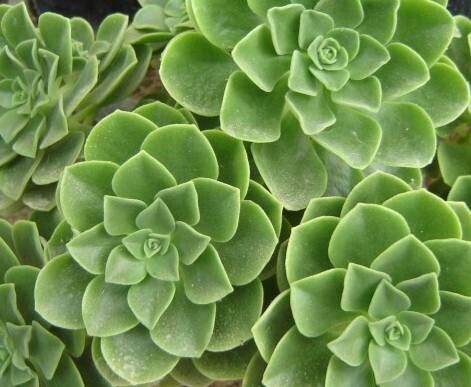
Aeonium goochiae is a real stunner. It forms these beautiful, loose rosettes of fuzzy, silvery-green leaves. They have this almost ethereal quality, especially when they catch the light. Growing more of them means you can share the magic with friends, fill up more pots, or even create a stunning focal point in your garden. And the best part? Propagating it is surprisingly rewarding. For beginners, I’d say Aeonium goochiae is fairly beginner-friendly, making it a great plant to start your propagation journey with.
The Best Time to Start
The sweet spot for propagating Aeonium goochiae is generally during its active growing season. For most of us, this means spring and early summer. The plant is putting on new growth and has the energy to root and establish itself quickly. Trying to propagate when it’s dormant in the heat of summer or the chill of winter will likely lead to slower results, or even failure.
Supplies You’ll Need
Before we get our hands dirty, let’s gather our tools:
- Sharp, clean pruning shears or a sharp knife: Essential for clean cuts that heal better.
- Well-draining potting mix: A cactus and succulent mix is ideal. I like to add a bit of perlite or pumice for extra aeration.
- Small pots or trays: For your new cuttings. Make sure they have drainage holes!
- Rooting hormone (optional but helpful): A powder or liquid that encourages root development.
- Watering can or spray bottle: For gentle watering.
- Newspaper or a tray: To catch any mess.
Propagation Methods
Aeonium goochiae is quite adaptable, and we can use a few different methods with great success.
Stem Cuttings
This is probably the most straightforward method for Aeoniums.
- Select a healthy stem: Look for a stem that has at least a few leaves. You’ll want to make a clean cut just below a leaf node (where a leaf attaches to the stem).
- Prepare the cutting: Gently remove the lower leaves from the cutting. This will expose the stem and give it an opportunity to form roots.
- Let it callus: This is a crucial step for succulents. Place your cuttings in a dry, shaded spot for 2-5 days. You’ll see the cut end dry out and form a protective callus. This prevents rot when you plant them.
- Dip in rooting hormone (optional): If you’re using rooting hormone, dip the callused end into the powder or liquid.
- Plant your cutting: Fill your small pot with your well-draining mix. Make a small hole in the soil and insert the callused end of the cutting. Gently firm the soil around it.
- Water sparingly: Water very lightly. You want the soil to be barely moist. Overwatering at this stage is the quickest way to rot your cutting.
Leaf Cuttings (Less Common for Aeonium goochiae, but Possible)
While stem cuttings are generally more successful with Aeoniums, you can sometimes root individual leaves.
- Gently twist off a healthy leaf: Twist the leaf from the stem, making sure you get the very base of the leaf where it attaches.
- Let it callus: Just like with stem cuttings, let the leaf callus over in a dry, shaded spot for a few days.
- Lay on soil: Once callused, lay the leaf on top of your well-draining potting mix. You don’t need to bury it.
- Mist lightly: Mist the soil surface occasionally, but avoid saturating it. You’re looking for tiny roots to emerge from the callused end and eventually a new plantlet to form.
The “Secret Sauce” (Pro Tips)
Here are a few things I’ve learned over the years that can really boost your success:
- Don’t let the leaves touch the water if using water propagation (if you choose to try it): While I generally prefer soil for Aeoniums, some folks like to try water. If you do, ensure only the very bottom of the stem touches the water, not the leaves. Rot sets in quickly otherwise!
- Bottom heat can be your best friend: If you’re propagating in a cooler environment or want to speed things up, placing your pots on a gentle heat mat can significantly encourage root development. Think lukewarm bath temperature, not hot!
- Patience is key, especially with leaf cuttings: Don’t expect miracles overnight. Leaf cuttings can take weeks, even months, to show significant progress. Resist the urge to poke and prod too much!
Aftercare & Troubleshooting
Once you see those lovely new roots starting to emerge (you might see tiny white nubs, or the cutting will start to resist a gentle tug), it’s time for a little more TLC.
- Increase watering gradually: As the roots grow, you can start watering a bit more regularly, but always allow the soil to dry out between waterings.
- Provide bright, indirect light: Keep your new propagations in a spot with plenty of light but avoid direct, intense sunlight, which can scorch delicate new growth.
- Watch for rot: The most common problem is rot, which usually happens from overwatering or not allowing cuttings to callus. If you see a mushy, dark stem or leaves, unfortunately, that cutting is likely lost. Remove it immediately to prevent it from spreading.
- Don’t fertilize too early: Wait until your plant shows good new growth before introducing any fertilizer.
Happy Propagating!
There you have it! Propagating Aeonium goochiae is a journey of patience and observation, but the payoff is so worth it. Enjoy the process, learn from each attempt, and soon you’ll have a whole collection of these gorgeous, fuzzy succulents to admire. Happy gardening!
Resource:
https://identify.plantnet.org/k-world-flora/species/Aeonium%20goochiae%20Webb%20&%20Berthel./data